
Last updated on May 20th, 2025
Many home bakers struggle with the time investment traditional sourdough requires, leading to abandoned starters and unfulfilled baking dreams. Mini sourdough loaves are the game-changer – they bake faster, require less proofing time, and still deliver that signature tangy flavor and perfect crust. These small-batch wonders let you enjoy fresh, artisanal bread in half the time without sacrificing quality or taste. Perfect for busy parents or impatient bakers, mini sourdough loaves transform your baking routine into an efficient, rewarding experience. Discover how these adorable, delicious time-savers can bring the joy of sourdough back to your kitchen.
What Is a Mini Sourdough Loaf?
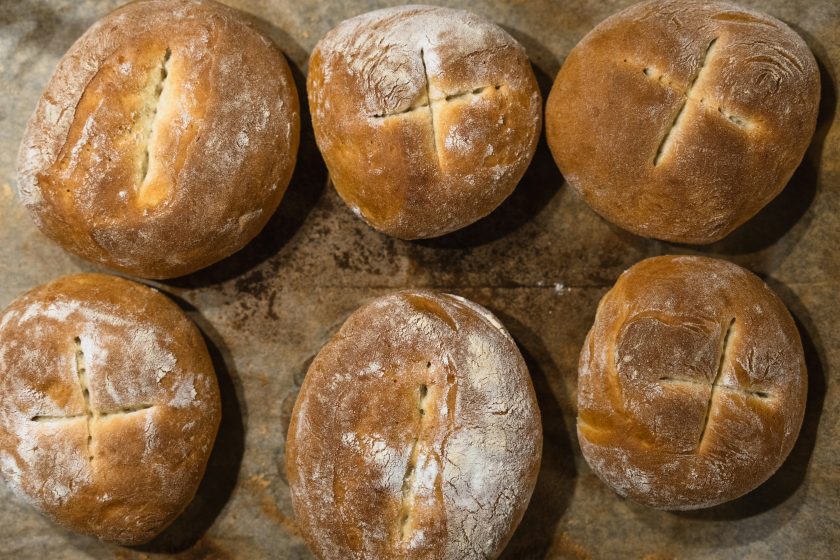
Mini sourdough loaves are scaled-down versions of traditional artisan bread, typically weighing 150-250g compared to the standard 800-1000g full-sized boule. These delightful bite-sized beauties are more than just regular sourdough shrunk down – they’re a different baking beast altogether.
The size reduction affects crucial aspects like hydration and oven spring. Because of their smaller surface area, mini loaves lose moisture faster during baking, creating a crispier crust even at lower hydration levels. Surprisingly, they often exhibit more dramatic oven spring than larger loaves since the gases produced during fermentation can push through the smaller mass more powerfully.
Mini loaves are perfect for sandwich-sized portions, individual dinner servings, or even bread bowls for soup. Think of them as the Swiss Army knife of rustic bread, offering all the complex flavors and artisanal character of traditional sourdough in a more convenient package. For small-batch baking enthusiasts, they’re ideal for experimenting with add-ins, gift-giving, or simply enjoying fresh bread without waste.
Ingredients
Basic ingredients per mini loaf:
- 300g bread flour (or all-purpose)
- 40-50g active sourdough starter
- 190-210g water (75-80°F)
- 6g salt (2% of flour weight)
Keep flavor additions under 20% of flour weight to avoid disrupting dough structure. Popular options include:
- Savory: roasted garlic, jalapeño cheddar, sun-dried tomatoes, herbs
- Sweet: cinnamon honey butter, dried fruit, chocolate chunks
- Seeds/nuts: soak seeds overnight in equal parts water before adding
Equipment You’ll Need
- Dutch oven alternative: Use a baking sheet with steam creation methods – place towels in a baking dish with boiling water, or add pie weights to a cast iron skillet with cold water
- Small bannetons: 7-8 inch round or 8-9 inch oval baskets work perfectly, or use small bowls lined with floured dish towels
- Dough scraper: Essential for dividing dough and moving sticky portions – both metal and flexible versions are useful
- Parchment paper: Simplifies transferring mini loaves to and from the oven
- Digital scale: Critical for accurate measurements when dividing dough into portions
Feeding & Maintaining Your Sourdough Starter
Keep it small, keep it strong – that’s the mantra for mini loaf starters. A mini sourdough starter isn’t just about saving flour; it’s about precision. Start with just 20g of established starter and feed it with 20g flour and 20g water, maintaining the sacred 1:1:1 ratio. This tiny powerhouse will give your mini loaves the perfect rise without creating excessive discard.
Your starter feeding schedule depends on your baking rhythm and kitchen temperature. If you’re keeping starter at room temperature (70-75°F), daily feeding keeps it ready for action within 24-48 hours. For mini loaves, watch for the magic moment when your starter doubles or triples within 6-8 hours – that’s your green light for baking.
Here’s the insider secret: you can easily scale up a mini starter when needed by reserving 30g and adding larger amounts of flour and water. This flexibility lets you maintain minimal waste while having enough starter for multiple mini loaves or gifting.
Don’t stress about hooch (that brownish liquid) – it’s just hungry starter speaking up. Simply stir it back in or pour it off, then resume your feeding schedule. Temperature is your starter’s best friend, so keep it warm (ideally 75-80°F) for faster, more predictable fermentation.
Related: How to Feed Sourdough Starter
Mixing & Bulk Fermentation
Think of building strength in mini dough like crafting a miniature suspension bridge – less steel needed, but precision matters even more. Start with your wet ingredients (active starter and water) in a mixing bowl, then add flour and salt, mixing until a shaggy dough forms.
Here’s where mini loaves get their magic: the autolyse phase. Let this mixture rest for at least 30 minutes, allowing the flour to fully absorb the liquid. For mini loaves, consider incorporating an autolyse step of 30 minutes, as it helps improve gluten development and hydration in the dough, creating that perfect structure despite the smaller size.
After autolyse comes the ballet of stretch and folds. Perform 3 to 6 sets of stretches and folds during the first two hours, spaced 20-40 minutes apart. With each set, you strengthen the dough, equalize temperature, and incorporate air while monitoring fermentation progress. Mini loaves need fewer sets than their full-sized cousins since their compact size means faster gluten development.
Timing is everything – bulk fermentation typically takes 6-9 hours at room temperature, depending on your starter percentage and kitchen warmth. Watch for signs: look for doubling in size, visible bubbles, and the dough pulling away from the bowl sides. Mini loaves won’t ferment faster just because they’re smaller, so patience remains your sourdough soulmate.
Shaping Mini Loaves
For Mini Boules (Round Loaves):
- Start with a pre-shaped round and flip it over onto your work surface
- Spread it out gently, then pull the bottom edges apart to create two “wings”
- Fold each wing to the middle, then pull the top edge down like sealing an envelope
- Grab the bottom and pull it up and over to the top
- Tuck and drag the dough toward your body to create tension, spinning it until the outside is smooth
- Place seam-side up in your proofing basket
For Mini Batards (Oval Loaves):
- Flip your dough so the smooth side meets the counter
- Gently ease it into a rough rectangle with the short side facing you
- Fold the top down, then fold in the right and left sides
- Roll from bottom to top, creating surface tension as you go
- Position the seam underneath and tighten by pulling the dough toward yourself without lifting it off the counter
- Place seam-side up in your oval proofing basket
Pro Mini-Shaping Tips:
- Create surface tension without disturbing the delicate interior – think “gluten cloak”
- Rest the shaped mini dough for 10-15 minutes before final proof to relax the gluten
- Make multiple mini loaves from one batch for built-in practice opportunities
- Use the same techniques as full-sized loaves – they scale perfectly for minis
Related: Perfect Sourdough Garlic Knots
Baking Tips for Mini Sourdough Loaves
- Crank that oven hot – preheat to 475°F with your baking vessel inside for at least 30 minutes before the dough goes in.
- Adjust your timing – mini loaves typically need 20-25 minutes covered, followed by 10-15 minutes uncovered for that perfect crust development.
- Create steam magic for artisan-worthy crust – either use a Dutch oven or place a towel-lined baking dish with boiling water on the bottom rack.
- Spritz loaves with water just before closing the oven door for that signature crackling crust that sings as it cools.
- Check internal temperature – mini loaves should reach 205-210°F for proper doneness, regardless of how beautiful they look.
- Consider your oven type – electric ovens often deliver more consistent results, but gas ovens work well too, with proper preheating.
- Allow shorter cooling time – about 30 minutes is usually sufficient for mini loaves before slicing into that aromatic perfection.
- Watch closely during the final uncovered bake – mini loaves can darken quickly due to their smaller size and higher surface-area-to-volume ratio.
Storage and Serving Ideas
- Store fresh mini loaves at room temperature in a breathable bread box or paper bag for up to 3 days – this maintains that perfect balance between crusty exterior and tender crumb.
- For longer storage, slice your mini loaves before freezing them in airtight containers or freezer bags. This way, you can grab just what you need without thawing the entire loaf.
- Refresh day-old mini loaves by spritzing with water and popping into a 350°F oven for 5-7 minutes – they’ll emerge with that just-baked texture and aroma.
- Transform mini loaves into the ultimate sandwich vessels – their compact size creates perfect individual portions without overwhelming fillings.
- Create impressive bread bowls for soups or dips by hollowing out the center – the mini size makes for perfect individual servings at dinner parties.
- Split horizontally and toast under the broiler for rustic bruschetta bases – the smaller diameter makes them easier to handle as appetizers.
- Turn slightly stale mini loaves into spectacular French toast – their denser texture after a day soaks up the custard mixture beautifully.
- Cube leftover mini sourdough for homemade croutons or bread pudding – their robust flavor adds complexity to these classic recipes.
Small Loaves, Big Impact
Let’s be real – mini sourdough loaves are game-changers! These little 150-250g bread bombs pack all the wow-factor of traditional sourdough but in super-convenient portions. By maintaining a small but mighty starter, mastering simple shaping techniques, and understanding the critical fermentation process, you’ll create bread perfect for sandwiches, bread bowls, or creative flavor experiments. Now you’ve got all the tricks to bake impressive bread without the waste – proving good things do come in small packages!
FAQs
Can I make mini sourdough loaves?
Absolutely! Mini sourdough loaves (150-250g) are perfect for beginners and pros alike. They use the same ingredients as regular sourdough, but in smaller portions. You’ll get crispier crusts, better oven spring, and less waste. Plus, they’re ideal for sandwiches, individual servings, or experimenting with new flavors!
Do small sourdough loaves take less time to bake?
Yep! Mini sourdough loaves typically bake in about 30-40 minutes total – usually 20-25 minutes covered, then 10-15 minutes uncovered for that gorgeous crust. They cook faster than full-sized loaves because of their smaller mass, but you’ll still want to check for that internal temp of 205-210°F to be sure they’re done.
What size Dutch oven for mini sourdough loaves?
A 3.5-5 quart Dutch oven works perfectly for mini sourdough loaves. If you don’t have one, no sweat! You can use a baking sheet with steam creation methods – just place towels in a baking dish with boiling water or add pie weights to a cast iron skillet with cold water for that perfect crust.
How long to bake mini bread loaves?
Mini sourdough loaves need about 30-40 minutes total baking time – typically 20-25 minutes covered at high heat (around 475°F), followed by 10-15 minutes uncovered to develop that gorgeous brown crust. Watch them closely during the uncovered phase since they can darken quickly due to their smaller size!





