
Last updated on September 10th, 2026
My first few batches of homemade garlic knots came out dry and kind of bland, nothing like the ones from my favorite pizza spot. Turns out the fix wasn’t fancier ingredients, it was using real sourdough for the chew and doubling up on garlic (roasted AND fresh) for the flavor. It takes a full day between feeding the starter and the long ferment, but most of that is just waiting around, not actual work.
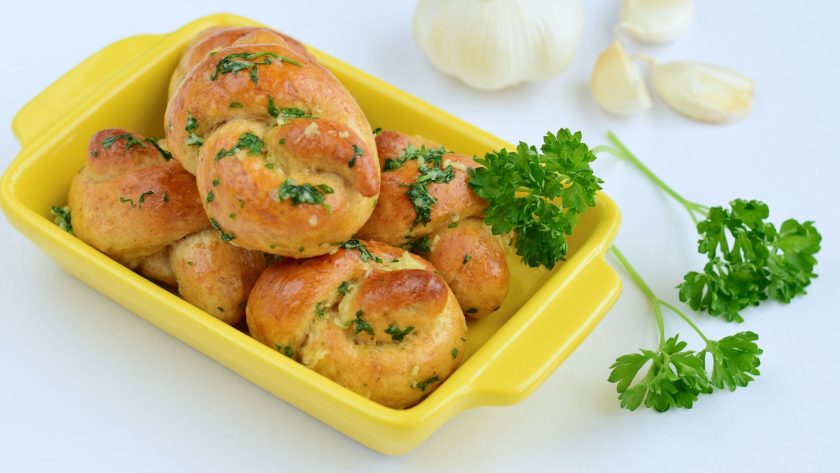
Why You’ll Love This Recipe
- Real sourdough flavor. A long, slow fermentation gives these knots a mild tang and chewy interior that yeast-only versions can’t match.
- Double garlic hit. Roasted garlic brings sweetness, fresh minced garlic brings bite. Together they build a much deeper flavor than either one alone.
- So much butter. You brush the butter on before baking, right after baking, and again before serving, so every layer gets coated.
- Flexible baking. Want a crackly crust or a softer, pillowy knot? Pick your oven temperature and get the texture you’re after.
- You can make it ahead. The dough can sit in the fridge overnight, which actually improves the flavor.
Ingredients
For the Dough
| Ingredient | Amount | Why It’s There |
|---|---|---|
| Bread flour | 500g (or 400g bread flour + 100g whole wheat) | Higher protein content builds the gluten structure that gives knots their chew |
| Active sourdough starter | 100g, fed 4-6 hours before use | Provides leavening and the signature sour flavor |
| Water | 350g, room temperature | Sets hydration at 70%, which keeps the dough workable but still open-crumbed |
| Sea salt or kosher salt | 10g | Controls fermentation speed and rounds out flavor |
For the Garlic Butter
| Ingredient | Amount | Why It’s There |
|---|---|---|
| Whole head of garlic, roasted | 1 | Turns mellow and sweet after roasting, softens the overall bite |
| Fresh garlic, minced | 4-6 cloves | Adds the sharp, punchy garlic flavor that roasting mellows out |
| Unsalted butter, softened | 113g (1 stick) | The base that carries flavor and helps the crust brown |
| Extra virgin olive oil | 2 tbsp | Loosens the butter slightly so it brushes on evenly |
| Fresh parsley, chopped | 1 tbsp (optional) | Adds color and a fresh, herby finish |
| Dried oregano | 1/2 tsp (optional) | Rounds out the flavor with a bit of earthiness |

Make Your Own Garlic Knots From Sourdough
Step 1: Build the Sourdough Base
- Feed your starter 4-6 hours before mixing. It should double in size and look full of bubbles before you use it.
- Mix the dough. Combine the active starter, flour, water, and salt. Mix until no dry flour remains, then let it rest 20-30 minutes before working it further.
- Stretch and fold the dough 3-4 times over the first 2 hours, spaced about 30 minutes apart. Do this while the dough is still fresh and slack, since it builds gluten strength before the long ferment sets in.
- Continue bulk fermenting for 8-12 hours total at room temperature (this includes the time spent on the folds above). This is where most of the flavor develops, so don’t rush it.
- Divide and shape. Once fermentation is done, divide the dough into roughly 50g pieces. Roll each into an 8-inch rope, tie into a simple knot, and tuck the ends underneath.
- Final proof for 2-3 hours on a parchment-lined sheet, spaced apart so they have room to grow. They’re ready when a light poke springs back slowly.
Step 2: Make the Garlic Butter
- Roast the garlic. Slice the top off a whole head, drizzle with olive oil, wrap in foil, and bake at 400°F for about 40 minutes until soft and golden.
- Whip the butter. Beat softened butter until fluffy, then fold in the roasted garlic paste followed by the fresh minced garlic.
- Fold, don’t stir. Folding keeps some air in the butter so it melts more evenly into the warm dough.
- Season and rest. Stir in parsley, a pinch of flaky salt, and a small splash of lemon juice. Let the butter sit for an hour if you have time. It only gets better.
Why not add garlic straight into the dough? Fresh garlic has natural antimicrobial properties that can slow down fermentation. Stick to brushing it on after shaping, or use roasted garlic in the dough if you want it baked in.
Step 3: Bring It Together
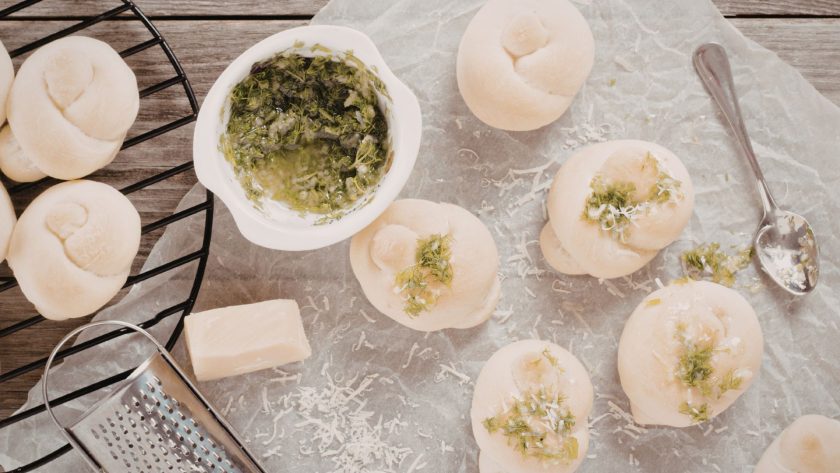
- Brush half the garlic butter onto the shaped knots.
- Let them sit for 15-20 minutes so the butter has time to soak in.
- Bake using one of the methods below.
- As soon as they come out of the oven, brush on more garlic butter while they’re still hot.
- Right before serving, add one more light coat for a glossy, fragrant finish.
Choose Your Bake Style
| Style | Temperature | Time | Result |
|---|---|---|---|
| Crispy edges | 425°F, baking sheet | 15-18 min | Golden, slightly crunchy exterior |
| Bakery style | Pizza stone, preheated 30 min | 15-18 min | Extra lift and a crisper bottom crust |
| Soft and pillowy | 375°F | 20-22 min | Tender crumb, light golden top |
| Convection oven | Lower any temp above by 25°F | Watch closely | Faster, more even browning |
They’re done when your kitchen smells like a garlic bakery, the tops are golden, and the butter is bubbling faintly at the edges.
Recipe Tips
- Preheat properly. Give your oven (and stone, if using) a full 30 minutes to heat up. This makes a real difference in how the knots rise.
- Add steam for extra crackle. Place a cast iron skillet on the bottom rack while preheating, then pour boiling water into it right after the knots go in. It helps build a crisp, bakery-style crust.
- Finish under the broiler. A quick 1-2 minutes under broil at the end adds color and a toasty flavor, but watch closely so they don’t burn.
- Don’t skip the rest before baking. The 15-20 minute rest after brushing on butter lets the flavor actually soak into the dough instead of just sitting on top.
- Cold ferment for more flavor. Refrigerating the dough overnight after bulk fermentation deepens the tang. Just let it warm up before shaping.
Ways to Serve
- Alongside tomato soup for a comforting, dippable pairing
- Next to pasta to mop up leftover sauce
- With olive oil, marinara, or pesto for dipping
- On a charcuterie board with soft cheese and fig jam
- As a party appetizer with a few sauces on the side
Mix-In Ideas
- Herbs: rosemary, thyme, or basil
- Cheese: mozzarella, parmesan, or feta sprinkled on before baking
- Heat: red pepper flakes or cayenne
- Extras: sun-dried tomatoes, olives, or caramelized onions folded into the butter
- Sweet twist: a drizzle of honey or balsamic glaze after baking
Feel free to experiment and let me know your favorites to add!
Related on the blog:
FAQs
Can I make the dough ahead of time?
Yes. Refrigerate it after bulk fermentation and it’ll keep for about a day, developing more flavor as it sits. Let it come to room temperature before shaping.
How do I store leftover garlic knots?
Keep cooled knots in an airtight container at room temperature for up to 2 days, or freeze for up to 3 months. Reheat at 350°F for 5-7 minutes.
Does garlic inhibit or mess with sourdough fermentation?
Fresh garlic can slow fermentation if mixed directly into the dough, so it’s best brushed on after shaping. Roasted garlic is milder and safer to mix in if you want that flavor baked throughout.
Can I use commercial yeast instead of sourdough starter?
Yes, though you’ll lose the sourdough tang. Swap the 100g starter for about 7g (2 teaspoons) of instant yeast and cut the fermentation time down to 1-2 hours.
What’s the best way to shape the knots?
Roll each piece into an 8-inch rope, tie a simple overhand knot, and tuck the ends underneath. Leave it a little loose so there’s room for it to expand while proofing and baking.

Sourdough Garlic Knots Recipe
Chewy, tangy sourdough knots brushed three times with a roasted-and-fresh garlic butter. Crispy outside, soft inside, and worth the wait.
- Total Time: about 24 hours (8-12 hour bulk ferment plus 2-3 hour final proof)
Ingredients
Ingredients
- 500 grams bread flour
- 100 grams active sourdough starter, fed 4-6 hours before use
- 350 grams water, room temperature
- 10 grams sea salt or kosher salt
- 1 whole head of garlic, roasted
- 5 garlic cloves, minced
- 113 grams unsalted butter, softened
- 2 tablespoons extra virgin olive oil
- 1 tablespoons fresh parsley, chopped
- 0.5 teaspoons dried oregano
Instructions
- Mix the dough: Combine 500 grams bread flour, 100 grams active sourdough starter, fed 4-6 hours before use, 350 grams water, room temperature, and 10 grams sea salt or kosher salt until no dry flour remains. Rest 30 minutes.
- Stretch and fold: Over the next 120 minutes, do 3-4 stretch and folds spaced 30 minutes apart to build gluten strength.
- Bulk ferment: Let the dough continue fermenting at room temperature for 600 minutes total (including the fold time above), until noticeably puffy.
- Roast the garlic: Slice the top off 1 whole head of garlic, roasted, drizzle with a little of the 2 tablespoons extra virgin olive oil, wrap in foil, and roast at 400°F until soft and golden.
- Make the garlic butter: Beat 113 grams unsalted butter, softened until fluffy, then fold in the roasted garlic paste and 5 garlic cloves, minced. Stir in 1 tablespoons fresh parsley, chopped and 0.5 teaspoons dried oregano, plus a pinch of salt. Rest 60 minutes if possible.
- Shape the knots: Divide dough into 50g pieces, roll into 8-inch ropes, tie into simple knots, and tuck the ends underneath. Space out on a parchment-lined sheet.
- Final proof: Let the shaped knots proof for 150 minutes, until a light poke springs back slowly.
- First butter coat: Brush half the garlic butter over the knots and let them sit 20 minutes before baking.
- Bake: Bake at 425°F until golden and the butter bubbles at the edges.
- Finish with butter: Brush the remaining garlic butter over the hot knots as soon as they come out of the oven, then add one more light coat right before serving.
Notes
- Cold-ferment tip: Refrigerate the dough overnight after bulk fermentation for extra tang, then let it warm up before shaping.
- Storage: Keep in an airtight container at room temp for 2 days, or freeze up to 3 months. Reheat at 350°F for 5-7 minutes.
- Garlic caution: Keep fresh garlic out of the dough itself since it can slow fermentation. Save it for the butter instead.
- Crispier crust: Bake on a preheated pizza stone, or add steam with a water-filled skillet on the bottom rack.
- Prep Time: 45 minutes (active)
- Cook Time: 1 hour — 40 minutes to roast the garlic, 15-18 minutes to bake the knots






why would you have step 3 say to let it prove for 8- 12 hours. And then have step four say to do the stretch and folds during the first couple hours of proofing? This is very confusing and step 3 should be to stretch and fold every 30 minutes for a couple hours and then step four should be the long proof. I done step three before doing step four because, obviously. And now after letting it proof for 12 hours I’m trying to do the stretch and folds. I hope it turns out regardless.
Fixed, apologies for the confusion!