
Last updated on August 21st, 2026
Creating a sourdough starter shouldn’t feel like rocket science, but many give up before they even begin. The conflicting advice, mysterious terminology, and fear of failure. What should be simple becomes something overwhelming.
Wondering why your previous attempts failed? Tired of wasting ingredients on starters that never rise? It’s not just you!
It doesn’t matter if you’re a first-timer or returning after past disappointments. You’re welcome to discover the secret approach that even professional bakers don’t want you to know about.
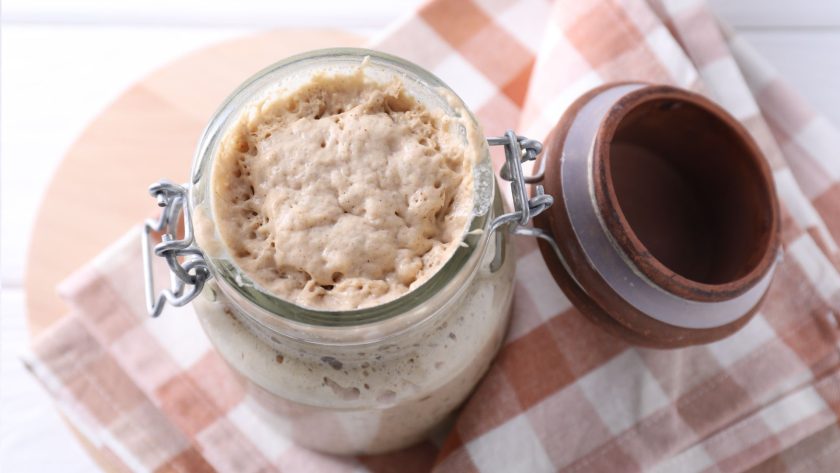
What is Sourdough Starter?
A sourdough starter is simply a mixture of flour and water – that’s it.
This concoction captures the wild yeast found in the air all around us, which causes the starter to come alive. As the yeast feasts on the natural sugars in the flour, it creates:
- Carbon dioxide bubbles (makes bread rise)
- Lactic and acetic acids (creates sourdough’s signature tangy flavor)
How Does It Work?
Through natural fermentation, this simple flour-water mixture becomes a powerful leavening agent that makes your bread rise without commercial yeast.
The process of making and maintaining a sourdough starter is pretty straightforward and easy. Just combine equal parts flour and water, and feed it daily by discarding some of your starter and adding fresh ingredients afterwards.
Timeline: In about 7-14 days, your bubbly starter will be ready to bake delicious homemade sourdough bread.
Related: 4 Types Of Sourdough Starter
Beginner’s Quick Start Checklist
Before you begin, gather these essentials:
Equipment Needed:
- ✓ Glass jar (1-quart/1-liter size recommended)
- ✓ Kitchen scale (for accurate measurements)
- ✓ Stirring spoon or spatula
- ✓ Breathable cover (coffee filter + rubber band, or cloth)
- ✓ Marker or tape (to track rise)
Ingredients Needed:
- ✓ Whole wheat or all-purpose flour (100-150 grams to start)
- ✓ Filtered or dechlorinated water
- ✓ Room temperature environment (70-75°F ideal)
Time Commitment:
- Daily: 5 minutes per day for feeding
- Total: 7-14 days until ready to bake
Pro Tip: Mark your jar with a rubber band or tape at the starting level to easily track how much your starter rises.
Why Do I Need to Discard Some Starter?
It may seem wasteful, but discarding some starter is actually an important step in maintaining a strong, vibrant, and flavorful sourdough starter!
Why Discarding Matters
- Keeps Starter Manageable Your starter grows quickly. Without discarding, you’d have gallons of starter within weeks (too much to feed properly).
- Maintains Proper Balance Wild yeast and bacteria need the right ratio of food (flour + water). Adding fresh ingredients without discarding creates an imbalanced environment that leads to weak fermentation.
- Encourages Strong Activity Think of discarding like pruning a plant. You remove old growth to make room for vigorous new growth.
- Prevents “Hungry” Starter Discarding ensures your yeast culture gets enough fresh nutrients to stay active and healthy.
Do I Throw My Discard Away?
Don’t throw your discard away! Use it in:
- Sourdough pancakes
- Sourdough crackers
- Sourdough biscotti
- Pizza dough
- Muffins and quick breads
Keep a container in the fridge and collect discard throughout the week for weekend baking projects.
Why You Should Make A Sourdough Starter
No Store-Bought Yeast No more last-minute grocery runs. Your starter is always ready when you are.
Superior Flavor Sourdough bread has complex, tangy flavors that store-bought loaves simply can’t match.
More Cost-Effective Once established, your starter costs pennies to maintain (you need just flour and water).
A Living Kitchen Companion Your starter responds to care and environment. On warm days, it bubbles eagerly; in cooler weather, it takes its time. This creates a satisfying rhythm in your kitchen.
Participate in Baking Tradition Join generations of bakers who’ve maintained starters for decades (some starters are over 100 years old!).
Pride of Accomplishment There’s nothing quite like pulling a perfectly crusty, tangy loaf from the oven knowing you created it entirely from scratch, right down to the leavening agent.
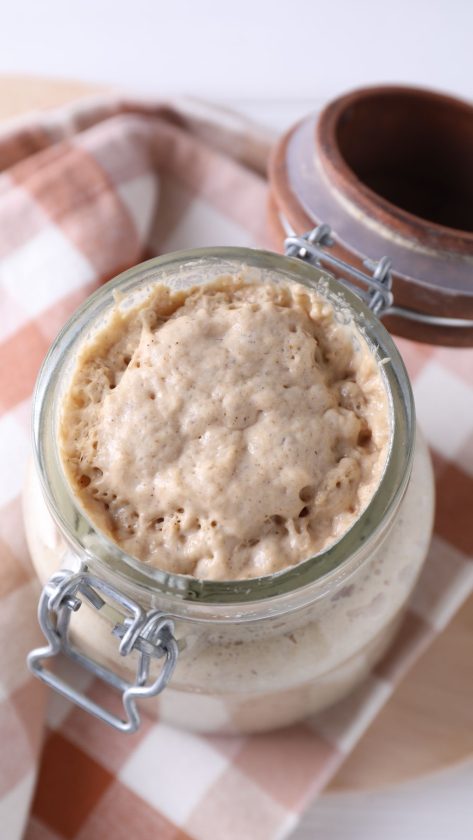
Ingredients You Need – Only Two!
Making a sourdough starter requires just flour and water. No special equipment, no additives, just these two pantry staples.
Choosing Your Flour
Best for Beginners: Whole Wheat Flour
Why whole wheat?
- Contains more wild yeast and microorganisms
- Higher nutrient content feeds fermentation
- Starts faster than all-purpose flour
Common Approach: Many start with whole wheat for days 1-3, then switch to unbleached all-purpose flour for ongoing maintenance.

Prices pulled from the Amazon Product Advertising API on:
Product prices and availability are accurate as of the date/time indicated and are subject to change. Any price and availability information displayed on [relevant Amazon Site(s), as applicable] at the time of purchase will apply to the purchase of this product.
Also Works Well: All-purpose Flour
Choose unbleached all-purpose flour for better results. Bleached flour contains fewer beneficial microorganisms.
Note: All-purpose flour takes longer to activate (sometimes 2-3 extra days) but works perfectly fine.
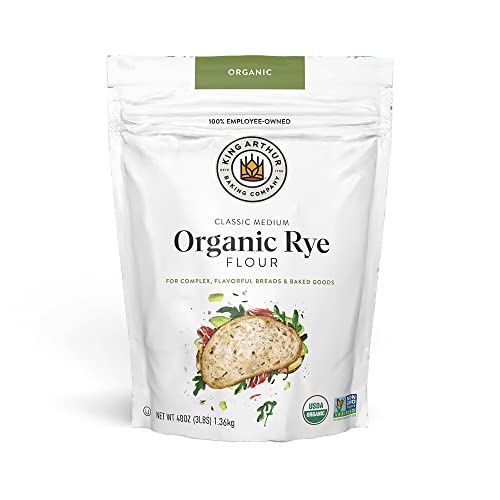
Boost Option: Rye Flour
Add 1 tablespoon of rye flour to any feeding if your starter needs a boost. Rye is incredibly rich in wild yeasts.

- A Single Ingredient Milled to Perfection | Our Gourmet Flour is Truly One in a Mill! Our All-Purpose Flour Infuses Delectable Rustic Taste, Distinctive Palate-Pleasing Texture & Wholesome Nutrition to All Your Culinary Creations | Premium Presifted Variety Saves You Time & Worry—No Lumps, Clumps, or Stones
Prices pulled from the Amazon Product Advertising API on:
Product prices and availability are accurate as of the date/time indicated and are subject to change. Any price and availability information displayed on [relevant Amazon Site(s), as applicable] at the time of purchase will apply to the purchase of this product.
Organic vs. Conventional?
Organic flour often contains more wild yeasts and beneficial bacteria due to absence of pesticides. However, conventional unbleached flour works fine. Don’t let this stop you from starting!
Choosing Your Water
Best Options:
- Filtered water (easiest)
- Bottled spring water
- Tap water left overnight (allows chlorine to evaporate)
Avoid:
- Heavily chlorinated tap water (inhibits fermentation)
- Distilled water (lacks minerals yeast needs)
Temperature: Use room temperature water (around 70-75°F)
The Magic Ratio for an Active Sourdough Starter
100% hydration = Equal weights of flour and water
This creates a consistency between pancake batter and thick yogurt. Easy to stir and ideal for fermentation.
Example: 50g flour + 50g water = 100g total starter
Related: How to Keep Sourdough Starter Warm
Step-by-Step Guide to Making Your Starter
Day 1 (Creating Your Starter Base)
- Mix 50 grams of whole wheat flour with 50 grams of room-temperature water in a clean glass jar.
- Stir vigorously until no dry flour remains. We’re looking for a thick, pancake-like batter. The stirring isn’t just for mixing; you’re incorporating oxygen that helps kickstart fermentation.
- Cover with a breathable lid (a coffee filter secured with a rubber band works perfectly) and place in a warm spot in your kitchen, so around 70-75°F is ideal.
What to expect: Probably nothing on Day 1. That’s normal!

Prices pulled from the Amazon Product Advertising API on:
Product prices and availability are accurate as of the date/time indicated and are subject to change. Any price and availability information displayed on [relevant Amazon Site(s), as applicable] at the time of purchase will apply to the purchase of this product.
Day 2 (Daily Feeding and Discarding Routine)
After that first 24 hours, you’ll begin the feeding schedule that turns this simple mixture into a living kitchen pet.
- Discard all but 50 grams of your starter (yes, throwing it away feels wrong, but it’s necessary until it’s mature).
- Add 50 grams of fresh flour and 50 grams of water to what remains.
- Stir vigorously again, and return to its warm spot.
What to expect: Possibly a few small bubbles. Starter may smell slightly sweet or like fresh flour.
Day 3 (and Onwards)
Daily Routine (same time each day):
- Observe and note changes
- Discard all but 50g
- Add 50g flour + 50g water
- Stir vigorously
- Cover and place in warm spot
What to Expect Each Day
Day 3:
- Small bubbles may appear
- Slight volume increase possible
- Mild sweet or yeasty smell
Day 4:
- More bubbles forming
- Might smell funky (acetone, alcohol, or vinegar) – this is normal!
- May see 20-30% rise
Day 5:
- Increased bubble activity
- Stronger sour smell developing
- May double in size (if so, almost ready!)
Days 6-7:
- Consistent doubling within 4-8 hours after feeding
- Bubbles throughout (not just surface)
- Pleasant tangy, yogurt-like aroma
- If showing these signs: your starter is ready!
Signs of Success to Watch Out For
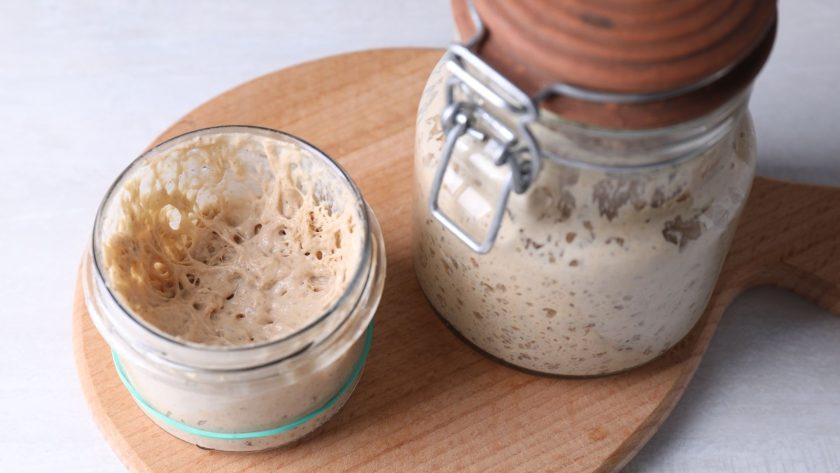
- Doubles in size within 4-8 hours after feeding. This usually happens between days 7-14, depending on your kitchen environment.
- Bubbly throughout (not just on the surface)
- Has a pleasantly sour aroma
- Follows a predictable rise and fall pattern after feeding.
Early Troubleshooting
“My starter smells weird!” Odd smells (acetone, nail polish remover, overripe fruit, gym socks) are NORMAL in the first week. The bacterial balance is still establishing.
“Nothing is happening!” Some starters take 10-14 days, especially in cooler kitchens. Be patient and keep feeding!
“There’s liquid on top!” This is “hooch” which is alcohol from fermentation. Your starter is hungry. Stir it back in before feeding.
“It rose on Day 3 but now nothing!” This is called a “false start.” Bad bacteria often bloom first, then die off as good yeast establishes. Keep going!
How to Maintain Your Starter (Stress-Free Approach)
Keeping your sourdough starter alive is simple once you understand the basics.
And guess what: the best maintenance schedule is the one that fits your lifestyle. Your starter is remarkably resilient and will adapt to your baking rhythm, whether you use it frequently or not.
- At room temperature, feed your starter once a day: discard all but 50 grams, then add 50g each of flour and water, and stir vigorously. That’s it! Again, don’t toss that discard, there are many sourdough starter discard recipes you can try to make with it!
- Too busy for daily feeding? The refrigerator is a game-changer. Yes you can refrigerate your sourdough starter to make it last longer. Cold temperatures slow fermentation dramatically, reducing feeding to just once a week. After feeding, let it sit at room temperature for an hour before refrigerating with a loose lid.
- Even neglected starters can bounce back. Remove from the fridge, discard most, and resume daily feedings. In 2-3 days, you’ll see signs of life returning.
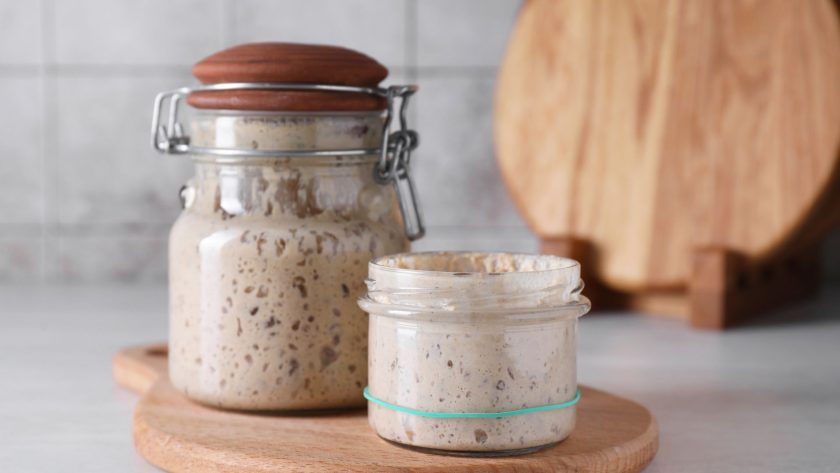
Easy Feeding Schedule Guide
Let’s simplify it further with some options you might want to work with:
Option 1: Room Temperature (Daily Feeding)
Best for: Active bakers who bake weekly or more
Schedule:
- Feed once per day at roughly the same time
- Discard all but 50g
- Add 50g flour + 50g water
- Stir and cover
Pros:
- Starter stays at peak activity
- Ready to bake anytime
- Predictable rise and fall
Cons:
- Requires daily attention
- Uses more flour
- Risk of forgetting and over-fermenting
Option 2: Refrigerated (Weekly Feeding)
Best for: Occasional bakers or busy schedules
Schedule:
- Feed starter as normal (50g starter + 50g flour + 50g water)
- Let sit at room temperature for 1-2 hours
- Put in refrigerator with loose lid
- Feed once per week
To Use for Baking:
- Remove from fridge
- Feed and let come to room temperature (4-8 hours)
- Feed again 4-8 hours before baking
- Use when doubled and bubbly
Pros:
- Low maintenance (once weekly)
- Saves flour
- Perfect for weekend baking
- Starter can last 2 weeks between feedings
Cons:
- Takes longer to activate for baking
- Needs planning ahead
Option 3: Twice-Daily Feeding (Peak Performance)
Best for: Hot climates or serious bakers
Schedule:
- Feed every 12 hours
- Keeps starter at peak activity
- Prevents over-fermentation
When to use:
- Kitchen over 78°F
- Preparing for competition or special bake
- Starter showing signs of weakness
Adjusting Feeding Ratios
Standard Ratio: 1:1:1 (starter:flour:water)
- Example: 50g starter + 50g flour + 50g water
For Less Frequent Feeding: 1:2:2 or 1:3:3
- Example: 50g starter + 100g flour + 100g water
- Gives more food, extends time between feedings
For Peak Activity: 1:1:1 twice daily
- Keeps starter at maximum strength
Beginner Feeding Tips:
Consistency is so important. Feed at roughly the same time daily for best results.
Watch your starter, not the clock. Learn its rhythm. Some are fast, some are slow.
Life happens. Missed a feeding? No problem. Just feed when you remember and continue.
Going on vacation? Feed your starter, refrigerate it, and it’ll be fine for 2-3 weeks.
When Is Your Starter Ready to Use?
Your easy sourdough starter is ready for baking when it shows clear signs of strong fermentation activity.
Here’s exactly what to look for:
The Four Signs of Readiness
1. Consistent Doubling
- Starter reliably doubles in size within 4-8 hours after feeding
- Falls back down as it gets hungry
- This pattern repeats predictably
How to check: Mark jar at starting level, watch over 8 hours
2. Bubbles Throughout
- Not just surface bubbles
- Bubbles visible through sides of jar
- Looks foamy and aerated when stirred
3. Pleasant Aroma
- Smells tangy and yogurt-like
- May have fruity notes
- Not vinegary or like nail polish remover
4. Passes Float Test
- Drop 1 teaspoon of recently-fed starter into glass of room-temperature water
- If it floats → enough gas bubbles for baking!
- If it sinks → needs more time/feeding
Typical Timeline
Days 7-10: Most starters are ready
Days 10-14: Cooler kitchens or all-purpose flour
Days 5-7: Warm kitchens with whole wheat flour
What “Ready” Looks Like
Before Feeding:
- Fallen from peak
- May have hooch layer
- Smells tangy/sour
4-8 Hours After Feeding:
- Doubled in volume
- Domed top
- Bubbles throughout
- Pleasant aroma
Peak Window for Baking: Right when it reaches maximum rise, before it starts falling.
Still Not Sure? Try This Test:
The Spoon Test:
- Scoop a spoonful from middle of starter
- Should be stretchy and full of bubbles
- Drops should cling to spoon
The Smell Test:
- Should smell pleasant and tangy
- Like yogurt, cheese, or sourdough bread
- Not overly sour or chemical-like
When to Wait Longer:
❌ Only small bubbles on surface
❌ Takes 12+ hours to double
❌ Smells strongly of alcohol or acetone
❌ Fails float test
❌ Doesn’t rise predictably
Solution: Keep feeding daily for another 3-5 days
Your starter is typically ready between days 7-14 but note that your kitchen temperature and flour type may influence this.
More Sourdough Starter Problems (and Their Fixes)
When Your Starter Refuses to Bubble
No bubbles in your starter? Check your kitchen temperature first. Wild yeast thrives between 70-75°F. Place your jar in a warmer spot if your kitchen is too cold. Some starters naturally take up to two weeks to become active, especially in cooler environments.
You can also add a tablespoon of rye or whole wheat flour to your next feeding. These nutrient-rich flours contain microorganisms that accelerate fermentation.
Prices pulled from the Amazon Product Advertising API on:
Product prices and availability are accurate as of the date/time indicated and are subject to change. Any price and availability information displayed on [relevant Amazon Site(s), as applicable] at the time of purchase will apply to the purchase of this product.
Dealing with That Funky Smell
Acetone or alcohol odors indicate your starter is hungry. So increase feeding frequency for several days.
For overly sour, vinegary aromas, use cooler water and keep your starter in a slightly cooler location to balance the acid-producing bacteria.
Spotting and Handling Mold
Healthy starters resist contamination through natural acidity.
If you see colored fuzzy patches (pink, orange, blue, green), transfer the unaffected starter to a clean container if contamination is minimal.
For widespread mold, start fresh.
Prevent issues by transferring to clean jars weekly.
Reviving a Neglected Starter
For forgotten starters with thick hooch layers, discard most but save a tablespoon from the bottom. Feed twice daily with fresh flour and water. Bubbles typically return within 3-4 days as beneficial cultures reestablish dominance.
Most starters recover surprisingly well with consistent care!
Troubleshooting Your Starter
Mistake #1: Using Chlorinated Water
Problem: Chlorine kills beneficial bacteria and yeast Solution: Use filtered water or let tap water sit overnight
Mistake #2: Inconsistent Feeding Schedule
Problem: Starter becomes weak or over-fermented Solution: Set a daily alarm, feed at roughly same time
Mistake #3: Wrong Temperature
Problem: Too cold = slow/no activity; Too hot = bad bacteria Solution: Keep between 70-75°F (use thermometer if unsure)
Mistake #4: Not Stirring Enough
Problem: Dry flour pockets, poor fermentation Solution: Stir vigorously for 1-2 minutes, scrape jar sides
Mistake #5: Using Airtight Lid
Problem: Pressure buildup, explosion risk Solution: Always use breathable cover (cloth, coffee filter)
Mistake #6: Giving Up Too Soon
Problem: False starts are normal around Day 3-4 Solution: Keep feeding daily until Day 7-10 minimum
Mistake #7: Not Discarding Enough
Problem: Weak, sluggish starter with poor rise Solution: Keep only 50g before each feeding
Mistake #8: Using Bleached Flour
Problem: Fewer wild yeasts, slower activation Solution: Switch to unbleached flour
Mistake #9: Too Much/Too Little Water
Problem: Wrong consistency affects fermentation Solution: Weigh ingredients, aim for pancake batter thickness
Mistake #10: Impatience
Problem: Using starter before it’s ready = flat bread Solution: Wait for all four signs of readiness
Problem: No Bubbles After 5 Days
Possible Causes:
- Kitchen too cold
- Chlorinated water
- Bleached flour
- Not enough stirring
Solutions:
- Move to warmer location (75-80°F)
- Switch to filtered water
- Add 1 tablespoon rye or whole wheat flour
- Increase feeding to twice daily
- Stir more vigorously (2 minutes)
Timeline: Should see bubbles within 2-3 days of changes
Problem: Smells Like Nail Polish Remover/Acetone
Cause: Starter is very hungry, producing excess alcohol
Solutions:
- Feed more frequently (every 12 hours)
- Increase feeding ratio to 1:2:2
- Move to slightly cooler location
Is it ruined? No! This smell is normal and fixable.
Problem: Liquid Layer on Top (Hooch)
What it is: Alcohol from fermentation
What it means: Starter is hungry and needs feeding
Solutions:
- For mild hooch: Stir back in, then feed
- For thick dark hooch: Pour off, then feed
- Prevention: Feed more frequently
Color meanings:
- Clear = slightly hungry
- Gray = hungry
- Dark brown/black = very hungry (but still okay!)
Problem: Starter Rose Then Stopped
What happened: “False start” – initial bacterial bloom before good yeast takes over
Timeline:
- Day 2-3: Quick rise
- Day 4-5: Nothing happens
- Day 6-7: Real activity begins
Solution: This is NORMAL! Keep feeding daily. Real activity starts soon.
Problem: Mold Growing
How to identify:
- Fuzzy patches
- Colors: pink, orange, green, blue, white fuzz
- On surface or sides of jar
Solutions:
- Small amount: Scoop out unaffected portion, transfer to clean jar
- Widespread: Start over with fresh batch
Prevention:
- Use clean utensils
- Keep jar clean (transfer to fresh jar weekly)
- Don’t skip feedings
- Maintain proper temperature
Note: Hooch and bubbles are NOT mold!
Problem: Starter Smells Like Vomit
Cause: Butyric acid bacteria (common Days 2-5)
Solution:
- This is temporary and NORMAL
- Keep feeding daily
- Smell will improve by Day 6-7
- Don’t give up!
Problem: Separated into Layers
Cause: Over-fermentation or inconsistent stirring
Solution:
- Stir everything together
- Discard all but 25g
- Feed with 50g flour + 50g water
- Feed twice daily for 2-3 days
Problem: Too Thick or Too Thin
Too thick (stiff dough):
- Add water 1 teaspoon at a time
- Aim for thick pancake batter
Too thin (runny liquid):
- Add flour 1 teaspoon at a time
- Should coat spoon when lifted
Ideal consistency: Between pancake batter and thick yogurt
Problem: Forgot to Feed for Several Days
Starter at room temperature:
- Look for mold (if present, see mold section)
- Pour off any hooch
- Keep 50g from center
- Feed twice daily for 2-3 days
- Should recover within 3-4 days
Starter in refrigerator:
- Can survive 3-4 weeks without feeding
- Remove, feed 2-3 times before using
Revival success rate: 80-90% if no mold present
Problem: Weak Rise (Only 25-50% Growth)
Causes:
- Not enough food
- Too cold
- Needs more time
Solutions:
- Increase feeding ratio to 1:2:2
- Ensure temperature is 70-75°F
- Feed twice daily
- Add tablespoon of rye flour
- Be patient (can take 2-3 more days)
Still Having Problems?
Environmental Factors to Check:
- Temperature (use thermometer)
- Water quality (try bottled)
- Flour freshness (check expiration)
- Jar cleanliness
- Feeding consistency
When to Start Over:
- Widespread mold
- No activity after 14 days despite troubleshooting
- Persistent foul smell that doesn’t improve
Remember: Most problems are fixable. Don’t give up too soon!
Storage & Maintenance for Your Starter
Room Temperature Storage
When to use:
- Baking multiple times per week
- Want starter always ready
- Live in temperate climate
Daily routine:
- Feed once daily at same time
- Keep in warm spot (70-75°F)
- Always use breathable cover
- Transfer to clean jar weekly
Signs of health:
- Doubles within 4-8 hours
- Pleasant tangy smell
- Bubbles throughout
Refrigerator Storage
When to use:
- Bake weekly or less
- Want low-maintenance option
- Going on vacation (up to 3 weeks)
Weekly routine:
- Remove from fridge
- Discard all but 50g
- Feed 50g flour + 50g water
- Let sit 1-2 hours at room temp
- Return to fridge with loose lid
Preparing for baking:
- Remove from fridge (night before)
- Feed and let reach room temp (4-8 hours)
- Feed again in morning
- Use when doubled and bubbly (4-8 hours)
Freezer Storage (Long-Term Backup)
When to use:
- Creating backup
- Taking break from baking
- Traveling for months
How to freeze:
- Feed starter until very active
- At peak rise, spread thin on parchment paper
- Let dry completely (12-24 hours)
- Break into flakes
- Store in airtight container in freezer
Shelf life: Up to 1 year
To reactivate:
- Mix flakes with equal parts flour and water
- Feed daily until active (3-5 days)
- Use when showing all readiness signs
Transferring to Clean Jar
Frequency: Weekly for room temp, monthly for refrigerated
Process:
- Clean new jar thoroughly
- Add 50g active starter
- Feed as normal
- Old jar goes in dishwasher
Why it matters: Prevents buildup, reduces contamination risk
Reducing Discard Amount
Standard feeding: 50g starter + 50g flour + 50g water
Smaller feeding: 20g starter + 20g flour + 20g water
Benefits:
- Less discard
- Less flour used
- Same healthy starter
When to upsize: Day before baking, feed larger amount (150g total) to have enough for recipe
Long-Term Maintenance Tips
Keep notes: Track feeding times, temps, rise times
Name your starter: Makes it fun and memorable!
Watch for patterns: Learn your starter’s unique rhythm
Trust the process: Starters are resilient and forgiving
Join communities: Online sourdough groups offer support
Recipes Using Discard – No Waste!
Not ready for a full bread loaf? Discard recipes are perfect training wheels.
Each time you feed your starter, you remove perfectly good fermented flour and water that’s already developing flavor.
And here are some recipes for you to try it out on:
Breakfast Recipes
- Sourdough Pancakes – Fluffy and tangy
- Sourdough Waffles – Crispy and delicious
- Sourdough Discard Cinnamon Rolls – Weekend treat
- Sourdough English Muffins – Perfect for toasting
- 14 Sourdough Discard Breakfast Recipes
Snacks & Sides
- Sourdough Crackers – Crispy and addictive
- Sourdough Pizza Dough – Best homemade pizza
- Sourdough Pretzels – Soft or hard
- Sourdough Breadsticks – Great for dipping
Sweets
- Best Sourdough Biscotti – Perfect with coffee
- Sourdough Discard Pumpkin Coffee Cake – Seasonal favorite
- Sourdough Brownies – Fudgy with tang
- Sourdough Cookies – Chewy and unique
- 7 Best Fall Sourdough Discard Recipes
Pro Tips
- Save in batches: Keep container in fridge, add discard all week
- Unfed discard works best: Don’t need active starter for these recipes
- Freeze extra discard: Thaw when ready to use
- Add to any recipe: Replace some flour/liquid in muffins, cookies, etc.
Your Sourdough Success Starts Here!
So, to recap:
✓ Making sourdough starter requires just flour and water
✓ Takes 7-14 days to develop fully
✓ Feed daily at room temp or weekly in fridge
✓ Look for doubling in 4-8 hours as ready sign
✓ Use discard in recipes—no waste!
✓ Most problems are easily fixable
✓ Starters are remarkably resilient
Your Action Plan
Today:
- Gather flour, water, and jar
- Mix first batch (Day 1)
- Mark starting level
- Find warm spot
This Week:
- Feed daily at same time
- Watch for bubbles
- Don’t give up if it seems slow
- Track progress with notes
Next Week:
- Look for readiness signs
- Try float test
- Bake first loaf!
- Celebrate your accomplishment
You’ve got this!
With these easy steps, you’ll be baking delicious homemade bread from scratch in no time!
FAQs – Easy Sourdough Starter Recipe
What is the secret to a good sourdough starter?
The secret to a good sourdough starter is consistency. Feed it with equal parts flour and water at regular intervals, keep it at a warm temperature (70-75°F), and be patient. Vigorous stirring to incorporate oxygen, using filtered water to avoid chlorine, and occasionally adding a bit of whole wheat or rye flour can help jumpstart activity when needed.
What is the shortest time for sourdough starter?
While a fully mature sourdough starter typically takes 7-14 days to develop, you can sometimes get a usable starter in as little as 5 days if conditions are optimal. The key factors are warm temperature, quality flour (especially whole wheat or rye to start), and consistent twice-daily feedings. Watch for reliable doubling in size after feeding as you sign it’s ready.
Can you make a sourdough starter with just all-purpose flour?
Yes, you can make a sourdough starter with just all-purpose flour, though it may take longer to become active compared to whole wheat or rye flour. All-purpose flour has fewer wild yeasts and nutrients, but will still capture enough wild microorganisms to create a healthy starter. For best results, use unbleached all-purpose flour and be patient with the development process.
Is sourdough bread good for you?
There are many benefits to sourdough bread. Experiencing gut problems? Many people with mild gluten sensitivities find sourdough easier to digest than regular bread. Trying to consume less carbs? Sourdough’s lower glycemic index makes it a smarter carb choice.
How do I know if my starter has gone bad?
Most concerning smells and appearances are actually normal. Hooch (liquid on top) just means your starter is hungry, sour or vinegar smells are normal, and lack of activity for a few days just means it needs consistent feeding. Signs your starter has actually gone bad include visible mold with fuzzy colored patches, a truly rotten smell that’s putrid rather than just sour, or pink and orange streaks indicating harmful bacteria. When in doubt, if it only smells bad but has no visible mold, try reviving it with 2-3 days of twice-daily feedings—most starters recover successfully.
Can I use tap water?
It depends on your water supply. If your tap water is lightly chlorinated, let it sit overnight uncovered to allow the chlorine to evaporate. If it’s heavily chlorinated, use filtered or bottled water instead. Well water is usually perfect as-is. An easy test is to fill a glass with tap water and let it sit for 24 hours—if the chlorine smell disappears, it’s fine for your starter. The best options are filtered water (safest choice), spring water (bottled), or dechlorinated tap water. Avoid distilled water as it lacks the minerals that yeast needs.
Why did my starter rise then stop?
This is called a “false start” and is completely normal! What happens is that during days 2-3, you see quick activity from bacteria rather than good yeast. Then during days 4-5, everything dies down as these bacteria die off. Around days 6-7, the real sourdough yeast takes over, and by days 7-10 you’ll see consistent, reliable activity. The solution is simple: keep feeding daily and don’t give up. The real starter is developing underneath, and this temporary slowdown is part of the natural process.
How long can I leave my starter unfed?
At room temperature, you can leave your starter unfed for a maximum of 24-48 hours before feeding, though it will develop heavy hooch and isn’t recommended regularly. In the refrigerator, you can comfortably go 1-2 weeks between feedings, and starters can survive 3-4 weeks in an emergency, though best practice is weekly feeding. In the freezer as dried starter, it can last up to 1 year as a backup. For vacations, simply feed your starter, refrigerate it with a loose lid, and it’ll be fine for 2-3 weeks. Revive it with 2-3 feedings when you return.
Can I speed up the process?
Some safe accelerators include starting with whole wheat or rye flour for days 1-3, keeping the starter warmer at 75-78°F instead of 70-75°F, feeding twice daily instead of once, and adding a tiny pinch of whole grain flour to boost activity. However, avoid shortcuts like adding commercial yeast (which defeats the purpose), using very hot water (which kills beneficial microbes), or skipping the discard step (which weakens the starter). The reality is that rushing usually backfires—the 7-14 day timeline allows proper flavor development and a stable culture, so patience truly pays off.
What’s the best container for my starter?
The ideal container should be glass so you can see through the sides, have a wide mouth for easy stirring and feeding, hold about 1-quart or 1-liter capacity, and feature straight or tapered sides rather than a narrow neck. Good options include Weck jars, large mason jars, Pyrex measuring cups, or dedicated sourdough crocks. Avoid metal containers that can react with the acid, very narrow openings, and containers that are too small since your starter needs room to rise. A pro tip is to use a rubber band or tape to mark the starting level so you can easily track how much your starter rises.
Related Articles:
 How to Feed Sourdough Starter (A Beginner’s Guide to Perfect Bread)
 Sourdough Cinnamon Banana Bread: Easy, Moist & Delicious Recipe
 How to Use Sourdough Starter Like a Pro (Even as a Beginner)
 How to Rehydrate Sourdough Starter: Step-by-Step Guide for Beginners
 How Often to Feed Sourdough Starter (Your No-Stress Guide)

Natasha, Great article. I am just learning and much of what you said makes sense. I purchased a starter and also grew one from the flour that I am using. I mix them for each batch of loaves of bread. Currenlty making 8 or so loaves a week and will double it this next week. Do you have any experience with freezing bread?
Thanks
David Toland
Thank you. I am starting today.
Good luck with it!
Cheers, David! Congrats on scaling up to 8 loaves a week, that’s impressive!
When freezing: sourdough actually freezes super well, so it suits batch baking like yours. Let it cool completely first (warm bread traps moisture and gets soggy). Wrap it tightly in plastic wrap or foil, then pop it in a freezer bag with the air squeezed out. Whole loaves hold up better than pre-sliced, but if you want portions grab-and-go snacks, slice before freezing (you can toast slices straight from frozen without thawing). It’ll keep well for 2-3 months. For a whole loaf, thaw it wrapped at room temp for a couple hours, then put in a 350°F oven for 10-15 minutes.
Hope that helps!