
Last updated on August 21st, 2026
Is your sourdough starter just sitting in the fridge between loaves? Put it to work here. Fermenting the dough overnight gives these donuts a light, open crumb and a mild tang that plain donuts don’t have, and using discard-adjacent starter instead of tossing it means less waste in your kitchen too.
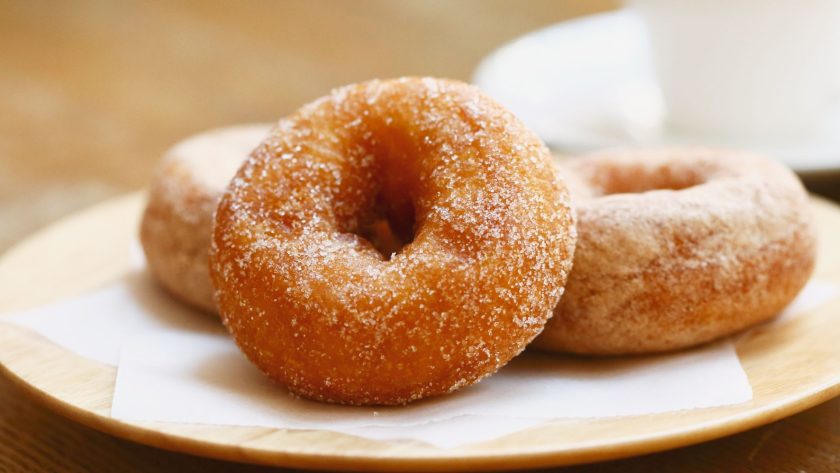
What We’re Making Today
If you have ever bitten into a donut and thought “this is fine, but it could be so much better,” sourdough is your answer.
These are donuts with a twist, amazingly next-level treats. Soon you’ll have everyone asking what your secret is.
This recipe uses an active starter (not discard) so the dough actually rises, and it works whether you want to deep fry for the classic donut shop texture or bake for a lighter, less messy version.
| Yield | About 12–14 donuts (3.5-inch) plus the same number of donut holes |
| Active time | About 45 minutes |
| Fermentation + proofing | 4–15 hours depending on which method you choose (see below) |
| Cook method | Fry or bake, your choice |
| Best flour | Bread flour, or a mix of bread and all-purpose |
Why Sourdough Instead of Regular Yeast?
| Feature | Regular Donuts | Sourdough Donuts |
|---|---|---|
| Leavening | Commercial yeast | Wild yeast starter |
| Flavor | Sweet, one-note | Tangy, more complex |
| Texture | Dense or airy, depending on recipe | Light and open-crumbed |
| Digestibility | Standard | Easier for many people to digest |
| Shelf life | 1–2 days | Stays fresh a bit longer |
| Prep time | Quick | Needs time for fermentation |
The tradeoff is time, not effort. You’re mostly waiting while the starter does the work of building flavor!
Ingredients
| Ingredient | Amount | Notes |
|---|---|---|
| All-purpose flour | 500g | Organic, unbleached if you can get it |
| Active sourdough starter | 200g | Fed 4–6 hours before use |
| Unsalted butter, softened | 60g | |
| Large eggs, room temperature | 3 | |
| Granulated sugar | 100g | |
| Whole milk, slightly warmed | 240ml | |
| Vanilla extract | 1 tsp | |
| Ground nutmeg | 1/2 tsp | |
| Salt | 1 tsp | |
| Oil for frying | ~2 quarts | Grapeseed, peanut, or refined coconut oil |
Yield note: this amount of dough makes roughly 12–14 standard 3.5-inch donuts, plus the cut-out centers, which you can fry or bake as donut holes. Exact count depends on how thick you roll the dough and how much you re-roll the scraps.
Substitutions
Good news if you have dietary restrictions because this recipe is pretty to alternatives that work better for you.
Flour swaps
- Bread flour instead of all-purpose adds more chew, thanks to its higher protein content (12–14%)
- Swap up to 25% of the flour for whole wheat for a nuttier flavor
- Gluten-free 1:1 baking blend works if you add 1 tablespoon psyllium husk powder for structure
Dairy-free
- Coconut oil instead of butter, adds a mild tropical note
- Plant-based butter also works, pick a low-water-content one
Egg-free
Replace each egg with 1/4 cup applesauce plus 1 tablespoon cornstarch (donuts will be a little denser but still good)
Related: Sourdough Pumpkin Donuts
Step 1: Prepare Your Sourdough Starter
- 12–18 hours before baking: feed your refrigerated starter equal parts flour and water by weight, then leave it at room temperature.
- 4–6 hours before mixing dough: feed it again, 50g starter + 100g flour + 100g water.
- How to know it’s ready: it should have roughly doubled, look bubbly, and pass the float test (a spoonful dropped in water floats).
- Ideal temp: 75–80°F for active fermentation.
If your starter is sluggish, move it somewhere warmer like near the stove, add a small pinch of rye flour to the feeding, or switch to filtered water if your tap water is heavily chlorinated.
Tip: Do not throw away your starter discard! It is perfect for pancakes, crackers, or sourdough cake. Nothing goes to waste here.
Step 2: Make the Dough
Here comes the fun part. Once your starter is active and bubbly, you are ready to bring this dough together.
- Combine your bubbly starter with warm milk and whisked eggs in a large bowl.
- In a separate bowl, cream the butter and sugar until just combined.
- Add the butter mixture to your wet ingredients along with vanilla and nutmeg.
- Mix in flour and salt until everything comes together.
- Knead for 8-10 minutes by hand or 5 minutes on medium-low in a stand mixer.
What you are looking for: A soft, slightly tacky dough that feels supple and springs back gently when poked. It should not be sticky like glue, but it should not be stiff either. When it feels like it has a little life to it, you are on the right track.
- Too sticky? Add flour one tablespoon at a time.
- Too dry? Add a small splash of milk.
Place dough in a lightly oiled bowl, cover with a damp kitchen towel, and let it rise. The hardest part now is just being patient!
Step 3: Fermentation and Proofing
The flavors you are going to taste in the finished donut? They are developing right now, slowly and beautifully. Do not rush this stage.
You only need to pick one bulk fermentation method and one final proof method below, not all four. Mixing and matching both room-temp and fridge versions of the same stage will over-ferment the dough.
Bulk fermentation (pick one, right after mixing the dough):
| Method | Time | What you’re looking for |
|---|---|---|
| Room temperature | 3–5 hours at 75–78°F | Dough increases 50–75% in volume, small bubbles on the surface |
| Refrigerator | Overnight (8–12 hours) | Slower rise, tangier flavor by morning |
Final proof (pick one, after you’ve shaped the donuts in Step 4):
| Method | Time | What you’re looking for |
|---|---|---|
| Room temperature | 1–3 hours | Donuts wobble gently when you nudge the tray |
| Refrigerator | 8–12 hours | Let the shaped donuts sit at room temp for 30 minutes before frying or baking |
A common combo: bulk ferment at room temp during the day, then do the final proof overnight in the fridge so you can fry fresh in the morning. But any single path through the two tables above works, room temp through both, fridge through both, or a mix of the two stages (just not both options within the same stage).
Poke test: Press a finger lightly into the dough. If it leaves a slight dent that slowly springs back, you are in great shape.
Temperature tips:
- Too cold: fermentation slows dramatically
- Too warm: ferments too fast without developing flavor
- No proofing box? Your oven with just the light on creates a perfectly cozy environment for your dough.
Step 4: Shape the Donuts
Now for the satisfying part: turning your beautiful dough into actual donuts.
- Turn dough onto a lightly floured surface and roll to 1/2-inch thickness.
- Use a 3.5-inch cutter for the outer circle and a 1-inch cutter for the center hole.
- Press straight down without twisting for clean edges that rise evenly.
- Transfer carefully to parchment-lined trays using a dough scraper.
No cutters? No problem:
- Use a drinking glass for the outer circle and a bottle cap for the hole
- Or hand-shape: roll dough into 2-ounce balls, poke a finger through the center, and gently widen the hole for a charmingly rustic look
Tip: Do not toss those scraps! Gather them up, let them rest for 10 minutes, then re-roll for a few extra donuts. Every scrap counts.
Step 5: Frying vs. Baking
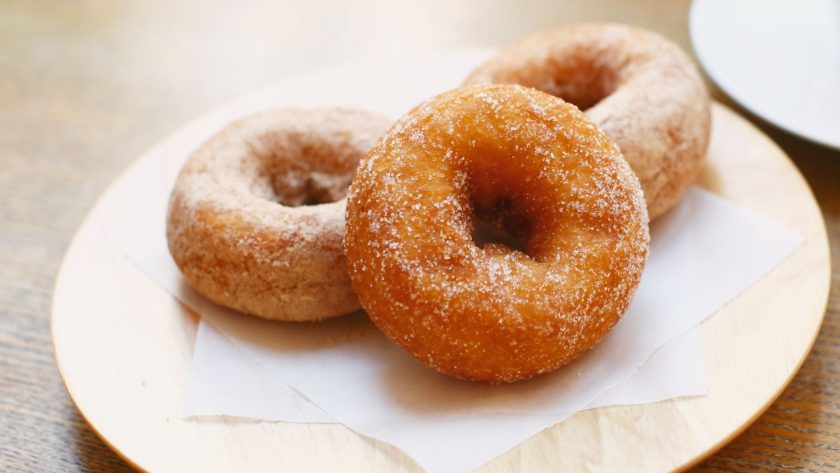
Here is where you get to choose your own adventure. Both methods produce genuinely great results with sourdough dough.
| Method | Temp | Time | Result |
|---|---|---|---|
| Deep frying | 350-365°F | 2-3 min per side | Crispy outside, pillowy inside, classic donut experience |
| Baking | 375°F | 12-15 minutes | Lighter on calories, less mess, more bread-like texture |
Frying tips:
- Use a heavy Dutch oven for stable, even heat
- Fry only 2-3 donuts at a time to keep the oil temperature consistent
- Best oils: grapeseed, peanut, or refined coconut oil
Baking tips:
- Brush lightly with butter before baking to develop a gorgeous golden crust
- Use slightly higher hydration dough to prevent dryness during the longer cooking time
Step 6: Glazes and Toppings
Classic glazes
Apply glaze while the donuts are still slightly warm so it sticks and sets properly.
| Glaze | Ingredients |
|---|---|
| Vanilla | 2 cups powdered sugar + 1/4 cup milk + 1 tsp vanilla extract |
| Chocolate | 4 oz melted chocolate + 3 tbsp butter + 1 cup powdered sugar + milk to loosen |
| Maple | Pure maple syrup + powdered sugar + a pinch of salt |
A plain glaze isn’t a downgrade, it lets the sourdough flavor come through more clearly. Toppings are just for fun when you want them.
Creative Flavor Upgrades
Want to take things up a notch? Mix any of these into your base glaze:
- Cardamom
- Orange blossom water
- Espresso powder
- Brown butter (adds incredible caramelized, nutty depth)
- Reduced fresh berry syrup (strain first, then blend into powdered sugar)
Topping Ideas
Apply while glaze is still tacky so everything sticks like it should:
- Toasted coconut flakes
- Crushed freeze-dried berries
- Candied citrus zest
- Chopped nuts
- Cacao nibs
- Crushed pretzels
Sometimes a simple glaze is honestly the best choice because it lets the complex sourdough flavor shine through. But there are absolutely no rules here!
More on the blog: Baked Sourdough Donuts
Donut Revolution, The Sourdough Way!
Choose deep-fried for a crispy texture or baked for a healthier option, experiment with different flours to create your perfect donut.
Enjoy these delicious, tangy treats!
FAQs – The Ultimate Sourdough Donut Recipe
Is sourdough good for donuts?
Yes, and then some. Sourdough creates a more complex, tangy flavor that balances the sweetness of a donut in the best possible way. It also produces a lighter, airier texture, improves digestibility, and extends shelf life compared to donuts made with commercial yeast.
What is the difference between sourdough donuts and regular donuts?
Regular donuts rely on commercial yeast for a quick rise. Sourdough donuts use wild yeast from a natural starter, which requires more time but rewards you with a more nuanced flavor, better texture, and a more digestible finished product. The wait is always worth it.
What is the best flour for sourdough donuts?
Bread flour is the top choice because its higher protein content (12-14%) gives the donuts great structure and a satisfying chew. For a softer result, mix bread flour with all-purpose flour. Always reach for organic, unbleached flour when possible since it contains more natural enzymes that support fermentation and flavor development.

![[video] from the seed to the peasant bakery with nicolas supiot](https://www.mydailysourdoughbread.com/wp-content/uploads/2022/11/image-16-120x120.jpeg "[Video – Part 2] Entering Into Peasant Bakery 8")

I have no baked these yet but years ago I made some which were really good. Now a few decades later I bake sourdough bread and love experimenting on it and while I did it at first just becuase I wanted to baked sourdough bread, I did not care for it. However after a few years I have learned to like and have been thinking I need to make those sourdough donuts! But when reading the recipe over I realized I wanted more than was offered in a recipe and here I am. Your recipe is fabulous to say the least. In reading it over and all you wrote I realized here is someone who really knows how do sourdough. I then looked over some of your other ideas and they too reflect your expertise and experience. You are fantastic to say the least. I will make these this weekend for sure. I like longer sourdough recipes as aging the dough makes things better. Thanks so much.
I measured on scale as always when baking with my sourdough and the dough was extremely wet- like cake batter. Had to add a lot of flour, maybe 200 g. It was very hard to work after overnight fridge ferment and second rise 2 hrs after shaping, in oven w light on- they were very sticky even on floured parchment. After frying though, they came out well. Can’t say I’ve ever had organic sourdough donuts and they did not disappoint. Made 15 plus holes. Thank you for all the information included in your post, made a first time fry feel less daunting.
Happy to help and make the experience less intimidating!
Thank you so much for this wonderful message!
It sounds like you’ve built such a lovely relationship with sourdough over the years. Your patience and curiosity really comes through.
I’d love to hear how they go, please do come back and let me know! Happy baking 🥐
Hello, based off your given measurement how many donuts would you say this makes? Also, the fermentation directions are a little confusing. I don’t need to do both bulk fermentations correct? Also are there 2 separate final proofs or am I selecting one of the other?
Hi! Great questions.
This makes about 12–14 donuts (if sized 3.5-inch), plus the same number of donut holes.
You only pick one bulk fermentation method (room temp OR fridge, not both) and one final proof method (room temp OR fridge, not both). They’re two different paths to the same step, not things you do back to back. So it’s one bulk method + one final proof method total, mix and match those two stages however fits your schedule.
I updated to make it clearer! Thank you!