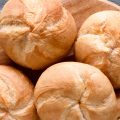
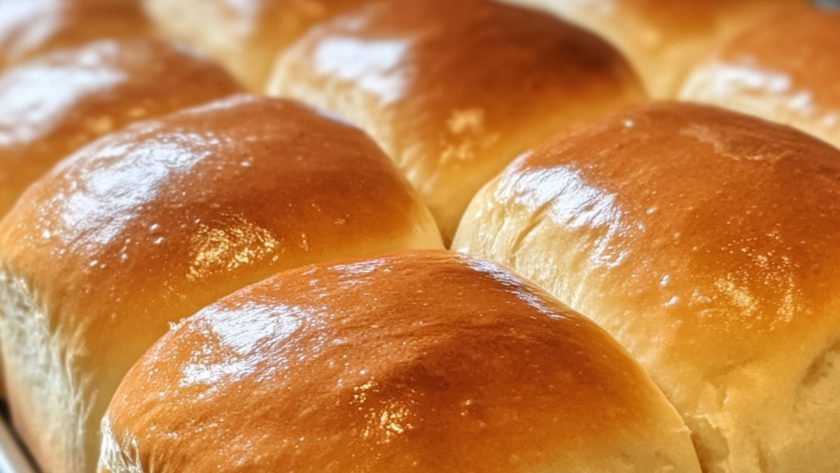
Store-bought Hawaiian rolls just don’t cut it, and homemade versions with commercial yeast fall flat. Sourdough Hawaiian rolls are total game-changers. That tangy kick from sourdough starter perfectly balances the sweetness while making these rolls incredibly soft and fluffy. No more disappointment! This easy method turns your sourdough discard into the most addictive dinner rolls ever—zero preservatives or weird ingredients needed. Get ready for that perfect golden crust and pillowy interior that’ll make your sourdough Hawaiian rolls the talk of the table. Your bread basket will never be the same!
Ingredients
- 100g active sourdough starter
- 3/4 cup pineapple juice
- 3 tablespoons honey
- 4 cups bread flour
- 6 tablespoons unsalted butter
- 2 large eggs
- 1 teaspoon salt
- 1 tablespoon milk (for brushing)
Making the Sourdough Starter (if not prepped)
For these Hawaiian rolls, you’ll need an active, bubbly starter at peak fermentation. If your starter’s been in the fridge, give it at least two feedings before baking day. Discard half, then feed with equal parts flour and water by weight. Within 6-8 hours at room temperature, you should see plenty of bubbles forming.
Your starter should double in size, have a pleasant sour aroma (not acetone-like), and pass the float test—drop a small spoonful in water; if it floats, you’re ready! For Hawaiian rolls specifically, aim for a slightly stiffer starter (65-70% hydration), which provides better structure to these enriched doughs.
Catch your starter 4-6 hours after feeding when it’s most active. This timing ensures enough rising power to handle the honey, butter, and pineapple juice that make these rolls special. Creating a new starter from scratch? That’ll take about 5-7 days of consistent feeding. For a quick boost, add a tablespoon of unsweetened pineapple juice to your feeding routine—the natural acids help jump-start fermentation and discourage unwanted bacteria.
Related: Easy Sourdough Starter – A No-Fuss Guide for Beginners
Dough Preparation
Creating the perfect sourdough Hawaiian rolls starts with masterful dough preparation. This enriched dough balances strength and tenderness for that signature pull-apart fluffiness.
- Begin by combining your active sourdough starter with pineapple juice – this unique liquid strengthens gluten while adding subtle tropical notes
- Add honey to complete your fermentation fuel trio – your sourdough will thrive on this sweet mixture
- Incorporate bread flour gradually, allowing it to hydrate evenly
- Add eggs and butter only after flour is partially mixed in – this prevents the fats from interfering with initial gluten formation
- Mix until ingredients are just combined, then rest for 20 minutes (this autolyse period jumpstarts gluten development)
For mixing, choose what works best for you:
- Stand mixer with dough hook: Start on low (2 minutes), then increase to medium (6-8 minutes) – perfect for maintaining consistent pressure
- Hand kneading: Requires more effort but provides an intuitive feel for when the dough transforms from sticky to smooth
Aim for moderate gluten development – slightly less than for crusty sourdough. The window pane test should show dough that stretches thin enough to see light through without tearing immediately.
The dough hydration (65-70%) makes it manageable, but resist adding extra flour if things feel sticky. The butter will fully incorporate with proper mixing, creating that satin-smooth texture that’s the hallmark of perfect Hawaiian rolls.
Bulk Fermentation
The magic of sourdough Hawaiian rolls truly begins during bulk fermentation – that crucial first rise when your dough transforms from a simple mixture into a living, breathing creation. Unlike commercial yeast breads, sourdough needs time to develop those complex flavors that’ll make your family swear these rolls came straight from a Honolulu bakery.
- Transfer your mixed dough to a lightly oiled bowl and cover it with a damp cloth or plastic wrap.
- Allow the dough to ferment at room temperature (around 75°F) for 4-6 hours. This can stretch to 8-10 hours in cooler kitchens.
- Look for a 50-75% increase in volume, not quite doubled like traditional sourdough bread. The enriched dough with butter, eggs, and honey ferments more slowly than plain sourdough.
- Watch for a puffy, slightly domed surface and tiny bubbles visible along the sides of your container.
- Perform the poke test – press a floured finger about half an inch into the dough. It should slowly spring back but leave a slight indentation.
- Adjust for temperature as needed. Every 10°F difference can double or halve your fermentation time. For consistent results, aim for 75-78°F.
- For chilly days, create a DIY proofing box using a heating pad nearby or place the container in your oven with just the light on.
- In warm kitchens, use cooler water in your initial mix or find the coolest spot in your home.
Shaping the Rolls
- Gently turn your dough onto a lightly floured surface, being careful to preserve the aeration you’ve developed.
- Use a bench scraper to divide the dough into equal portions of 65-75 grams each for classic dinner roll size.
- Take each portion and create surface tension by cupping your hand over the dough in a loose “claw” shape.
- Make small circular motions against an unfloured section of the counter (you need the grip) until the dough forms a tight ball with a smooth surface.
- Aim for just 3-4 rotations per ball – overthinking leads to overworking. The surface should be taut but not stretched too thin.
- If the dough sticks to your hands, dust your hands with flour, not the dough itself.
- Position your shaped dough balls about ½ inch apart in your baking dish – close enough to grow together during proofing but not cramped.
- Gently flatten each ball slightly before placing it in the pan to create more surface area for connecting during proofing.
- Arrange in rows with just enough space that they’ll connect during the final rise, creating that classic pull-apart effect with soft edges where they touch.
- The arrangement now will determine how beautifully your rolls separate when served fresh from the oven.
Final Proofing
The second rise is where your shaped Hawaiian rolls develop their signature texture before baking. Place your rolls in a warm spot (78-82°F) and cover with a damp cloth or plastic wrap to prevent drying.
This final proof typically takes 2-4 hours, depending on your kitchen’s ambient temperature, but could stretch to 6 hours in cooler conditions. Remember that every 10-degree difference can double or halve your rise time.
Your perfectly proofed rolls should puff up noticeably (50-75% larger), touch each other at the sides for that classic pull-apart effect, and feel soft with a slight dome on top. The definitive test: when gently poked, the dough should spring back slowly but not completely, similar to pressing into a marshmallow. Too much spring means they need more time; no spring indicates overproofing.
Keep your rolls away from drafts or direct sunlight, which can create uneven proofing. When they’re puffy, touching at the edges, and passing the poke test, brush them with a tablespoon of milk for a gorgeous shine, and they’re ready for the oven.
I’ll restructure the baking process section using an enumerated list for the steps while maintaining the useful information.
Related: Delicious Sourdough Rolls From Starter: A Beginner’s Guide
Baking Process
The baking stage transforms your beautiful dough into irresistible golden rolls with the perfect balance of soft interior and lightly crisp exterior. Follow these steps for baking success:
- Preheat your oven to 375°F (190°C) for at least 30 minutes before baking to ensure even heat distribution.
- Place your proofed rolls on the middle rack where heat circulates most evenly for optimal oven spring.
- Brush the rolls with milk just before baking to enhance that gorgeous golden crust development.
- For an extra-special crust, place a metal pan with hot water on the bottom rack during preheating, then remove it halfway through baking.
- Bake for 22-25 minutes, watching for uniform golden-brown tops, which happen naturally as the honey and pineapple juice accelerate caramelization.
- If the rolls are browning too quickly, tent loosely with foil after the first 15 minutes of baking.
- Test for doneness when the internal temperature reaches 190°F (88°C), or listen for a hollow sound when tapped.
- Remove from the oven when the tops gleam like polished amber and your kitchen is filled with that intoxicating sweet-bread aroma.
- Cool in the baking pan for exactly 5 minutes – any longer risks condensation making your perfectly crisp bottoms soggy.
- Transfer to a wire rack to finish cooling just enough that you won’t burn your fingers when you inevitably snatch the first warm roll!
Island Magic in Every Bite
Mastering sourdough Hawaiian rolls combines artisanal tang with tropical sweetness for rolls that outshine any store-bought version. The secret? A perfectly active starter, authentic pineapple juice, and that slow, patient fermentation. Your reward: golden-topped, pillowy rolls that pull apart with a satisfying stretch and melt in your mouth. These aren’t just rolls—they’re your ticket to transforming everyday meals into memorable experiences, no plane ticket to Hawaii required!