Last updated on October 16th, 2025
So you’ve got yourself a sourdough starter – congrats! Now you’re probably wondering how often to feed sourdough starter to keep it healthy and active. Here’s the deal: your sourdough starter is basically a living culture packed with wild yeast and lactobacillus bacteria. These little guys are your baking buddies – the wild yeast creates all that rise through carbon dioxide, while the bacteria give you that signature tangy flavor we all love. Keep feeding them consistently, and they’ll keep that delicate balance going strong, transforming simple flour into the enzymes that break down starches and create the perfect fermentation environment. This whole process is what gives sourdough its amazing taste and incredible leavening power.
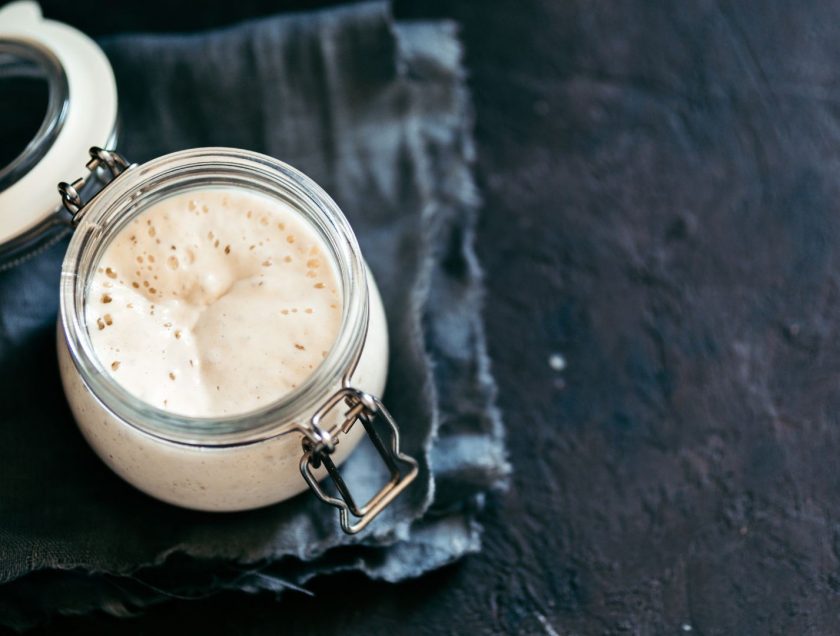
The Feeding Basics (It’s Pretty Simple)
Feeding your starter means refreshing it with fresh flour and water after you toss out a portion. It’s a simple three-step dance: discard, add flour, add water. This keeps the right nutrient balance while preventing things from getting too acidic and funky. Most bakers stick with a 1:1:1 ratio – equal parts starter, flour, and water by weight. Super straightforward math.
Why discard? Because you’re getting rid of all those fermentation waste products, and the fresh ingredients give your wild yeast and bacteria the fuel they need to keep partying. This whole refreshing process basically resets your starter’s fermentation cycle, and within hours, you’ll see bubbles, expansion, and that pleasant yeasty smell that means everything’s working perfectly.
Room Temperature: Daily Feeding Life
When you keep your sourdough starter chilling on the counter, daily feeding becomes your new routine for keeping things healthy and active. The sweet spot temperature range of 70–75°F creates perfect conditions where your wild yeast and bacteria work their magic most efficiently, chomping through flour and multiplying like crazy.
At room temperature, your starter burns through its food supply in about 12 to 24 hours, depending on how warm it is, the humidity, and how strong your starter is. Feed it every 12 hours until you see it double or even triple in volume within 6 to 8 hours – that’s when you know it’s at peak readiness for baking. Most home bakers find that once every 24 hours does the trick for keeping a healthy, counter-kept starter happy.
The temperature is huge here. The warmer things get, the faster fermentation happens. In kitchens running above 75°F, especially during those brutal summer months, your starter might demand food every 12 hours instead of 24. This ramped-up activity is like having a hyper pet that needs more frequent meals – the metabolism just runs way faster when it’s warm.
Daily feeding keeps your starter in peak condition, ready for whenever you get that sudden urge to bake. There’s something really satisfying about having a bubbly, active culture just waiting to transform into pancakes, pizza dough, or a gorgeous artisan loaf. The consistency of daily care helps you develop a predictable pattern where you’ll learn to recognize exactly when your starter hits its peak activity level.
Getting into a routine – whether it’s morning coffee time or evening wind-down – helps both you and your starter develop reliable rhythms. This consistency lets your culture adapt and perform at its best when you need it most.
Related: How Soon After Feeding Sourdough Starter Can I Use it (Simple Guide)
Fridge Life: The Weekly Chill Schedule
The refrigerator totally transforms sourdough maintenance from a daily commitment into a weekly ritual. Feed once a week to keep your starter alive and ready to bounce back when you need it. Cold storage at 35-40°F dramatically slows down the metabolic activity of your wild yeast and bacteria, basically hitting pause on fermentation while keeping all those microorganisms alive and waiting.
This hibernation effect lets your starter coast on its last feeding for about a week before it needs fresh flour and water. The cold temperature slows fermentation so much that weekly maintenance becomes not just doable, but actually ideal for occasional bakers who don’t want the daily commitment.
The weekly feeding routine is refreshingly simple. Pull your starter from the fridge, discard a portion, add fresh flour and water using whatever ratio you prefer, then let it chill at room temperature for 2-4 hours. This warming period reactivates the culture before you send it back to cold storage. This gives the yeast a chance to warm up and start feeding again before going back into hibernation.
Tons of weekend bakers find this approach perfect for their lifestyle. Feed on Sunday evening, stick it in the fridge, and by the following Saturday, your starter is ready for weekend baking projects. The beauty of refrigerated storage is that it works with irregular baking schedules while keeping your starter healthy and happy.
If you notice a grayish liquid called “hooch” hanging out on top, don’t panic – this alcohol byproduct just means your starter’s getting a little hungry. Stir it back in if you want more tangy flavor, or pour it off for something milder – either way works perfectly. When you’re ready to bake, pull your starter out a day or two early and give it 2-3 room-temperature feedings to get it back to full strength and activity.

What Messes With Your Feeding Schedule
Temperature Effects
Temperature is hands-down the biggest factor affecting how often you need to feed. Higher temps mean your starter peaks faster, while cooler temps stretch out fermentation time. In winter kitchens sitting at 65-68°F, your starter might take way longer to show any action. Summer kitchens hitting 80°F or higher can cause rapid peaking within just a few hours.
Flour Type Impact
Whole-grain flours like rye and whole wheat totally supercharge starter activity because they pack way more nutrients and enzymes compared to refined white flour. If you’re using significant portions of whole grain, you might need to adjust your feeding frequency – potentially feeding more often or using higher ratios to slow things down.
Hydration Levels
The water-to-flour ratio affects how fast fermentation happens. Thicker starters (less water) generally ferment more slowly than liquid ones. Most bakers stick with 100% hydration starters (equal weights of flour and water), but your consistency preferences can definitely impact timing.
Your Baking Habits
Your actual baking schedule should drive your maintenance strategy. Daily bakers do great with room temperature storage and regular feedings, while weekend bakers prefer refrigerator storage with weekly maintenance. Matching your starter care to how much you actually bake prevents both over-maintenance and culture neglect.
Signs Your Starter Needs Food
Rise and fall patterns – Look for those telltale streaks on your jar sides where the starter has risen and collapsed – that’s hunger talking. An active starter doubles in size, then eventually falls back down as the food runs out.
Bubble activity changes – Healthy, recently fed starters develop bubbles throughout – small, delicate ones on the surface, larger, dramatic ones deeper in the culture. As food dwindles, bubbles become less frequent and smaller.
Hooch formation – That grayish or brownish liquid forming on top signals hunger. This alcohol byproduct shows up when your starter has consumed most of the available food and needs refreshing.
Aroma shifts – Well-fed starters smell pleasantly yeasty, like fresh bread dough or slightly fruity. Hungry starters develop sharper, more acidic, vinegary aromas that get increasingly pronounced.
Texture changes – Active starters feel spongy and fluffy with good volume. Hungry cultures become deflated, dense, and less aerated as fermentation slows down.
Timing patterns – Feeding at consistent times trains your starter to rise and fall predictably. Once you establish a routine, you’ll start anticipating feeding needs before obvious visual signs appear, creating a seamless maintenance rhythm.
Don’t Do These Things
Inconsistent feeding schedules create the biggest headaches for home bakers. Consistency is everything – regular feedings with the same flour-to-water ratio help build a strong, predictable starter. Your starter literally thrives on routine, adapting to your schedule and developing rise and fall patterns that match your timing. Sporadic feeding constantly throws your culture off balance, preventing optimal performance.
Overfeeding occurs when bakers use ratios that are too rich for their environment or feed their animals excessively frequently. Many people start with 1:1:1 ratios requiring multiple daily feedings, which gets old fast. Higher ratios like 1:5:5 or 1:10:10 extend the time between feedings while keeping things healthy. Matching feeding frequency to your actual lifestyle prevents exhaustion and maintains cultural strength.
Wrong ratios can mess up your fermentation balance. While following ratios guides you, pay attention to what your starter actually needs. On some days, you may need more water if the mixture appears thick, or additional flour if the consistency seems too thin. Temperature, flour type, and absorption rates all affect texture – trust what you see alongside your measurements.
Temperature mistakes trip up tons of new bakers. Keeping starters in overly warm spaces causes rapid peaking and crashing, while cool environments slow everything down frustratingly. That ideal range of 70-78°F promotes healthy, predictable activity. Finding your kitchen’s sweet spot through observation and maybe a thermometer creates optimal conditions for consistent performance and timing you can actually rely on for baking.
Related: Forgot to Feed Sourdough Starter? Here’s What Happens
Sample Schedules (Pick Your Adventure)
Daily Baker Schedule
Feed at consistent times (8 AM and 8 PM for 12-hour cycles). Discard half the starter, add equal parts flour and water (1:1:1 ratio), let it rise 4-8 hours until bubbly and active, then repeat the cycle while maintaining room temperature storage. Plan your dough mixing around peak activity (typically 5-6 hours after feeding).
Weekend Warrior Schedule
Sunday evening: remove starter from refrigerator, discard the portion and feed with fresh flour and water, rest at room temperature for 2-4 hours to reactivate, return to the refrigerator until next Sunday. Two days before baking: remove and begin the daily feeding cycle, feed twice daily (morning and evening) to build strength, use when the starter doubles in 6-8 hours consistently.
Occasional Baker Schedule
Feed starter every 2-3 weeks to keep it alive. Three days before planned baking: begin reactivation process.
Day 1: feed once and observe activity level.
Day 2: feed twice (morning and evening) at room temperature.
Day 3: monitor doubling time and adjust feeding as needed. Use higher ratios (1:5:5 or 1:10:10) to extend feeding intervals and keep detailed notes on timing for future reference.
Master Your Sourdough Feeding Routine
Finding your perfect sourdough starter feeding rhythm balances science with practical lifestyle needs. Your starter adapts remarkably well to different schedules – the feeding frequency that works in winter might need summer adjustments, and that’s totally normal. Consistency beats perfection every single time. A starter getting regular feedings with decent ratios will outperform one getting sporadic perfect feeds every time. These cultures are surprisingly resilient and forgiving. Start with a feeding schedule that matches your current baking routine, watch how your starter responds, and adjust accordingly. Your sourdough starter wants to work with you, creating years of incredible baking adventures ahead.
FAQs – How Often to Feed Sourdough Starter
What is the best feeding schedule for sourdough starter?
The best schedule depends on your baking frequency and storage method. For daily bakers keeping starter at room temperature, feed every 12-24 hours using a 1:1:1 ratio. Weekend bakers should refrigerate their starter and feed it weekly. Occasional bakers can feed every 2-3 weeks, then reactivate with daily feedings 2-3 days before baking.
How long can sourdough starter go without feeding?
Room temperature starters need feeding every 12-24 hours. Refrigerated starters can go about one week without feeding. For longer neglect, starters can survive 2-4 weeks refrigerated, or even months if frozen, though they’ll need several revival feedings. Signs of life include bubbles or rising after feeding – even neglected starters often bounce back surprisingly well.
Should I stir sourdough starter between feedings?
Generally, no – avoid stirring between feedings as it disrupts the natural fermentation process and bubble structure. However, if “hooch” (grayish liquid) appears on top, you can stir it in for a tangier flavor or pour it off for a milder taste. Only stir during feeding when mixing in fresh flour and water.
How do I tell if my sourdough starter is hungry?
Look for these hunger signs: rise-and-fall marks on jar sides, fewer bubbles throughout, grayish “hooch” liquid on top, sharp vinegary smell instead of pleasant yeasty aroma, and deflated, dense texture. A well-fed starter should be bubbly, fluffy, and smell pleasantly yeasty. Timing patterns also help – most starters show hunger 12-24 hours after feeding.

![How to freeze sourdough starter [top tips for success]](https://www.mydailysourdoughbread.com/wp-content/uploads/2023/06/storing-starter-in-freezer-120x120.jpg "How To Freeze Sourdough Starter [Top Tips For Success] 6")