
Last updated on August 16th, 2026
Sourdough pastries have that impossibly flaky, buttery thing going on that feels totally out of reach for home bakers. Turns out it’s not just for pastry chefs with fancy equipment—it just takes the right ingredients, solid technique, and a little patience.
That active starter sitting on your counter? It’s basically the secret weapon for turning basic dough into croissants, Danish, and more, all with better flavor and easier digestibility than anything made with commercial yeast. Get the fundamentals down and lamination stops feeling intimidating—it just becomes another skill in your baking toolkit.
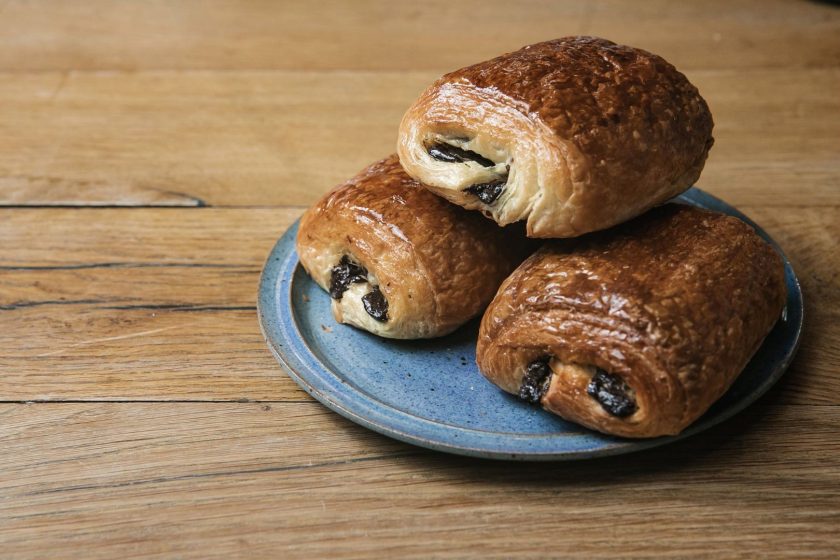
Table of Contents
- Benefits of Baking Pastries with Sourdough
- Main Ingredients
- Essential Equipment
- Lamination Basics
- Most Popular Sourdough Pastries
- Common Mistakes
- Storage & Freezing
- Flaky Layers, Here You Come
- FAQs
Benefits of Baking Pastries with Sourdough
Sourdough’s slow fermentation builds real flavor complexity that commercial yeast just can’t match—organic acids create a subtle tang that plays beautifully against buttery layers. That same fermentation strengthens gluten structure, so your pastries hold their shape and stay crisp outside, tender inside. Those organic acids also act as a natural preservative, keeping pastries fresh a day or two longer than yeasted versions. And since fermentation breaks down some gluten and starches before baking even starts, many people find sourdough pastries noticeably easier to digest. It’s a win on every front: better taste, better texture, better shelf life, and an easier experience for your gut.
Main Ingredients
- Bread flour – 500g
- European-style butter – 300g (cold)
- Active sourdough starter – 150g
- Salt – 10g
- Sugar – 25g
- Water – 200ml (cold)
Essential Equipment
Lamination demands precision, so a few key tools make all the difference. A long, straight rolling pin (no tapered ends) applies even pressure without disturbing your butter layers. A bench scraper helps you lift, fold, and move dough without stretching or tearing it, while keeping your surface clean. A digital scale ensures your flour, butter, and starter ratios stay consistent every time—no guessing with measuring cups. Finally, a thermometer keeps you in that sweet spot where butter stays pliable but never melts into the dough. Together, these tools take a lot of the guesswork out of a process that leaves little room for error.
Lamination Basics
Lamination is what gives sourdough pastries their signature flaky layers, and it comes down to a repeatable process:
- Chill your dough. Start with a cold, rested dough straight from the fridge—warm dough won’t hold up to rolling.
- Build your butter block. Pound cold butter into a flat, even slab. It should be pliable, not hard, and definitely not melting.
- Encase the butter. Wrap the butter block completely inside the dough, sealing the edges so nothing leaks out.
- Roll it out. Roll the dough into a long rectangle, applying even pressure from the center outward.
- Fold. Use a single fold (thirds, like a letter) or a double “book fold” (both ends toward the center, then folded again) to build layers.
- Rest. Chill the dough for at least 30 minutes between folds. This isn’t optional—skipping it lets gluten fight back, causing butter to squeeze out or layers to merge.
- Repeat. Most recipes call for three to four total turns, alternating folds and rest periods.
- Final rest. After your last fold, give the dough a longer chill (or overnight rest) before shaping.
Rushing any of these steps is the fastest way to end up with dense, greasy pastries instead of light, flaky ones. Patience really is the secret ingredient.
Related: How to Laminate Dough: A Step-by-Step Guide
Most Popular Sourdough Pastries
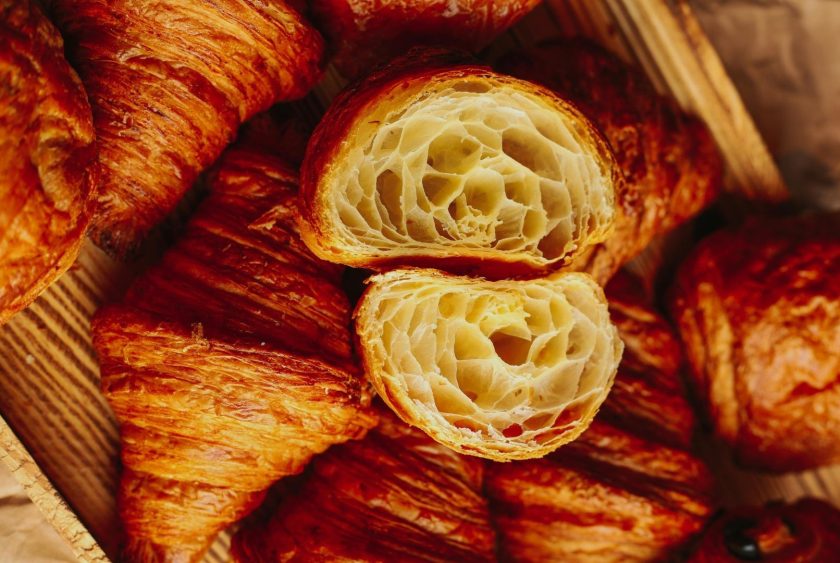
- Croissants – The classic buttery, flaky favorite, made even more interesting with sourdough’s signature tang.
- Danish – Often filled with fruit, cheese, or custard; the tang balances out the sweetness nicely.
- Pain au Chocolat – A croissant with a chocolate center; sourdough cuts through the richness for a more balanced bite.
- Kouign-Amann – A caramelized, sugary Breton specialty; sourdough adds depth so the sweetness doesn’t feel one-dimensional.
- Cinnamon Rolls – Not traditionally laminated, but still benefit from slow fermentation for a softer roll with less added sugar needed.
Croissants
Additional Ingredients (beyond your base dough and butter block):
- Whole milk – 200ml (replaces water for a richer dough)
- Egg (for egg wash) – 1
Method:
- Prepare your dough using the ratios from the Main Ingredients section, substituting whole milk for water.
- Laminate the dough following the folding and resting process outlined in Lamination Basics, completing three total turns.
- Roll the finished laminated dough into a long, thin rectangle, about 1/4-inch thick.
- Cut the dough into even triangles using a sharp knife or pizza cutter.
- Starting from the wide end, roll each triangle toward the point to form the classic crescent shape.
- Place shaped croissants on a lined baking sheet, curving the ends slightly inward.
- Proof at room temperature for 3-4 hours, until they look puffy and jiggle slightly when nudged.
- Brush generously with egg wash for a shiny, golden finish.
- Bake at 400°F for 18-20 minutes, until deep golden brown and layers are visible on the sides.
Danish
Additional Ingredients:
- Cream cheese – 200g (or fruit preserves/pastry cream of choice)
- Sugar – 30g (for filling, if using cream cheese)
- Vanilla extract – 1 tsp
- Egg (for egg wash) – 1
- Powdered sugar – for dusting (optional)
Method:
- Prepare your dough using the ratios from the Main Ingredients section.
- Laminate the dough following the folding and resting process outlined in Lamination Basics, completing three total turns.
- Roll the laminated dough into a large rectangle, about 1/4-inch thick, and cut into squares.
- Mix cream cheese, sugar, and vanilla until smooth (skip this step if using fruit preserves instead).
- Fold each square’s corners toward the center, leaving a well in the middle for filling.
- Spoon filling into the center of each shaped pastry.
- Proof at room temperature for 2-3 hours, until puffy.
- Brush edges with egg wash before baking.
- Bake at 375°F for 16-18 minutes, until golden. Dust with powdered sugar once cooled, if desired.
Pain au Chocolat
Additional Ingredients:
- Dark chocolate batons – 2 per pastry (or chopped dark chocolate)
- Egg (for egg wash) – 1
Method:
- Prepare your dough using the ratios from the Main Ingredients section.
- Laminate the dough following the folding and resting process outlined in Lamination Basics, completing three total turns.
- Roll the laminated dough into a large rectangle, about 1/4-inch thick, and trim the edges for clean lines.
- Cut the dough into even rectangles, roughly 4×6 inches each.
- Place one chocolate baton near the edge of a rectangle and roll it once to enclose it.
- Add a second chocolate baton, then continue rolling to seal the pastry completely.
- Place seam-side down on a lined baking sheet.
- Proof at room temperature for 3-4 hours, until puffy and jiggly.
- Brush with egg wash for a shiny finish.
- Bake at 400°F for 16-18 minutes, until deep golden brown.
Related: Pain Au Levain vs Sourdough – Here’s What Sets Them Apart
Kouign-Amann
Additional Ingredients:
- Granulated sugar – 150g (for caramelization, divided)
- Coarse sea salt – a pinch (for finishing)
Method:
- Prepare your dough using the ratios from the Main Ingredients section.
- Laminate the dough following the folding and resting process outlined in Lamination Basics, but sprinkle sugar over the dough before each fold instead of leaving it plain.
- After your final fold, roll the dough into a large rectangle and sprinkle the remaining sugar evenly over the surface.
- Cut the dough into squares, then fold each corner toward the center to seal in the sugar.
- Place shaped pastries into a well-buttered muffin tin, sugared-side down.
- Sprinkle a little extra sugar and a pinch of sea salt on top of each.
- Proof for 2-3 hours, until slightly puffy.
- Bake at 400°F for 20-25 minutes, until deeply caramelized and bubbling at the edges.
- Let cool slightly before removing from the tin—the caramelized sugar will be very hot.
Cinnamon Rolls
Additional Ingredients:
- Brown sugar – 100g (for filling)
- Ground cinnamon – 2 tbsp
- Softened butter – 50g (for filling)
- Cream cheese – 100g (for icing)
- Powdered sugar – 100g (for icing)
- Milk – 1-2 tbsp (to thin icing)
Method:
- Prepare your dough using the ratios from the Main Ingredients section—no lamination needed for this one.
- Roll the dough into a large rectangle, about 1/4-inch thick.
- Spread softened butter evenly across the surface, then sprinkle with brown sugar and cinnamon.
- Roll the dough tightly into a log, starting from the long edge.
- Slice into even rounds, about 1.5 inches thick.
- Arrange rolls in a greased baking dish, leaving a little space between each.
- Proof at room temperature for 3-4 hours, until visibly puffy.
- Bake at 375°F for 25-30 minutes, until golden brown.
- Whisk cream cheese, powdered sugar, and milk into a smooth icing, then drizzle over warm rolls.
Common Mistakes
- Butter leaking out – Usually caused by warm butter or thin spots in the dough. Keep everything cold and work quickly.
- Poor rise – Often comes down to a sluggish or underfed starter. Check its activity before troubleshooting anything else.
- Dense, heavy crumb – Typically the result of under-proofing or skipping rest periods between folds. Give the dough the time it needs.
Storage & Freezing
Store baked pastries at room temperature in an airtight container for up to two days—skip the fridge, since it dries pastries out faster than the counter does. For longer storage, freeze unbaked, shaped pastries on a tray until solid, then transfer them to a freezer bag; this way, you’ve got fresh pastries ready whenever you want them, without starting from scratch. When you’re ready to eat, reheat in a warm oven at around 300°F for 5–10 minutes to bring back that just-baked crispness. Skip the microwave—it’ll leave you with a soggy, disappointing pastry instead.
Flaky Layers, Here You Come
Turns out, sourdough isn’t just for bread—it’s a total game-changer for pastries too. That slow fermentation is doing some serious heavy lifting, packing in flavor, building better texture, and even making your bakes easier to digest. Once you’ve got your starter active and your ingredients dialed in, lamination is really just a rhythm: chill, fold, rest, repeat. Sounds simple because it is, once you get the hang of it.
And hey, if butter leaks out or your dough falls flat the first time, you already know exactly what went wrong and how to fix it. Store your pastries smart, freeze what you’re not using, and you’ll always have something flaky and fresh waiting in the wings. You’ve got everything you need—time to get your hands doughy.
FAQs
What kind of pastries can you make with sourdough?
Sourdough works beautifully for all kinds of laminated pastries, including croissants, Danish, pain au chocolat, and Kouign-Amann. It’s also great for non-laminated treats like cinnamon rolls. The natural fermentation adds a subtle tang and improved texture to each one, making sourdough a versatile base for both classic viennoiserie and simpler baked goods.
How to make sourdough pastries?
Start with an active sourdough starter, bread flour, and cold European-style butter. Laminate the dough by encasing a butter block, then rolling and folding in turns, resting between each one. Once laminated, shape the dough into your desired pastry, proof until puffy, and bake until golden brown and flaky.





