
Last updated on August 17th, 2026
Dense, gummy sourdough usually comes down to one thing or another: a weak starter or dough that just needed more time. The tricky part is these two problems look almost identical from the outside, which trips up even careful bakers. That’s exactly what weak starter vs. underproofing comes down to—learning which signs point to the starter and which point to the dough. Once you know how to test your starter properly and read your dough’s cues, diagnosing a dense loaf gets a whole lot easier. Here’s how to tell them apart and get back to consistent, beautifully risen bread.
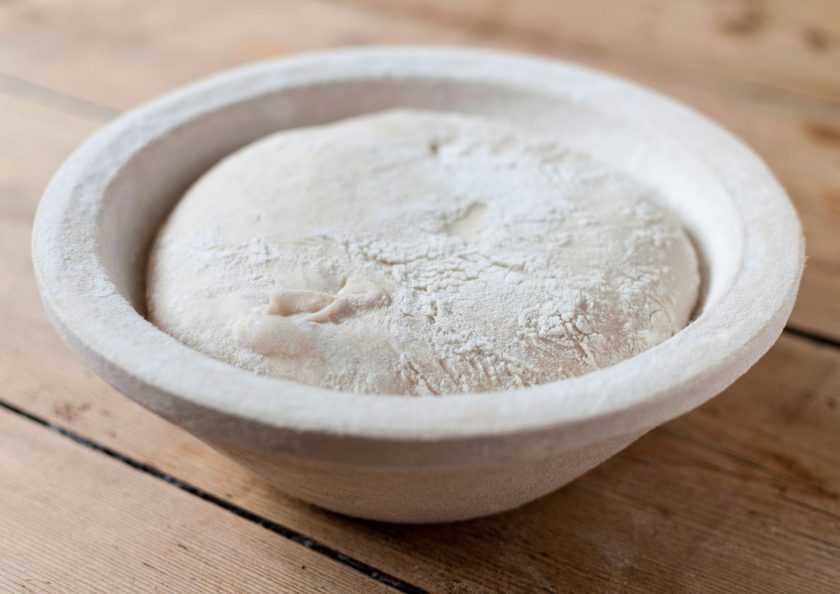
Weak Starter vs. Underproofing: What Is the Difference?
Defining a Weak Starter
Your sourdough starter is a living culture of wild yeast and lactic acid bacteria, and its job is to eat flour and produce carbon dioxide gas. A weak starter doesn’t have enough active yeast and bacteria to do that job efficiently. Feed it, and it responds slowly—maybe a few scattered bubbles, but nothing that signals it’s ready to leaven a loaf of bread.
Defining Underproofed Dough
Underproofing is a separate issue. Here, your starter might be perfectly strong, but the dough itself hasn’t had enough time—or the right conditions—to complete fermentation. Bulk fermentation and proofing are the stages where dough builds volume and structure through gas production and gluten development. Pull the dough too early, and it hasn’t finished that process.
Why the Symptoms Overlap
Both problems can produce the same result: a dense, gummy loaf that barely rises in the oven. A weak starter slows fermentation down across the board, which can look identical to underproofing even when the dough itself was given plenty of time. That overlap is exactly why guessing at a fix is risky—you need to identify the actual source of the problem before changing anything in your recipe or process.
Related: Underproofed Sourdough? What You Need to Know
What Does a Weak Sourdough Starter Look Like?
Feed a starter with real strength, and it gets to work fast—climbing the sides of the jar within a few hours and showing an active, bubbly surface. A weak starter responds far more slowly, if it responds at all, and that sluggishness tends to show up consistently, not just on an off day.
Key signs of a weak starter:
- Slow rise after feeding – little to no visible growth within the expected window
- Little bubbling – a flat, mostly smooth surface instead of an active, frothy one
- Failure to double or expand predictably – inconsistent growth from one feeding to the next
- Long time to reach peak – taking significantly longer than expected to hit maximum volume before deflating
- Poor performance across multiple feedings – the same weak activity repeats under similar feeding ratios and temperatures, ruling out a one-off issue
What Does Underproofed Sourdough Look Like?
Underproofed sourdough gives itself away both before and after baking. The dough tends to feel firm and slightly heavy when lifted, without the soft, airy quality that fully fermented dough develops. Once baked, it produces a dense loaf with a very tight crumb, where the holes sit close together instead of spreading out.
Key signs of underproofed sourdough:
- Dense, tight crumb – a heavy, compact interior rather than an open, airy one
- Small or uneven holes – tightly packed air pockets, sometimes with odd, random gaps
- Limited oven spring – little to no dramatic rise once the loaf hits the oven
- Dough that feels dense or overly elastic – firm to the touch and quick to spring back when poked
- Thick, pale crust – a crust that stays thick and pale instead of developing rich color
How a Weak Starter Can Cause Underproofing
A weak starter is often the hidden root cause behind underproofed dough. Your starter’s wild yeast produces the carbon dioxide that makes dough rise, so a weak yeast population simply can’t generate gas at the rate a healthy starter would. When you use that starter as your inoculation, fermentation starts slower than usual, and bulk fermentation and proofing both take longer than your recipe assumes.
This is where bakers often go wrong: they follow the recipe’s stated timing, pull the dough at the “right” time, and get a dense loaf. The natural conclusion is that the dough needed more time—but if the underlying issue is starter strength, adding time to the same weak starter won’t fully solve the problem.
The chain reaction looks like this:
- Weak yeast population → slow carbon dioxide production
- Slow gas production → reduced fermentation rate in the dough
- Reduced fermentation rate → dough that hasn’t fully risen within the expected window
- Misdiagnosis → baker extends proofing time instead of addressing starter strength
A starter problem doesn’t stay contained to the jar. It follows the dough through every stage of fermentation and resurfaces later as symptoms that look identical to underproofing.
How to Test Your Starter Before Baking
- Feed your starter at your usual ratio, then mark the level on the jar with a rubber band or piece of tape so you can track growth accurately.
- Note the temperature of your kitchen at feeding time, since fermentation speed depends heavily on it—aim for consistency between tests.
- Observe the rise. A strong starter will climb visibly within a few hours of feeding.
- Track time to peak. A strong starter should generally double after a 1:1:1 feeding within about 4 to 6 hours at roughly 75°F. Record how long yours actually takes.
- Check bubbles and texture. Look for a web of bubbles throughout, not just a few on the surface, along with a light, airy texture.
- Smell the starter. It should be pleasantly tangy rather than sharp, acidic, or reminiscent of nail polish remover.
- Repeat the test over two or three feedings at the same ratio and temperature to confirm the results aren’t a one-off.
- Skip the float test as your only measure. The float test can easily produce a false positive or false negative, so use it as a secondary check at most, not your main source of confidence.
How to Tell If Your Dough Is Underproofed
Volume increase is the first thing to check. During bulk fermentation, dough should visibly grow rather than just puff slightly. If it looks nearly the same as when you finished mixing, it likely hasn’t fermented long enough.
Bubbles are the next clue. Gently check the sides of your bulk container for fermentation bubbles distributed throughout. Sparse or absent bubbles point to insufficient fermentation, since the gluten network hasn’t trapped enough gas yet.
Elasticity tells you a lot with a simple poke test. Underproofed dough feels tight and springs back quickly and firmly, rather than slowly relaxing back into place. That eager resistance signals the dough still has fermenting left to do.
Surface structure is worth a look too. Well-fermented dough develops a smooth, slightly domed, jiggly surface. Underproofed dough tends to look tauter and less relaxed.
Temperature and time matter as much as the clock. Dough temperature drives fermentation speed, so the same bulk fermentation window that works in summer might leave dough underproofed in a cold kitchen. Always weigh your fermentation time against actual dough temperature, not the recipe’s stated time alone.
Weak Starter vs. Underproofing: A Side-by-Side Diagnosis
Diagnosing these two issues comes down to separating starter evidence from dough evidence. Starter symptoms appear in the jar before the dough is ever mixed: slow rise, weak bubbling, inconsistent doubling after feeding. Dough symptoms appear after mixing: limited volume increase, tight texture, minimal oven spring. Identifying which category your evidence falls into narrows down the actual cause.
Evaluate these two checkpoints independently. Before baking, assess your starter’s behavior on its own, using the tests outlined earlier. After mixing, assess the dough’s behavior during bulk fermentation and proofing, independent of how the starter performed before.
A Side-by-Side Comparison Table
| Sign | Weak Starter | Underproofed Dough |
| Where it shows up | In the starter jar | In the bulk container or shaped dough |
| Rise behavior | Slow or inconsistent doubling after feeding | Limited volume increase during bulk fermentation |
| Bubbles | Few or scattered on starter surface | Sparse fermentation bubbles in the dough |
| Crumb | Not yet applicable (not baked) | Dense, tight, small uneven holes |
| Oven spring | Not yet applicable (not baked) | Minimal to no spring |
| Root cause | Insufficient yeast/bacteria activity | Insufficient fermentation time or temperature |
If your starter failed to double reliably before you mixed the dough, that’s your primary clue. If the starter tested strong but the dough itself didn’t expand enough during bulk fermentation or proofing, the cause points to fermentation time or temperature rather than starter strength.
Related: Is My Sourdough Starter Dead – 5 Signs to Look Out For
How to Fix Each Problem
- Strengthen a weak starter by increasing your feeding ratio relative to the amount of starter you keep. Moving to a high ratio, such as 1:5:5 or even 1:10:10, dilutes built-up acidity in one shot and resolves the majority of weak starters.
- Adjust feeding ratio and temperature together. If your starter is barely rising, decrease your feeding ratio or use warmer water, around 80–85°F, at feeding time.
- Keep feeding conditions consistent. A ready-to-bake starter typically doubles within 4 to 6 hours after a 1:1:1 feeding at 76–80°F, so aim for that same schedule and temperature every time to let the yeast and bacteria populations stabilize.
- Give underproofed dough more fermentation time if your starter has already tested strong. Extend bulk fermentation or the final proof and watch the dough’s actual volume and bubble activity, not just the recipe’s stated time.
- Match bulk fermentation to dough temperature and starter activity. Warmer dough ferments faster, cooler dough ferments slower, and a stronger starter shortens the timeline while a weaker one extends it—adjust based on both factors together.
- Don’t blindly extend proofing time if the starter is the real issue. Giving a weak-starter dough more and more time risks overproofing before the dough ever properly develops. Fix the starter first, then let dough timing follow from there.
Quick Diagnostic Checklist
Run through these questions before you troubleshoot your next bake:
- Is the starter rising reliably? Check for consistent doubling within your expected timeframe after feeding.
- Did the dough increase in volume during bulk fermentation? Compare the dough’s size at the start and end of bulk.
- Was the fermentation temperature appropriate? Confirm your dough and starter were kept in a reasonable range, not sitting in a cold kitchen.
- Were there visible fermentation bubbles? Look for bubbles distributed through the dough, not just at the surface.
- Was the dough shaped before it had fermented enough? Compare your shaping time against the dough’s actual behavior, not just the recipe’s stated schedule.
- Does the evidence point to the starter or the dough? Separate starter-jar symptoms from bulk-fermentation symptoms to identify which stage actually failed.
Starter or Dough? Now You Know
Dense, gummy bread comes down to one of two things: a weak starter or dough that didn’t get enough time to ferment. Your starter tells its story first, before you even mix anything, and your dough tells its own story after. Mix up the two, and you’ll end up fixing the wrong problem entirely.
The good news is once you know how to read each one, the guesswork disappears. A little patience with your starter and a little trust in your dough go a long way. So next time your loaf comes out dense, don’t panic and don’t blame the whole recipe. Just figure out which one’s actually talking to you, and go from there.
FAQs
Is it better to have over- or underproofed sourdough?
Underproofed is usually the easier fix. Overproofed dough has already lost structure and gluten strength, so it’s harder to recover once you’ve gone too far. Underproofed dough just needs more time, and you can often adjust mid-process. Neither is ideal, but if you had to pick, catching dough before it’s fully risen gives you more room to correct course than dough that’s collapsed past its peak.
What are signs of a weak sourdough starter?
A weak starter rises slowly after feeding, shows little to no bubbling, and doesn’t reliably double in size. It also tends to take way longer than expected to hit its peak. If you’re seeing this pattern across multiple feedings—not just one-off day—your starter likely needs a feeding ratio adjustment, warmer temperatures, or more consistency before it’s ready to bake with.
Can underproofed sourdough still be good?
Yes, though it won’t be your best loaf. Underproofed sourdough tends to be dense and tight, with a thick, pale crust that lacks depth of flavor. It’s still edible and can work fine toasted or in dishes that don’t need an airy crumb. It just won’t give you that light, open texture that properly fermented dough delivers.




![[video] from the seed to the peasant bakery with nicolas supiot](https://www.mydailysourdoughbread.com/wp-content/uploads/2022/11/image-16-120x120.jpeg "[Video – Part 2] Entering Into Peasant Bakery 6")
