
Last updated on September 14th, 2026
“What equipment do I actually need to start making sourdough?” It’s the first question every new baker asks, and the answer is way simpler than the internet makes it sound. You really just need a handful of basics to turn flour and water into a proper loaf.
From your first mixing bowl to the pot you bake in, everything below breaks down exactly what earns a spot on your counter and what can wait. By the end, you’ll know precisely what to grab, what to borrow, and what to skip, so you can jump straight into baking today.
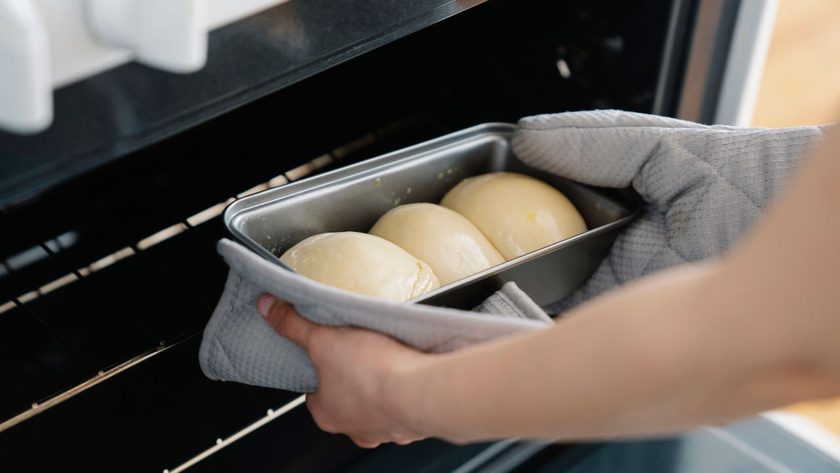
The Basic Sourdough Equipment Checklist
You don’t need a kitchen full of gadgets to bake your first loaf. Sourdough is old-school by nature—bakers were doing this long before specialty tools existed. Chances are you already own most of what you need: a regular mixing bowl, a spoon, and any oven-safe pot with a lid will get you through your first bake just fine. Your equipment needs follow the natural stages of the process—feeding your starter, mixing and fermenting your dough, shaping it, then baking it—and each stage calls for a slightly different piece of gear. Here’s what to prioritize first:
- Sourdough starter and a jar to keep it in
- Flour and water
- A large mixing bowl
- A digital kitchen scale
- A Dutch oven
- A standard home oven
Kitchen Scale
Cups and spoons are fine for a lot of cooking, but sourdough is unforgiving when it comes to measurements. A cup of flour can weigh anywhere from 120 to 150 grams depending on how it’s scooped, and that kind of swing can throw off your entire dough. A digital kitchen scale takes the guesswork out completely and gives you consistent results every single time. Weighing your flour, water, and starter accurately is what separates a predictable bake from a guessing game, since even small differences change hydration and fermentation speed. Once you’re weighing in grams, you can also work with baker’s percentage—a system that expresses every ingredient as a percentage of total flour weight, making it easy to scale recipes up or down without doing a bunch of math. A good scale also makes feeding your starter and adjusting recipes far simpler.
- Choose a scale with 1-gram increments, not just ounces
- Look for a capacity of at least 5,000 grams
- Pick one with a “tare” button so you can zero out bowls easily
- Go for a flat, stable base that won’t wobble on the counter
Mixing and Fermentation Equipment
Any sturdy, roomy mixing bowl works for combining your ingredients—glass, stainless steel, or ceramic all do the job, as long as it’s big enough to give the dough room to expand. A dough scraper earns its keep the moment you try to get sticky dough off your hands and out of the bowl, making mixing noticeably less messy. For bulk fermentation, a straight-sided container or dough tub is worth having because the flat sides let you see the dough rise and judge its progress at a glance, something a curved mixing bowl doesn’t allow. A simple glass jar is all your starter needs—skip anything fancy, since you just want to see the bubbles and track growth against a rubber band or marker on the side. A small spatula or spoon rounds things out, helping with scraping down starter, portioning ingredients, and general cleanup. If you’re missing a piece, don’t stress: a large yogurt container can stand in for a fermentation vessel, and a butter knife can do a scraper’s job in a pinch.
Banneton or Proofing Basket
During the final proof, shaped dough needs support to hold its structure while it relaxes and continues to rise. Without that support, wet dough tends to spread out flat instead of holding a nice, tall shape. A banneton, also called a brotform, typically comes in round or oval shapes—round for boules, oval for longer batards. Cane baskets create those classic spiral ridges on the crust and need a generous dusting of flour to prevent sticking, while wood-pulp versions often come with a linen liner built in, making them more forgiving for beginners. If you don’t own a banneton yet, a regular bowl lined with a well-floured kitchen towel does the same supportive job, just without the decorative ridge marks.
- Pick round for boules, oval for batards
- Choose cane for classic ridge patterns, wood-pulp with a liner for easier release
- Size it to match your typical dough weight (around 8–10 inches for a standard loaf)
- Start with an unlined basket only if you’re comfortable flouring it generously
Related: How to Use a Banneton: Learning Proofing Basics
Dutch Oven and Baking Vessel
A Dutch oven traps steam around the dough as it bakes, and that steam allows the loaf to expand fully before the crust sets, a process bakers call oven spring. Without it, your loaf can end up dense and stunted. That same trapped steam is also responsible for a shiny, crackly crust, keeping the surface soft just long enough for the interior to expand before the lid comes off and the crust crisps up in the dry heat. Covered baking is the easiest route for beginners because it creates steam automatically; uncovered baking can work too, but usually needs extra steps, like tossing ice cubes into the oven, to get similar results. If you don’t own a Dutch oven, cast iron combo cookers, a baking stone with a metal bowl as a cover, or a baking steel paired with a steam pan are all solid alternatives.
- Choose a Dutch oven with a tight-fitting lid to trap steam effectively
- Go for at least a 5-quart size to give the loaf room to expand
- Cast iron holds heat best, but enameled versions are easier to clean
- If buying an alternative, prioritize anything with a snug-fitting cover

Scoring Tools
A bread lame is basically a razor blade on a handle, designed specifically for scoring dough, though a plain razor blade works on its own too—the handle just gives you more control, especially early on. Scoring isn’t just decorative; it gives the dough a designated weak point to expand through in the oven, so skipping it can leave your loaf cracking open in random, unattractive places. For beginners, a single confident slash down the center of the loaf is the easiest cut to master and still produces that classic, dramatic look. A scoring blade is sharp enough to nick you if you’re not paying attention, so store it capped or in a small case and always cut away from your fingers.
Related: Sourdough Scoring Designs
Dough Scraper and Handling Tools
A bench scraper is a flat, rigid tool used to cut, divide, and shape dough on the counter, and it’s especially handy for lifting sticky dough without tearing it. A bowl scraper has a curved edge that follows the shape of your mixing bowl, making it perfect for folding dough during bulk fermentation and scraping every last bit out when you’re done. When dough handling gets sticky, you’ve got two options: wet your hands or dust with extra flour. Wet hands tend to work better since they don’t add extra flour that can throw off your hydration. If you can only buy one tool, get the bench scraper—it handles dividing, shaping, and general dough handling, while a bowl scraper is more of a convenience upgrade.
What You Don’t Actually Need
A stand mixer is nice, but sourdough doesn’t require the intense kneading a mixer is built for—most techniques rely on stretch-and-folds by hand, so this is one of the first “essential” tools you can cross off your list. You don’t need a dedicated bread oven either; a standard home oven paired with a Dutch oven or baking stone produces excellent results. A temperature-controlled proofing box sounds appealing, but a warm spot in your kitchen, like on top of the fridge or inside a turned-off oven with the light on, does the job just fine. Decorative starter jars and specialty bread storage bags look great on a shelf, but a basic glass jar and a plain cloth bag or container work just as well. Multi-piece scoring kits with interchangeable blades are also overkill when you’re starting.
- Stand mixer
- Special sourdough oven
- Temperature-controlled proofing box
- Fancy starter jars
- Specialty bread bags
- Expensive scoring kits
The Minimum Setup for Your First Loaf
If you’re keeping things as lean as possible, you need five things: a kitchen scale, a jar for your starter, a mixing bowl, a dough scraper, and a covered baking vessel like a Dutch oven. That combination is genuinely enough to produce a great first loaf, and it covers every stage of the process from feeding your starter to pulling a finished loaf out of the oven. If you can stretch your budget slightly, two additions make the process noticeably smoother: a banneton for shaping support during the final proof, and a bread lame for cleaner, more controlled scoring. Neither is required, but both make your results more consistent and your process less stressful, especially in those first few bakes when you’re still getting a feel for the dough.
Once sourdough becomes a regular habit rather than an occasional experiment, that’s the right time to think about upgrades. A second banneton lets you proof two loaves at once, a bench scraper makes dividing and shaping easier as your batches grow, and a proofing box gives you more control over fermentation temperature if you bake in a home that swings hot or cold. Let your baking frequency guide your spending rather than trying to buy everything up front. Most bakers find that starting small and adding tools as specific needs come up leads to a more useful kit than buying a complete set before ever mixing a single dough. Focus on the essentials first, get a few loaves under your belt, and let real experience tell you what’s actually worth adding next.
Ready, Set, Bake
You really don’t need a fancy setup to bake great sourdough. A handful of basics will get you a solid first loaf, and everything fancier is just a bonus for later. Skip the pricey gadgets for now and let your own baking habits tell you what’s actually worth buying down the road.
Sourdough rewards patience way more than it rewards a stacked kitchen, so don’t let gear hold you back from starting. You’ve got everything you need to get going, and honestly, the best way to learn is just to dive in and bake your first loaf. The rest comes with practice.
FAQs – What Equipment Do I Actually Need to Start Making Sourdough?
What do you actually need to start sourdough?
Honestly, just the basics: a starter, flour, water, a mixing bowl, a kitchen scale, and something to bake in, like a Dutch oven. That’s it. You don’t need anything fancy to get a real loaf out of your oven — most of it you probably already own. Everything else, like a banneton or a bread lame, just makes the process a little smoother.
Is sourdough a cheap hobby?
Yes, it can be surprisingly affordable. Your core setup — a bowl, a jar, a scale, and a Dutch oven — is a one-time cost, and flour, water, and salt are cheap ingredients that stretch a long way. Skip the pricier extras until you’re baking regularly, and sourdough ends up costing way less than most hobbies to start and maintain.

![[video] from the seed to the peasant bakery with nicolas supiot](https://www.mydailysourdoughbread.com/wp-content/uploads/2022/11/image-16-120x120.jpeg "[Video – Part 2] Entering Into Peasant Bakery 7")
