
Last updated on August 11th, 2026
Hydration is the ratio of water to flour in your dough. It’s the single number that predicts more about your loaf than almost anything else: how sticky the dough feels, how fast it ferments, and whether your crumb ends up tight and even or open and holey.
If you’ve been following a sourdough recipe and getting inconsistent results, hydration is where the fix starts, so let’s get into it.
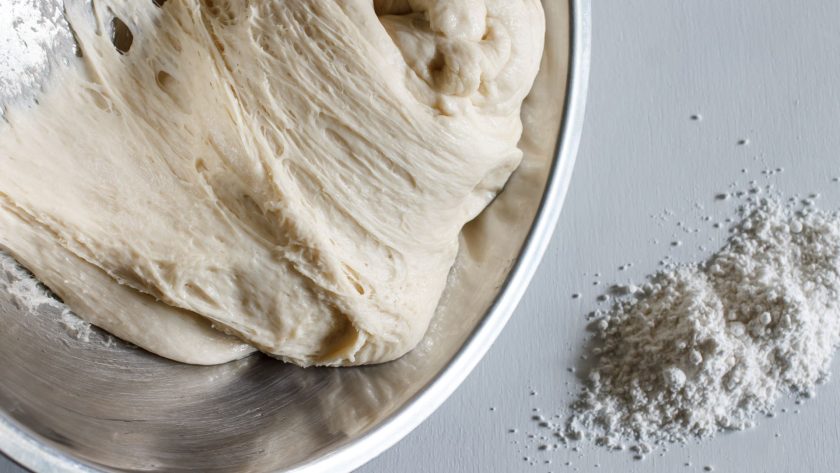
The Hydration Formula
Hydration is written as a percentage, and the math is simple:
Hydration % = (total water weight ÷ total flour weight) × 100
A few quick examples:
- 100g water + 100g flour = 100% hydration (equal parts by weight)
- 75g water + 100g flour = 75% hydration
- 85g water + 100g flour = 85% hydration
One thing that commonly causes confusion here: “total” means everything in the dough, including the water and flour hidden inside your starter, not just what you measure into the final mix.
More on that below, because it’s where a lot of hydration confusion actually comes from.
What Hydration Level Should You Use?
There’s no single right answer here. It depends on how comfortable you are handling wet, sticky dough and what texture you’re after.
| Hydration | Dough feel | Fermentation speed | Crumb | Crust | Good for |
|---|---|---|---|---|---|
| 60-65% (lower) | Stiff, easy to knead, not sticky | Slower | Tight, even | Thicker, harder | Beginners |
| 70-75% (medium) | Soft, slightly tacky | Moderate | Some open holes | Medium thickness | Bakers with a few loaves under their belt |
| 78-85%+ (high) | Wet, sticky, needs gentle handling | Faster | Very open, irregular holes | Thin, stays crisp longer | Bakers with lots of experience |
If you’re new to sourdough, start around 65-70% hydration. When you get to the point where you’re comfortable shaping and handling the dough, you can work your way up.
Higher hydration doesn’t make a “better” loaf, it just makes a different one, and it demands more practice to shape without the dough collapsing.

Starter Hydration vs. Dough Hydration (Don’t Mix These Up)
Your starter has its own hydration, based on the water and flour you feed it.
Your dough has a separate, overall hydration, based on everything in the final mix, starter included.
A 100% hydration starter (equal parts water and flour) will not automatically make your dough 100% hydration. Once you add more flour and water to build the dough, the ratio shifts.
To get an accurate dough hydration number, you have to add the starter’s water and flour into your totals, not just the water and flour you pour in separately.
The recipe below shows exactly how to do that math.
Sourdough Bread Recipe
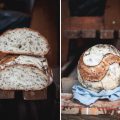
This makes one loaf with an open crumb and a crust that stays crisp for a few days.
Ingredients
Starter (build the day before baking):
- 150g water, added in two stages (100g, then 50g)
- 150g flour, added in two stages (100g, then 50g) — rye, whole wheat, or all-purpose all work
Dough:
- 600g bread flour
- 360g water
- 180g active starter
- 10g salt
- Rice flour, for dusting
How to Make
Day 1: Build the starter
- In the morning, mix 100g water with 100g flour in a jar. Cover loosely and leave at room temperature until it’s bubbly on top.
- About 7 hours later, feed it another 50g water and 50g flour. Cover and let it sit overnight.
This gives you 150g water and 150g flour total, a 100% hydration starter, equal parts water and flour by weight.
Day 2: Mix and ferment
- Combine the bread flour and 360g water in a large bowl. Cover and let it rest (autolyse) for 3 hours.
- Add 180g of your active starter and mix it in. Cover and rest for 1 hour.
- Sprinkle the salt over the dough, then stretch and fold to work it in.
- Bulk ferment for 3 hours, stretching and folding the dough every 30 minutes to build strength.
Shape and proof
- Turn the dough onto an unfloured counter. Shape it into a ball using the friction of the counter to build tension on the surface.
- Cover with an upturned bowl and rest for 30 minutes.
- Dust a proofing basket with rice flour so the dough won’t stick later.
- With wet hands, fold the bottom of the dough to the center, then the right side, left side, and top, pulling the corners in as you go to tighten the shape.
- Place the dough seam-side up in the basket. Cover and refrigerate overnight.
Bake
- The next day, put a Dutch oven (or another deep, lidded pot) in the oven and preheat to 450°F (230°C) for 1 hour.
- Turn the dough out onto a piece of parchment paper.
- Score the top with a sharp blade, then lower it, parchment and all, into the hot pot.
- Bake covered for 20 minutes.
- Remove the lid and bake for another 30 minutes, until deeply golden.
- Cool on a wire rack before slicing. This takes at least an hour, and skipping it affects the texture.
Watch the technique:
Working Out This Dough’s Actual Hydration
Here’s the math, using the total water and flour in the whole formula, starter included:
- Water: 360g (dough) + 90g (half of the 180g starter) = 450g
- Flour: 600g (dough) + 90g (half of the 180g starter) = 690g
- Hydration: 450 ÷ 690 = about 65%
That’s a medium-to-medium-high hydration dough. It’s wetter and more open-crumbed than a basic loaf, but easier to handle than a true 80%+ dough.
If you want to push it higher once you’ve got the technique down, add water in 20-30g increments and recalculate using the same formula each time, so you always know exactly what you’re working with.
A Lot Fewer Guessing Games
Once you know your actual hydration percentage, you stop guessing why one bake turned out different from the last. You can change one variable at a time, write down the number, and see what it does to your crumb, your crust, your rise.
That’s really the whole point of tracking it.
Weigh your next starter feed, run the math, and see where you land. If it’s not 100%, that’s fine too. Now you’ll know exactly what you’re working with.
FAQs
What Does Higher Hydration in Sourdough Do?
It softens the crumb and opens it up, giving you the larger, irregular holes you see in artisan-style loaves.
Is High Hydration Sourdough Better?
Neither high nor low hydration is objectively better, they’re different trade-offs. Higher hydration gives a more open crumb and a thinner crust that stays crisp longer, but the dough is harder to shape. Lower hydration is easier to work with and still makes great bread.
Does Higher Hydration Sourdough Ferment Faster?
Yes. More water gives the yeast and bacteria more room to move through the dough, which speeds fermentation up. An 85% hydration dough will generally ferment faster than a 75% one.
How do You Make 100% Hydration Sourdough Starter?
Feed it equal weights of water and flour, for example 100g starter fed with 100g water and 100g flour. Equal weights is what makes it 100%.
Why isn’t My Dough’s Hydration the Same as My Starter’s?
Because the flour and water you add when building the dough change the overall ratio. Always calculate dough hydration using everything in the formula, starter included, not just what you measure into the final mix.
Sourdough Bread (65% Hydration) Recipe
This recipe is for a two-day sourdough loaf with an open crumb and a crust that stays crisp for days.
Ingredients
- 150 grams water, for the starter
- 150 grams flour (rye, whole wheat, or all-purpose), for the starter
- 600 grams bread flour
- 360 grams water, for the dough
- 180 grams active sourdough starter
- 10 grams salt
- 2 tablespoons rice flour, for dusting
Instructions
- Start the starter: Mix 100g of the 150 grams water, for the starter with 100g of the 150 grams flour (rye, whole wheat, or all-purpose), for the starter in a jar. Cover loosely and leave at room temperature until bubbly.
- Feed and rest overnight: Feed the starter the remaining 50g water and 50g flour. Cover and let it sit overnight.
- Autolyse: Combine 600 grams bread flour and 360 grams water, for the dough in a large bowl. Cover and let rest.
- Add the starter: Mix in 180 grams active sourdough starter. Cover and rest.
- Add salt: Sprinkle 10 grams salt over the dough. Stretch and fold to work it in.
- Bulk ferment: Cover and let the dough bulk ferment, stretching and folding every 180 minutes to build strength.
- Pre-shape: Turn the dough onto an unfloured counter and shape into a ball, using the counter’s friction to build surface tension. Cover with an upturned bowl and rest.
- Shape and refrigerate: Dust a proofing basket with 2 tablespoons rice flour, for dusting. Fold the dough’s edges to the center to tighten the shape, place seam-side up in the basket, cover, and refrigerate overnight.
- Preheat: Place a Dutch oven (or another deep, lidded pot) in the oven and preheat to 450°F (230°C).
- Score and bake covered: Turn the dough onto parchment paper, score the top with a sharp blade, and lower it into the hot pot. Bake covered.
- Bake uncovered: Remove the lid and continue baking until deeply golden.
- Cool: Transfer to a wire rack and cool completely before slicing
Notes
- Dough hydration works out to about 65% once you account for the water and flour in the starter.
- Want it wetter and more open-crumbed? Add water in 20-30g increments next time and recalculate.

![[video] from the seed to the peasant bakery with nicolas supiot](https://www.mydailysourdoughbread.com/wp-content/uploads/2022/11/image-16-120x120.jpeg "[Video – Part 2] Entering Into Peasant Bakery 113")

Hi Natasha, I’m finding some of the information on your sourdough web pages extremely useful. I get inconsistent results and I’m hoping by following your methods and tips that I’ll get better results.
But I don’t understand what you mean by hydration. You mention 100%, 75% and 85%. Percent of what? In your high hydration recipe you suggest making a starter with 100g and 80g flour, then 7h later add 50g water and 62.5g flour. This all adds up to 150g water and 142.5g flour. But your recipe states 150g water, 162.5g flour.
Or, expressed as g water per 100g flour, these two different mixtures contain 95 and 108g respectively.
For my starter I always refresh with equal weights of water and flour. Is this what you would call 100% hydration?
In your final dough mix the water content is 39.5% so you don’t mean hydration in the bread, just the starter??? Help, I’m confused.
Best wishes
Thank you so much for taking the time to actually run the numbers, this is exactly the kind of feedback that makes a post better!
Hydration is the ratio of water to flour by weight, expressed as a percentage: (water ÷ flour) × 100. So if you’re refreshing your starter with equal weights of water and flour, yes, that’s 100% hydration. Your instinct there was spot on.
I’ve fixed the starter build so the two stages now total 150g water and 150g flour, a proper 100% hydration starter that actually matches what’s written.
I’d been using “hydration” loosely to describe the starter without being clear that dough hydration is a separate number. To get the dough’s true hydration, you have to include the water and flour that’s already inside the starter, not just what’s added separately. Once I did that math properly, this recipe actually comes out to about 65% hydration, not the 75-85% “high hydration” range I’d implied. I’ve corrected the labeling and added a worked example in the post so you (and anyone else) can run the same calculation on their own dough.
I’ve updated the article to fix all of this!