
Last updated on August 19th, 2026
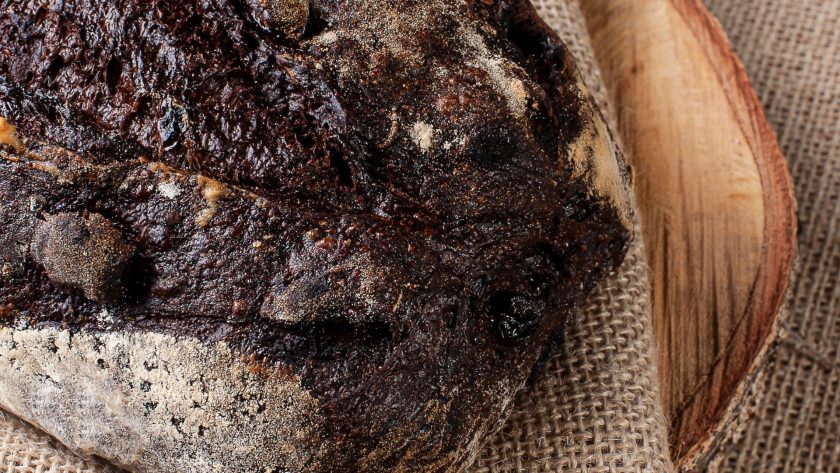
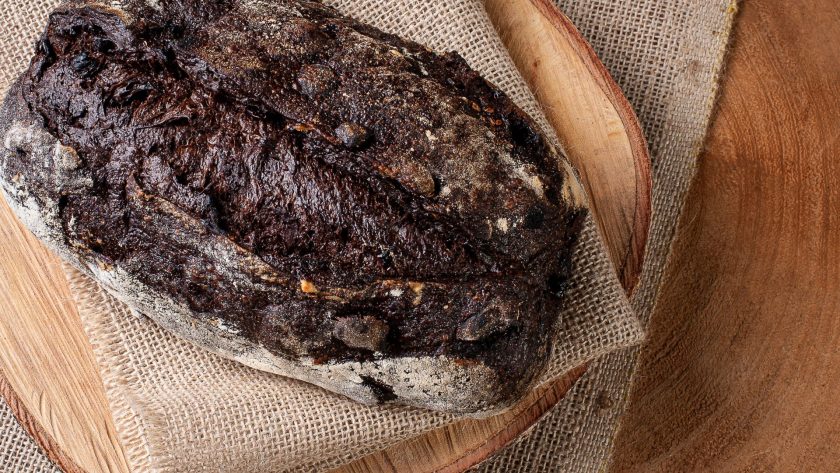
Your everyday sourdough loaf, but with rich cocoa running through the crumb and chunks of dark chocolate that melt and caramelize as it bakes. It’s still a real sourdough, tangy crumb and crackly crust included, just with a chocolate twist that’s great for breakfast toast or dessert.
Why You’ll Love This Recipe
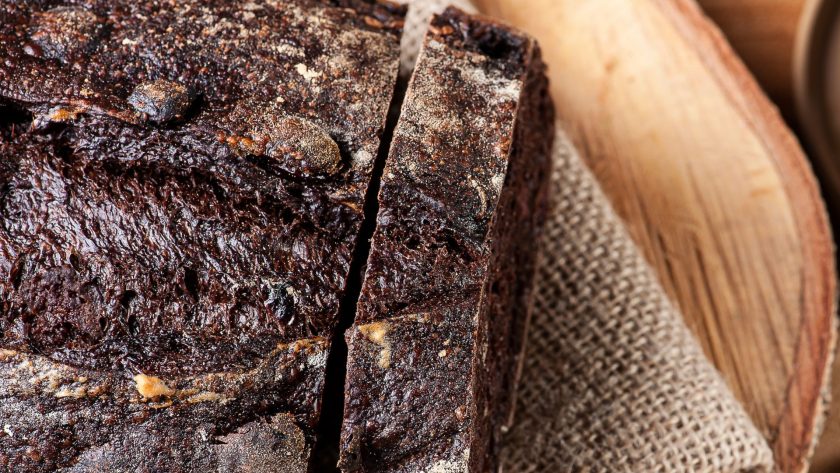
It’s chocolate and sourdough in one loaf, no compromises. You get all the tang and chew of a proper sourdough, plus pockets of melty chocolate and a deep cocoa flavor running through every slice (yuuuuum).
It’s a flexible recipe. Bake it as a round Dutch oven loaf for that classic crackly crust, or go with a sandwich loaf if you want neat slices for toast (almonds optional, but recommended if you like a bit of crunch).
It works for breakfast and dessert. Toast it with butter in the morning, or serve it with ice cream at night. Either way, it doesn’t feel like you’re settling for one or the other.
It’s a great way to use up an active starter. If you’ve been feeding your starter and aren’t sure what to make with the extra, this is a fun change from your usual loaf.
Do you need more reasons? I hope not!
What You’ll Need
| Ingredient | Amount |
|---|---|
| All-purpose flour | 500g (or swap 50g for whole wheat) |
| Active sourdough starter | 100g |
| Water | 350g |
| Salt | 10g |
| Cocoa powder | 30g |
| Dark chocolate chunks or chips | 150g |
Recipe Timeline at a Glance
Sourdough rewards patience more than precision, so think of these as ballpark times, not a strict schedule:
| Stage | Time |
|---|---|
| Feed starter | 8-12 hours before mixing |
| Autolyse | 30-60 minutes |
| Stretch and folds | 2-3 hours (every 30 min) |
| Bulk fermentation | 4-6 hours at 70-75°F |
| Bench rest | 20-30 minutes |
| Cold proof | 8-12 hours in the fridge |
| Bake | 40-50 minutes total |
Making Your Bread
Step 1: Wake Up Your Starter
Give your starter some love before you start mixing.
- Discard all but 50g of starter, then stir in 50g water and 50g flour. Let it sit at room temperature for 4-8 hours.
- You’re looking for it to roughly double in size with a domed, bubbly top.
- Try the float test: drop a spoonful into a glass of water. Floats means it’s ready. Sinks means it needs a bit more time.
- Cool kitchen? Fermentation will just take a little longer. A spot near a sunny window or on top of the fridge can help.
If you spot a layer of liquid on top (that’s hooch, totally normal), just stir it back in or pour it off before feeding.
Step 2: Mix the Dough
- In a large bowl, combine the active starter and water. Break up the starter with your hands or a spatula until it’s evenly mixed in.
- Add the flour and cocoa powder and mix until there are no dry patches left. The dough will look rough and shaggy at this point, and that’s exactly how it should look.
- Cover the bowl and let it rest (this is called the autolyse) for 30-60 minutes. This gives the flour time to soak up the water, so you’ll have an easier time building gluten later.
- Sprinkle the salt over the dough and pinch it in with wet fingers until it’s fully worked in.
Step 3: Stretch, Fold, and Add Chocolate
No kneading needed here. Instead, every 30 minutes for 2-3 hours, do a round of stretch and folds:
- Wet one hand, grab an edge of the dough, stretch it up, and fold it over itself.
- Give the bowl a quarter turn and repeat three more times.
Add the chocolate gradually so it spreads through evenly without knocking the air out of your dough:
- After your second round of folds, scatter in half the chocolate and fold it through.
- After your third round, add the rest.
By your last fold, the dough should feel noticeably smoother and stretchier, with bits of chocolate showing through.
Step 4: Bulk Fermentation
Cover the bowl and let the dough sit at room temperature (70-75°F) for 4-6 hours. Don’t expect it to double like a yeasted dough would. You’re looking for about 50-75% more volume.
Signs it’s ready:
- The dough looks jiggly and airy when you gently shake the bowl.
- You can see little bubbles through the side of the bowl.
- Poke it gently with a wet finger. The dent should slowly spring back about halfway. Springs back instantly? Give it more time. Stays dented? You’re slightly past the ideal point, but don’t worry, it’ll still bake up nicely.
Cocoa tends to slow fermentation down a touch, so if this stage runs long, that’s completely normal. Trust what you see and feel over the clock.
Step 5: Shape the Loaf
- Gently turn the dough onto a lightly floured surface. Pull the edges in toward the center to form a rough round, keeping as much air in the dough as you can.
- Cover with a towel and let it rest for 20-30 minutes so the gluten relaxes a bit, which makes shaping much easier.
- Flip the dough smooth-side down, fold each edge toward the center, then flip it back over so the seam sits on the bottom.
- Using a bench scraper, drag the dough in small circles on the counter to build a bit of surface tension on top.
- If chocolate chunks poke through, just tuck them back in gently. A few peeking out is totally fine.
- Dust a banneton generously with rice flour and place the dough in seam-side up.
Step 6: Cold Proof
Cover the banneton and pop it in the fridge for 8-12 hours. This slow chill builds extra flavor and firms the dough up, making it much easier to score before baking.
Step 7: Bake
- Preheat your oven to 450°F with a Dutch oven inside for at least 45 minutes.
- Turn the cold dough out onto parchment paper and score the top with one confident slash at a 45-degree angle.
- Carefully lower the dough (parchment and all) into the hot Dutch oven and put the lid on.
- Bake covered for 20 minutes, then remove the lid and bake another 20-30 minutes until deep golden brown.
- Check the internal temperature: you’re aiming for 205-210°F, and the loaf should sound hollow when you tap the bottom.
Since the cocoa makes the crust dark already, color alone won’t tell you much here, so a thermometer is your best friend. Darker patches where chocolate has caramelized are part of the charm, not a sign anything’s burnt.
Step 8: Cool and Store
Let the loaf cool completely, at least 2 hours, before slicing. We know that’s hard. But cutting in too early gives you a gummy crumb since the bread (and the chocolate) is still setting.
- Room temp: store cut-side down on a cutting board under a kitchen towel, good for 3-4 days. Skip the fridge, it dries the crust out.
- Freezer: slice and freeze in a bag for up to 3 months, then toast straight from frozen whenever you want a slice.
Ways to Enjoy Your Double Chocolate Sourdough
- Toasted with salted butter (the salt really brings out the chocolate)
- With cream cheese for a tangy contrast
- With almond butter for some nutty depth
- Alongside vanilla ice cream for dessert
- As the base for French toast
Related:
Recipe Tips
- Weigh your ingredients. Sourdough is sensitive to hydration, so a kitchen scale will get you much more consistent results than measuring cups.
- Don’t rush the starter. A sluggish starter means a flat, dense loaf no matter how well you handle the dough afterward. If you’re not sure it’s ready, do the float test before you commit.
- Go easy on the bench flour. A little dusting goes a long way when shaping. Too much flour gets worked into the dough and can toughen the crust.
- Add chocolate in stages, not all at once. Folding it in over two rounds keeps it evenly distributed without deflating the dough.
- Read the dough, not the clock. Fermentation times shift with your kitchen’s temperature, and cocoa slows things down slightly too. The poke test and visual cues (jiggle, bubbles, volume) are more reliable than a timer.
- Cold dough is easier to score. If you’re doing the round loaf, scoring straight from the fridge gives you a cleaner cut and helps the bread hold its shape in the oven.
- Let it cool fully before slicing. It’s tempting to cut in early, but the crumb and chocolate are still setting as the loaf cools. Give it the full two hours.
Let’s Get Baking
This loaf takes a bit of time, but most of it is hands-off waiting while your starter and dough do their thing.
Once you’ve made it once, you’ll have a feel for how the dough should look and behave, and the next one will come together even easier.
You’re in for a slice that’s equal parts bread and treat!
FAQs
Can I use milk chocolate instead of dark chocolate?
Yes, though dark chocolate balances the tang of the sourdough better. If you use milk chocolate, expect a sweeter loaf overall.
Why didn’t my dough double during bulk fermentation?
That’s normal here. Unlike yeasted dough, this recipe is looking for about 50-75% growth, not a full double. Use the poke test and visual cues to judge readiness instead of size alone.
Can I skip the cold proof?
You can, but it makes a difference. The cold proof develops more flavor and firms up the dough, which makes it much easier to score and shape. If you’re short on time, even 4-6 hours in the fridge is better than none.
My chocolate chunks are melting out during baking. Is that normal?
Yes, some chocolate on the surface will melt and caramelize, which is part of what gives this bread its character. If a lot is leaking out, you may have added it too late in the folding process or the dough may have been slightly too warm when you shaped it.
Can I make this without a Dutch oven?
Yes, you can also use a covered baking vessel of a similar size, or place a metal bowl over the dough on a baking sheet to trap steam.
Do I need to add sugar?
No, it’s optional. It softens the cocoa’s bitterness slightly and helps with browning, but the bread works fine without it if you prefer a more classic sourdough flavor.
How do I know if my starter is ready to use?
It should have roughly doubled in size, look bubbly with a domed top, smell pleasantly tangy, and pass the float test (a spoonful floats in water rather than sinking).
Double Chocolate Sourdough
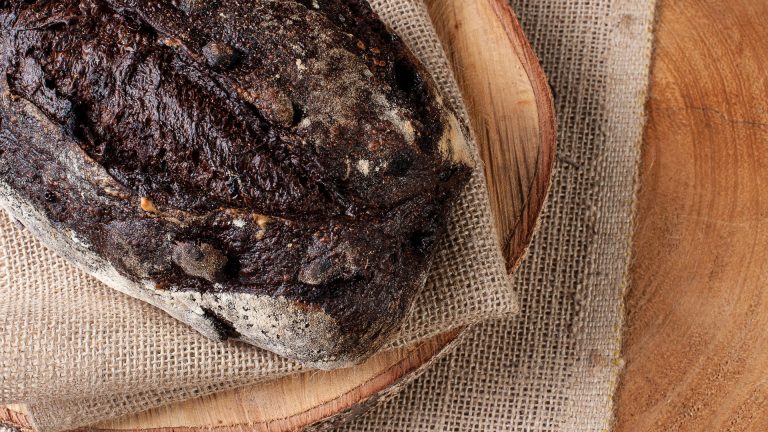
Double chocolate sourdough brings together everything you love about tangy, crusty artisan bread with pockets of melty dark chocolate in every slice.
- Total Time: 18-24 hours (mostly hands-off)
- Yield: 1 loaf (about 10–12 slices) 1x
Ingredients
- 500g all-purpose flour (or 450g all-purpose + 50g whole wheat)
- 100g active sourdough starter
- 350g water
- 10g salt
- 30g cocoa powder
- 150g dark chocolate chunks or chips
Instructions
- Feed your starter. 8-12 hours before mixing, discard all but 50g of starter and feed it 50g water and 50g flour. Let it sit at room temperature until doubled, bubbly, and passing the float test.
- Mix. Combine starter and water in a large bowl. Add flour, cocoa powder, and sugar (if using, approx 20-40g or roughly 2-3 tbsp as desired); mix until no dry patches remain.
- Autolyse. Cover and rest the dough for 30-60 minutes.
- Add salt. Sprinkle salt over the dough and pinch in with wet fingers until incorporated.
- Stretch and fold. Every 30 minutes for 2-3 hours, do a round of stretch and folds. Fold in half the chocolate after the second round, and the remaining chocolate after the third round.
- Bulk ferment. Cover and let rise at room temperature (70-75°F) for 4-6 hours, until the dough has grown by 50-75% and passes the poke test.
- Shape. For a round loaf, shape into a boule and place seam-side up in a rice-floured banneton. For a sandwich loaf, shape into a log and place seam-side down in a greased loaf pan, pressing almonds on top if using.
- Cold proof. Cover and refrigerate for 8-12 hours.
- Bake (round loaf): Preheat oven to 450°F with Dutch oven inside for 45 minutes. Score the cold dough, place in the Dutch oven, bake covered 20 minutes, then uncovered 20-30 minutes until deep golden brown.
- Bake (sandwich loaf): Preheat oven to 375°F. Let pan sit at room temperature 30 minutes, then bake 35-45 minutes until deep golden brown.
- Check doneness. Internal temperature should read 205-210°F, and the loaf should sound hollow when tapped.
- Cool. Let cool completely, at least 2 hours, before slicing.
Notes
- Sugar is optional. It softens the cocoa’s bitterness and helps with browning, but the loaf works fine without it.
- Fermentation times are guidelines. Warmer kitchens speed things up, cooler kitchens slow things down. Go by visual and tactile cues (jiggle, bubbles, poke test) rather than the clock.
- Add chocolate in two stages during the stretch and folds to distribute it evenly without deflating the dough.
- Use a kitchen scale for all ingredients. Sourdough is sensitive to hydration, and weighing gives much more consistent results than cup measurements.
- Use minimal flour when shaping to avoid toughening the crust.
- Store cooled bread cut-side down at room temperature, covered with a towel, for 3-4 days. Don’t refrigerate, it dries out the crust. Slice and freeze for up to 3 months for longer storage.
- A few chocolate chunks melting onto the crust during baking is normal and adds caramelized flavor, not a sign of burning.
- Prep Time: 30 mins (active), 16-20 hours (starter feeding, autolyse, bulk fermentation, cold proof)
- Cook Time: 40-50 mins
- Method: Baking






Natasha – the amounts of ingredients and steps do not match the picture (pulman loaf with maybe almonds in it) and the video (addition of sugar and totally different steps) in the least. Can you clarify please? I am in the middle of putting the dough together and am thinking I’m about to waste all my time and ingredients. Thank you.
Hi Nancy, recipe updated, apologies!
Hello. I’m not seeing how much sugar to add if choosing to use it. thank you.
Around 20-40g (roughly 2-3 tbsp) mixed in with the flour, as a general guideline!