
Last updated on January 21st, 2026
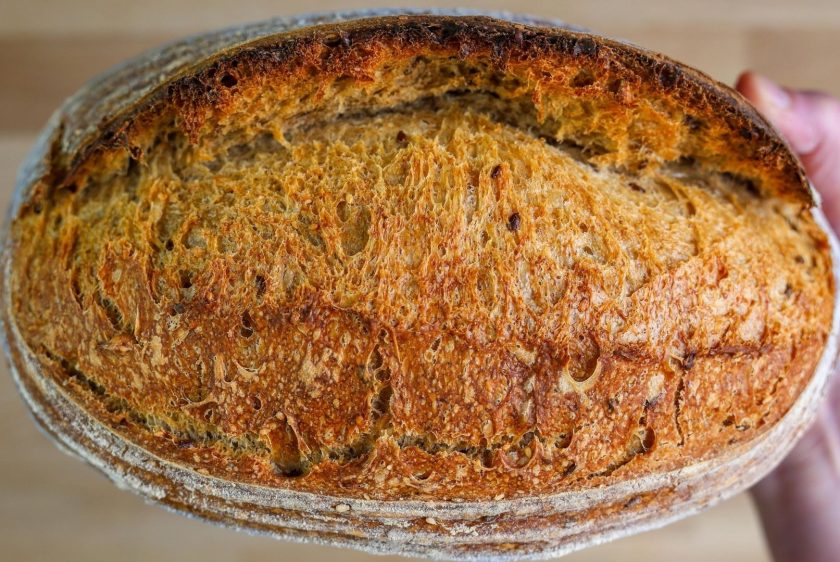
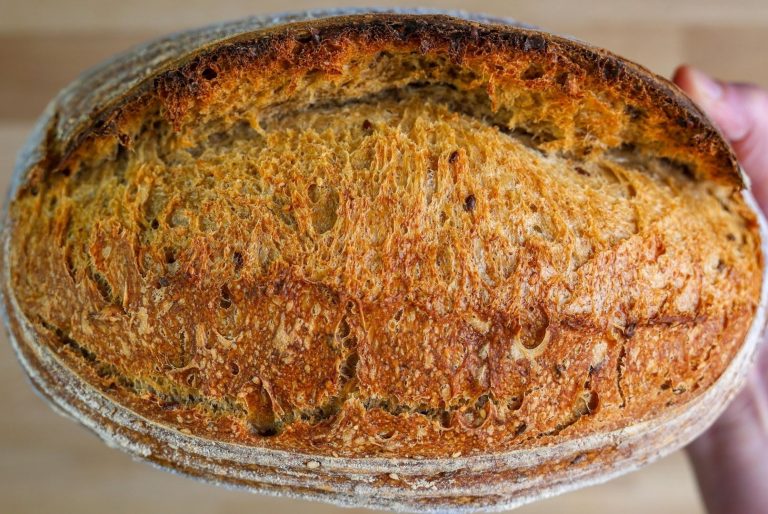
You’ve been staring at that tub of kimchi in your fridge, wondering if you could actually fold it into your sourdough. Spoiler: you absolutely can, and kimchi sourdough is incredible. The combo of fermented cabbage meeting wild yeast creates this insane flavor that’s spicy, tangy, and totally addictive. The trick is understanding how kimchi’s extra moisture and active bacteria change your usual process. Once you know how to adjust your hydration and work with that double fermentation, you’ll be pulling out loaves with deep mahogany crusts and pockets of funky, spicy goodness that’ll have everyone asking for your secret.
What Makes Kimchi Sourdough Unique
When you fold kimchi into sourdough, you’re creating a conversation between two ancient fermentation traditions. Your sourdough starter’s wild yeast and lactic acid bacteria meet the LAB from the kimchi, and together they create something that’s way more complex than the sum of its parts. The tanginess you love in regular sourdough gets a spicy, funky companion. That gochugaru (Korean red pepper flakes) doesn’t just bring heat—it adds a subtle sweetness and smokiness that plays beautifully against the bread’s natural sourness. And then there’s the umami. The fermented cabbage, garlic, and sometimes fish sauce in traditional kimchi deliver that savory depth that makes your taste buds sit up and pay attention. Every bite tastes slightly different—you’ll hit a pocket of intensely spicy kimchi, then get a mellower, tangy crumb, then encounter a caramelized bit of garlic. The natural fermentation process means this bread stays interesting as it ages, with flavors that mellow and marry in ways that make it perfect for sandwiches or alongside soup.
Ingredients Overview
- 500g bread flour
- 350g water (adjust for kimchi moisture)
- 100g active sourdough starter
- 10g salt
- 100-120g well-drained kimchi, chopped
Related: The Ultimate Cheesy Bread Recipe: Easy, Soft, and Delicious
Choosing the Right Kimchi
For kimchi sourdough, lean toward ripe kimchi that’s been fermenting for at least two to three weeks. At this fermentation stage, the flavors have developed complexity without becoming overwhelmingly pungent. The cabbage has softened just enough that it incorporates smoothly into your dough without creating tough, fibrous bits. Fresh kimchi brings crunch and milder flavor, but aged kimchi delivers that deep, complex sourness that can stand up to the bread’s own tang. A good store-bought baechu kimchi from your local Korean grocery works beautifully—look for brands that list napa cabbage, gochugaru, garlic, and ginger in the ingredients. If you make your own, make sure it’s actually fermented by letting it sit at room temperature for at least three days before refrigerating. The best kimchi for sourdough is sour kimchi with a good balance of heat and funk, not something that’s still basically spicy coleslaw.
Preparing the Dough
Your kimchi brings serious moisture to the dough—anywhere from 80-90% water content. Adjust your hydration by reducing water to about 70-72% if your usual recipe calls for 75%. Here’s how to bring it together:
- Mix bread flour with reduced water amount and let rest for 30 minutes (autolyse). This lets flour particles fully hydrate before adding your starter.
- Add active starter and salt, mixing until incorporated. Your dough will feel shaggy at this stage.
- Chop kimchi into half-inch pieces and squeeze out most (but not all) of the liquid. You want it damp, not dripping.
- Fold kimchi into your dough gently during your first or second stretch and fold. Don’t dump it all in at once—you’ll tear your gluten network.
- Perform 3-4 sets of stretch and folds, spaced 30-45 minutes apart. Wet your hands, grab one side of the dough, stretch it up and over to the opposite side. Rotate the bowl 90 degrees and repeat. Four stretches per set build strength.
The dough will feel wetter and stickier than regular sourdough, even with adjusted hydration—that’s normal. Kimchi can slow down gluten development because of its acidity, so you might need an extra set of folds. Watch your dough go from shaggy and loose to smooth and elastic. After your final set of folds, let the dough rest undisturbed so it can build those beautiful air pockets.
Bulk Fermentation
Bulk fermentation is where your sourdough’s wild yeast and LAB work alongside the kimchi’s active bacteria. Keep your dough at 75-78°F for optimal fermentation control. At this temperature range, expect 4-6 hours depending on your starter’s strength and kitchen warmth. Watch for the dough to increase by about 50-75% in volume—not quite doubled. You should see bubbles forming along the sides of your container and that lovely domed top.
Your dough will tell you when it’s ready. It should feel alive—slightly jiggly when you move the container, with visible air pockets throughout. If you gently poke it with a wet finger, the indentation should slowly spring back about halfway. Spring back all the way? Give it more time. Stay completely flat? You’ve pushed it too far. The kimchi adds its own funkiness to the smell, so you should notice a pleasant, slightly tangy scent mixing with that kimchi funk. It shouldn’t smell overly sour or like straight vinegar—that’s a sign of overproofing. Temperature matters more than you think because you’ve got two fermentation processes working simultaneously, so warmer temps will speed everything up fast.
Shaping and Proofing
When bulk fermentation’s done, turn your dough out onto a lightly floured surface—just enough flour to keep it from sticking. Pre-shape it gently into a round and let it rest for 20-30 minutes. This bench rest lets the gluten relax, so your final shaping builds tension rather than becoming a wrestling match.
For the final shape, build dough tension by pulling the edges toward the center, then flip it seam-side down and use your hands or a bench scraper to drag it across the counter. This creates that taut skin on top that’ll give you gorgeous oven spring. The kimchi makes this dough a bit more delicate, so gentle confidence is your friend here.
Place your shaped dough seam-side up in a well-floured banneton. If you don’t have a banneton, a bowl lined with a heavily floured tea towel works just fine. Now choose: room temperature proof for 2-3 hours, or a cold proof in the fridge for 8-24 hours. Cold proofing develops more complex flavors, firms up the dough for easier scoring, and gives you flexibility to bake on your schedule. Cover that banneton with a plastic bag or shower cap to prevent drying out.
If you’re doing room temperature proof, your dough is ready when it’s puffy and springs back very slowly when poked. For cold-proofed loaves, bake straight from the fridge—no need to bring to room temperature. Cold dough is easier to score and less likely to spread when turned out.
Baking Instructions
An hour before baking, crank your oven to 500°F with your Dutch oven (lid on) inside. You want that cast iron ripping hot for maximum oven spring.
- Pull out your cold dough and score it with one decisive slash down the middle at a slight angle, about half an inch deep. This lets the bread expand where you want it to.
- Carefully remove your Dutch oven using thick oven mitts, take off the lid, and lower your dough into it. You can lift it with parchment paper if needed.
- Cover with the lid, slide into the oven, and immediately drop the temperature to 450°F.
- Bake covered for 20 minutes without peeking. That steam environment keeps the crust soft enough for maximum expansion.
- Remove the lid and lower the oven temperature to 425°F. Bake for another 25-30 minutes uncovered until deep golden-brown.
- The bread’s done when it sounds hollow when you tap the bottom. Internal temperature should be around 205-210°F.
The kimchi can make your crust darker faster because of the sugars, so keep an eye on it during that final bake. If it’s browning too quickly, drop the temp another 10-15 degrees. The heavy Dutch oven lid traps steam that your dough naturally releases, creating that perfect humid environment for crust formation and oven spring.
Related: Sourdough Apple Bread (Your Next Autumn Recipe)
Serving and Storage
Let that bread cool for at least an hour before cutting. The interior is still cooking from residual heat, and the crumb needs time to set. Cut it too early, and you’ll have a gummy texture instead of that perfect, open crumb.
Serving suggestions:
- Toast thick slices and top with butter—the richness plays beautifully against the spicy tang
- Make grilled cheese with aged cheddar and thinly sliced pork belly
- Serve alongside Korean stews and soups
- Tear into chunks for dipping into soft scrambled eggs
- Spread with cream cheese and cucumber for an addictive contrast
Storage tips:
- Store at room temperature, cut-side down on a cutting board for the first day
- After that, wrap in a clean kitchen towel or bread bag
- Keeps well for 5-7 days on the counter, though the crust gradually softens
- Don’t refrigerate—it’ll dry out fast and mess with the texture
- Slice and freeze extras, wrapped in plastic, then foil; they toast beautifully straight from the freezer
- Reheat in a 350°F oven for 10 minutes to bring back fresh-baked magic
The kimchi flavors actually deepen over the next day or two, so this bread gets more interesting as it ages.
Time to Bake Your Best Kimchi Sourdough
Making kimchi sourdough isn’t about throwing fermented cabbage into dough and crossing your fingers—it’s about understanding how two fermentation powerhouses work together. You’ve got the complete roadmap now: choosing that perfectly aged kimchi, adjusting hydration for all that extra moisture, managing the double fermentation during bulk rise, and nailing the cold proof that makes everything easier. This dough will feel wetter than you’re used to, but trust it. Watch for that 50-75% rise, don’t skip the cold proof, and when that deep mahogany loaf comes out of your Dutch oven sounding hollow, you’ll know you nailed it. The flavors only get better over the next few days, so grab that kimchi and get baking.
FAQs
Is fermented sourdough bread good for you?
Yes, fermented sourdough bread offers several benefits. The long fermentation breaks down gluten and phytic acid, making it easier to digest than regular bread. The lactic acid bacteria create probiotics that support gut health, and the fermentation process lowers the glycemic index, meaning it won’t spike your blood sugar as quickly. Plus, it’s naturally preservative-free and packed with minerals your body can actually absorb.
Can kimchi be eaten with bread?
Absolutely! Kimchi pairs beautifully with bread in tons of ways. Try it on toast with butter, tucked into grilled cheese sandwiches, or alongside crusty bread for dipping into soups. The tangy, spicy kimchi cuts through rich flavors and adds a probiotic punch. You can also bake it directly into bread—like kimchi sourdough—where the fermented cabbage creates pockets of flavor throughout the loaf.
Kimchi Sourdough
You’ve been staring at that tub of kimchi in your fridge, wondering if you could actually fold it into your sourdough. Spoiler: you absolutely can, and kimchi sourdough is incredible.
Ingredients
- 500g bread flour
- 350g water (adjust for kimchi moisture)
- 100g active sourdough starter
- 10g salt
- 100–120g well-drained kimchi, chopped
Instructions
- Select kimchi: Use ripe kimchi fermented 2-3 weeks for complex flavor and soft texture.
- Adjust hydration: Reduce water to 70-72% to account for kimchi’s moisture content.
- Mix dough: Autolyse flour and water for 30 minutes, then add starter and salt.
- Incorporate kimchi: Chop into half-inch pieces, squeeze out excess liquid, fold into dough.
- Build strength: Perform 3-4 stretch-and-fold sets, 30-45 minutes apart.
- Bulk ferment: Rest 4-6 hours at 75-78°F until dough increases 50-75% in volume.
- Shape: Pre-shape, rest 20-30 minutes, final shape with tension, place in floured banneton.
- Proof: Refrigerate 8-24 hours for best flavor.
- Bake: Score, bake in preheated Dutch oven at 450°F covered (20 min), then 425°F uncovered (25-30 min).
Notes
- Toast thick slices and top with butter—the richness plays beautifully against the spicy tang
- Make grilled cheese with aged cheddar and thinly sliced pork belly
- Serve alongside Korean stews and soups





