
Last updated on August 12th, 2026
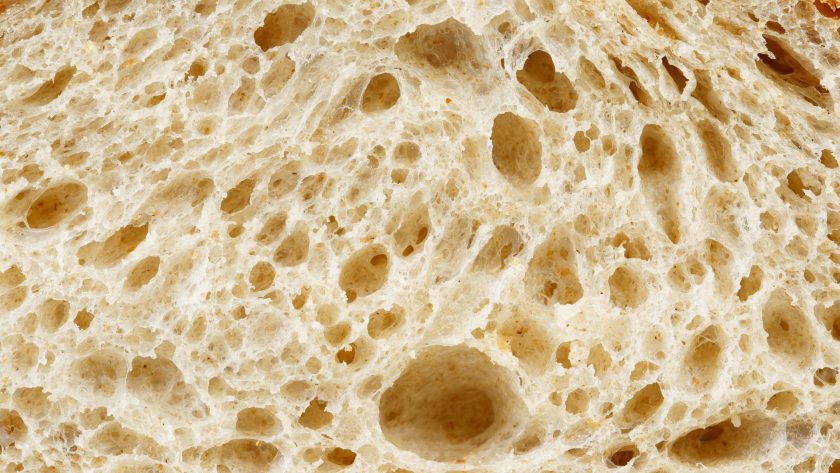
Cut open a loaf of sourdough and you get a report card. The size, shape, and spacing of those holes tell you almost everything about what happened during mixing, fermentation, shaping, and baking. Once you learn to read it, you stop guessing and start adjusting.
Let’s go through the most common crumb patterns, what causes them, and what to change next time.
Why Crumb Reading Matters So Much
Two bakers can follow the exact same recipe and get completely different loaves. That’s because sourdough is shaped by variables a recipe can’t fully control: room temperature, starter strength, flour protein content, and how long you actually let the dough sit versus how long the recipe says to.
The crumb is the record of all those variables working together. Instead of chasing a new recipe every time a loaf disappoints you, learn to trace the problem back to its source. That’s a skill you keep for every bake after this one.
Quick Sourdough Crumb Diagnoses
Start here if you just want a fast diagnosis. Match your crumb to the description, then dig into the full explanation below.
| Crumb Appearance | Most Likely Cause | Quick Fix |
|---|---|---|
| Dense, tight, few holes | Underproofed dough, weak starter, or too much flour | Extend bulk fermentation, feed starter more consistently |
| Gummy or wet-looking despite baking long enough | Underbaked interior or cut too soon | Bake longer, check internal temp (200-210°F), rest before slicing |
| Large irregular holes with tight bottom | Overproofed or handled too gently during shaping | Shorten bulk rise, shape with slightly firmer tension |
| Very open, almost holey all over | Overproofed dough or too much water for your flour | Reduce hydration slightly, watch fermentation closely |
| Flat crumb with a dense band under the crust | Cold oven spring or overhydrated dough | Preheat longer, reduce water 3-5% |
| Big tunnels near the top | Rough shaping or too much steam trapped near the crust | Degas more gently, shape with even tension |
| Gray or streaky crumb | Old starter, over-fermentation, or flour quality | Feed starter fresh before baking, shorten ferment time |
| Uneven holes (big on one side, tight on the other) | Uneven shaping tension or lopsided scoring | Practice consistent shaping pressure, score at a steady angle |
Dense, Tight Crumb
This is the most common complaint from newer bakers, and it usually comes down to fermentation, not technique.
What it looks like: Small, uniform holes packed close together. The loaf feels heavy for its size.
Common causes:
- The starter wasn’t active enough at mix time (it should roughly double and look domed or bubbly, not flat)
- Bulk fermentation ended too early
- Too much flour worked into the dough during shaping
- Dough temperature stayed too cool during the rise
What to try next:
- Feed your starter twice a day for 2-3 days before baking so it’s reliably active.
- Let bulk fermentation run by feel, not by clock. Look for a dough that’s visibly puffed, slightly jiggly, and has grown by 50-75%.
- Keep the dough somewhere warm (75-78°F is a solid target) if your kitchen runs cold.
- Use as little bench flour as possible when shaping.
Gummy or Wet Crumb
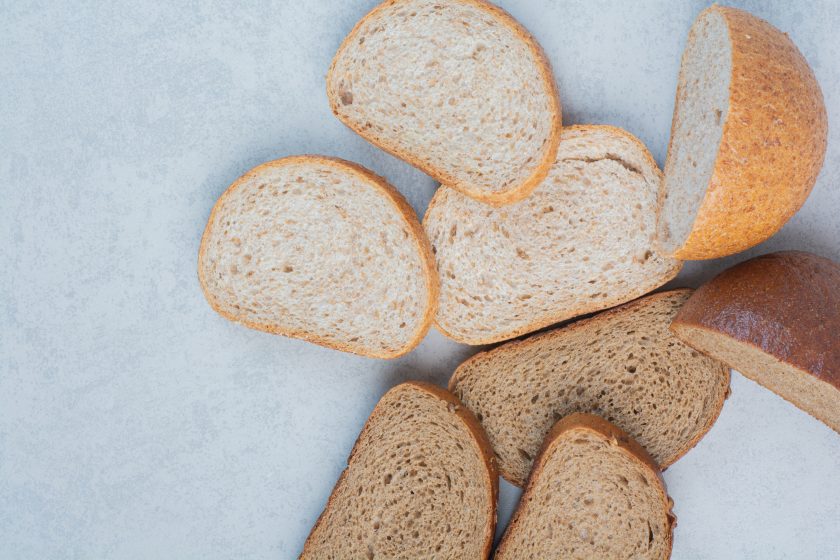
Gummy crumb gets blamed on underproofing more than it should. Most of the time, it’s actually a baking or cooling issue.
What it looks like: The bread looks baked on the outside but feels tacky or slightly raw when sliced, even hours after baking.
Common causes:
- Pulled from the oven too early
- Sliced before it finished cooling (bread keeps cooking internally as it cools)
- Too much water for the flour being used
- Oven running cooler than the dial suggests
What to try next:
- Check internal temperature with a thermometer. Sourdough is done around 200-210°F.
- Let the loaf rest for at least 1-2 hours before cutting into it. This feels like torture, but the structure needs that time to set.
- If your oven runs cool, buy an inexpensive oven thermometer and adjust your bake temp accordingly.
- Drop hydration by 3-5% if you’re using a lower protein flour.
Big, Irregular Holes (The “Open Crumb” Look)
A lot of bakers chase this look, but wildly open crumb with big tunnels near the crust is usually a sign of overproofing, not skill.
What it looks like: Large, unevenly sized holes, sometimes with a dense strip right under the crust and open holes everywhere else.
Common causes:
- Dough overproofed during bulk fermentation or the final rise
- Gentle shaping that didn’t build enough surface tension
- High hydration dough that lost strength before baking
What to try next:
- Shorten your bulk fermentation window and watch the dough instead of the clock.
- Use the poke test: press a floured finger into the dough. If it springs back slowly and leaves a slight indent, it’s ready. If it doesn’t spring back at all, it’s gone too far.
- Shape with firmer, more deliberate tension so the dough has some structure to hold gas during oven spring.
Flat Crumb With a Gummy Band Near the Crust
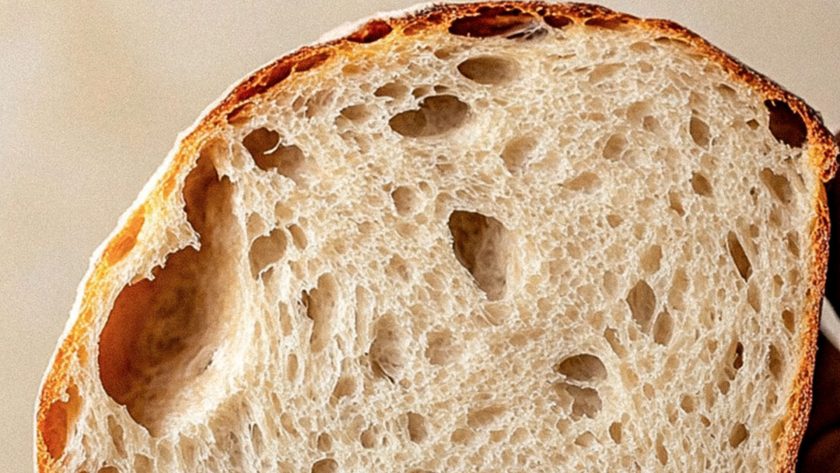
This band (sometimes called a “gum line”) shows up right under the crust and looks noticeably denser than the rest of the loaf.
Common causes:
- Weak oven spring from a cold oven or lack of steam
- Overhydrated dough that the crust set too fast to support
- Baking stone or Dutch oven not preheated long enough
What to try next:
- Preheat your Dutch oven or baking stone for a full 45-60 minutes before baking.
- Add steam for the first 15-20 minutes (a preheated Dutch oven with lid does this automatically).
- Reduce hydration slightly if this keeps happening with the same flour.
Tunnels and Large Air Pockets Near the Top
What it looks like: One or two oversized holes, often near the top crust, surrounded by more normal crumb elsewhere.
Common causes:
- Rough handling during shaping that trapped a pocket of gas
- Degassing too aggressively in one spot and not evenly across the dough
- Scoring that redirected steam and gas into one weak point
What to try next:
- When shaping, use even, consistent pressure across the whole dough surface rather than pressing hard in one area.
- Fold and degas gently and evenly instead of punching the dough down.
- Score at a consistent angle (around 30-45 degrees) so gas escapes predictably.
Gray, Dull, or Streaky Crumb
Color problems are less about structure and more about fermentation and ingredient freshness.
Common causes:
- Starter that’s overripe or has been neglected between feedings
- Dough that fermented too long or at too warm a temperature
- Flour that’s old or stored improperly
What to try next:
- Bake with starter that’s near its peak (doubled, domed, still smells pleasantly tangy rather than sharp or boozy).
- Store flour in a sealed container somewhere cool and dark, and use it within a few months of opening.
- Track your fermentation times in a notes app so you can spot patterns over several bakes.
A Simple Diagnostic Workflow
When a loaf comes out wrong, work through these questions in order instead of randomly changing your recipe:
- Was the starter active at mix time? If it wasn’t doubling reliably, fix that first before troubleshooting anything else.
- How did the dough feel at the end of bulk fermentation? Compare it against the poke test description above.
- Was the kitchen unusually warm or cold that day? Temperature swings of even 5 degrees can shift fermentation time by an hour or more.
- Did the oven get a full preheat? A rushed preheat shows up directly in the crumb as a dense band or flat rise.
- How long did it rest before slicing? Cutting too early masks a good bake as a bad one.
Keeping a simple bake log with these five points, plus a photo of the crumb, turns troubleshooting into pattern recognition after just a handful of loaves. Most bakers find their answer within the first two or three questions.
Building Consistency Over Time
Crumb reading isn’t a one-time fix, it’s more of a feedback loop. Every loaf you cut open gives you data for the next one.
Once you can look at a slice and immediately connect it to what happened hours earlier during mixing or shaping, you’ll spend a lot less time following recipes exactly and a lot more time adjusting them to your kitchen, your flour, and your starter.
FAQs
What does “good” sourdough crumb actually look like?
There’s no single right answer here since it depends on the loaf style. A sandwich loaf should have smaller, more even holes for easy slicing, while a rustic country loaf can handle bigger, more irregular ones. The real marker of a well-made crumb is even distribution and a texture that’s moist but not sticky, not a specific hole size.
Why is my crumb dense even though I let the dough rise for hours?
Time alone doesn’t guarantee proper fermentation. A cold kitchen, a sluggish starter, or dense flour can all mean the dough needs longer than usual to hit the same rise point. Judge readiness by how the dough looks and feels (puffy, jiggly, grown by 50-75%) rather than by the clock.
Can I fix a gummy loaf after it’s already baked?
Not really, but you can rule out whether it’s a slicing issue first. Let the loaf cool completely, even overnight, then cut a fresh slice. If it’s still tacky at that point, the problem is in the bake or the hydration, not the cooling time.
Does the flour I use change how the crumb turns out?
Yes, significantly. Higher protein bread flour builds stronger gluten and tends to support more open, structured crumb. Whole wheat and rye flours absorb more water and often produce a denser, tighter crumb even with a solid fermentation. If you switch flours, expect to adjust hydration and timing.
How long should I wait before cutting into a fresh loaf?
At least 1 to 2 hours, and longer is better if you can manage it. The interior structure is still setting during that window, and slicing too early will make even a properly baked loaf look gummy or underdone.
Is open, holey crumb always the goal?
Not necessarily. It’s a popular look, but it isn’t a marker of quality by itself. A loaf with tighter, more even crumb can be just as well fermented and often slices better for sandwiches. Chase the texture that suits how you actually eat the bread, not just the photo-friendly version.




![[video] from the seed to the peasant bakery with nicolas supiot](https://www.mydailysourdoughbread.com/wp-content/uploads/2022/11/image-16-120x120.jpeg "[Video – Part 2] Entering Into Peasant Bakery 9")
