Before your sourdough is ready for baking, it needs to be shaped. The best way to do this without any fuss, is through the use of a loaf pan. If you’ve been wondering whether using a loaf pan to bake sourdough bread is appropriate then I’m here to tell you that it is! We’ll discuss the simple steps in shaping your dough before it is ready for the pan!
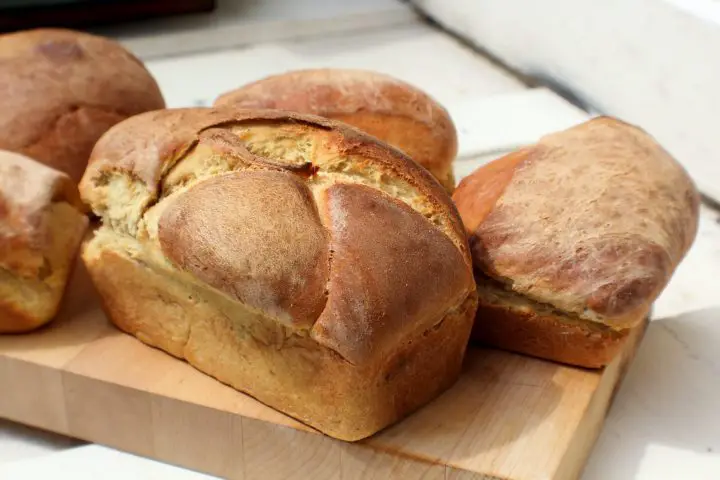
Table of Contents
- What is Sourdough Bread?
- Benefits of Baking Sourdough in a Loaf Pan
- How to Shape Sourdough Bread for Loaf Pan
- Sourdough Sandwich vs Boules
- How to Bake the Perfect Sourdough Bread
- How to Make Sourdough Starter
- Sourdough Loaf Recipe
- Sourdough Loaf – Possible!
- FAQs
Sourdough Loaf Recipe
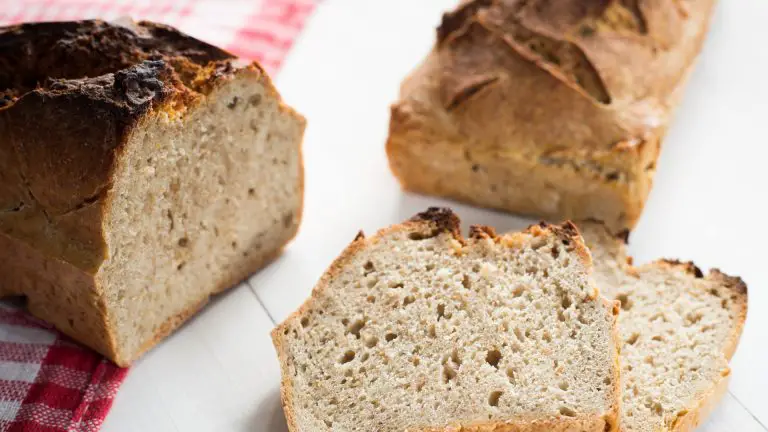
This sourdough pan bread recipe is good for baking in a loaf pan or tin.
- Total Time: 17 hrs 50 mins
- Yield: 1 loaf 1x
Ingredients
- 450 grams Bread flour
- 300 grams Water
- 10 grams Salt
- 100 grams Active sourdough starter
Instructions
Preparing the Dough
- Feed your starter 4 to 8 hours before you wish to make your dough. Take 25 grams of your active starter and mix it with 50 grams of bread flour and 50 grams of water. Let the mixture rise on the counter for 4 to 8 hours or until it has doubled in size.
- In a large mixing bowl, combine water, active sourdough starter and salt. Stir until the starter and salt have dissolved. Then add the flour on top of the wet ingredients. Stir the dough into the water until a lumpy dough forms without any dry bits of flour remaining. Cover the bowl with a tea towel and let the dough rest for 30 minutes.
- Now give the dough a set of stretch and folds. Grab the top part of the dough and fold it over towards the bottom. Then fold the bottom up towards the top, then fold the right over to the left and the left over the right. Cover the dough and let it rest for another 30 minutes. Repeat the stretch and fold process until you’ve completed three sets with 30 minutes of rest in between. After the third set let the dough rise for 3 to 6 hours. You want your dough to have doubled in size.
- Once the dough has doubled in size and jiggles a little when you shake the bowl, its time to shape the dough. Shape the dough into a smooth ball, cover with a tea towel and let it rest for 30 minutes.
Baking
- 30 minutes before baking preheat your oven to 425 degrees F. Place a cake pan on the bottom rack, as this will act as a steam tray later on.
- If you have proofed your dough for 2 hours you can score it using a bread lame or razor blade before baking. If your dough has proofed for longer (3 to 4 hours) there’s no need to score it.
- Slide your loaf pan into the middle of the center rack of your oven and pour some hot water into the steam pan. This will accumulate steam into your oven during the first half of the bake. Close the oven door and let the dough bake for 20 minutes.
- After 20 minutes lower the oven temperature to 350 degrees F. Remove the steam tray from the oven and let the bread continue to bake for 20 to 30 minutes, till the internal temperature of the bread reaches 190 degrees.
- Once your sourdough bread baked, remove it from the oven and slide the bread out of the bread pan. Transfer it to a wire rack for at least one hour before slicing.
- Prep Time: 16 hrs 30 mins
- Cook Time: 1 hr 20 mins
- Category: bread
What is Sourdough Bread?
Sourdough bread is made with wild yeasts and bacteria. Flour, water and salt harmonize to create a starter for a bread that rises naturally. The yeast and bacteria become activated once water has been added to the flour mixture. These bacteria begin to digest the flour and create bubbles in the dough (carbon dioxide), which makes the bread rise.
Benefits of Baking Sourdough in a Loaf Pan
Baking sourdough in a loaf pan is super simple, and comes with its own benefits.
Here are a few:
- You Don’t Need to Use a Baking Stone
- Shaping isn’t Essential
- Loaf Pans are Better for Sandwiches
- You Can Bake at a Lower Temperature
You Don’t Need to Use a Baking Stone
The first thing to note is that you won’t need to use a baking stone when baking sourdough using a loaf pan.
Normally, home bakers tend to bake their bread inside a Dutch oven or atop a pizza stone. The heat from the stone or cast iron provides the perfect oven spring, and the bottom of the bread develops a nice crust as well.
When baking sourdough bread in a loaf pan, the dough will already have its form of support from the loaf pan, so it won’t require an additional flat surface to rest on top of in the oven. While the baking stone can provide a nice boost to your bread, the bread will develop a nice spring all on its own in the loaf pan.
On the other hand, if you already have a pizza stone in your oven, then its perfectly fine to lay your bread pan over it and bake your bread.
Shaping isn’t Essential
When baking in a loaf pan it isn’t essential to shape sourdough bread.
The walls of the bread pan provide the support your dough requires whilst baking. So even if you’ve done a poor job at shaping your dough, it’ll still rise up nice and tall, all curtesy of the loaf pan.
Loaf Pans are Better for Sandwiches
Loaf pans produce loaves that are the perfect size for slices of toast, or for a sourdough sandwich bread. A loaf pan can really help create the perfect domed tops for sandwich breads.
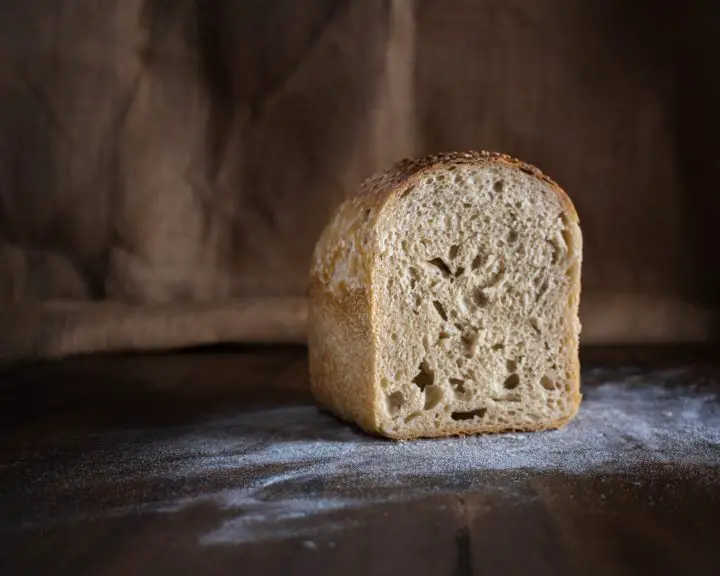
Baking in a loaf pan can also help keep the crumb of your bread even, meaning that you won’t be dealing with irregular shaped holes in your sourdough sandwich loaves.
You Can Bake at a Lower Temperature
Since you intend to create a slightly soft sandwich loaf, lower temperatures work best to produce a softer crust to your bread, which will be easier to slice through.
You can easily bake your sourdough bread at 425 or 450 degrees F if you’re using a loaf pan.
How to Shape Sourdough Bread for Loaf Pan
For those who are a little stuck on the steps needed to shape your dough for the loaf pan, here are some steps to help you:
- After the bulk fermentation, shape the dough into a round ball and let it sit for 15 to 30 minutes covered.
- Shape the round ball of dough into an oval shape, remembering to create a good amount of tension in the dough as you roll it.
- Pinch the seam closed and then transfer the dough seam side down into your loaf pan.
- Cover the dough up, and its ready to proof.
Sourdough Sandwich vs Boules
Many associate artisan sourdough with a boule.
A boule is a round loaf of bread, and a common characteristic of sourdough loaf bakers. Meanwhile, sourdough can be rolled into many shapes, from an oval shape to baguettes.
Sandwich loaves are quite the convenient shape for those who enjoy making sandwiches and toast with sourdough bread. The shape is similar to normal store-bought sandwich bread, though contains more nutrition and less chemicals.
Some home bakers prefer to bake their sourdough bread in a loaf pan, simply because it is much easier, as the pan provides a good structure for the dough to remain upright, allowing it to bake beautifully.
How to Bake the Perfect Sourdough Bread
If you’re struggling with forming the perfect domed top of your sourdough, then here’s some tips to help alleviate the burden:
- Proof the Dough for Longer
- Longer Final Proof
- Extend the Baking Time
Proof the Dough for Longer
To develop a nice, circular domed top on your sourdough sandwich bread, you’ll need to give your dough and extra long final proof, without scoring it.
Skipping the scoring and allowing your dough to proof for longer will provide a wonderful domed top to your bread.
Longer Final Proof
Sometimes during the baking process, your sandwich bread may rip along the sides of the bread pan. This can be due to the fact that you’re not proofing your sourdough for long enough.
When baking sourdough bread in a loaf pan, the pan creates a natural weak point, in the dough along the edge of the pan. If your dough has too much oven spring it can rip along the sides of the pan, somewhere during baking. To avoid this mess altogether, stick to proofing your dough for longer during the final proof.
To prevent your dough from ripping while it bakes, proof the dough until its 90% risen, so that when you pop it into the oven, it will have 10% rise left. This will allow your bread to puff up and stop, leaving you with a beautifully risen sourdough loaf.
Extend the Baking Time
If you’re accustomed to baking your sourdough bread in a Dutch oven, you may notice that your sourdough is taking longer to bake in a loaf pan. This is completely normal, and requires a little adjusting.
You may need to bake your loaf for an additional 5 to 10 minutes at the end of the bake so that your sourdough loaf can reach the same internal temperature as it would when baked in a Dutch oven (190 degrees).
How to Make Sourdough Starter
Before we can jump to baking sourdough loaves, you’ll require a sourdough starter.
And here’s what you’ll need to make one:
- 3/4 L jar
- 60g whole wheat flour
- 60g water
- Combine 60g of whole wheat flour and 60g of warm water in a large jar. Use a fork to combine this mixture, until you achieve a thick paste. Add more water to thin out the texture if needed.
- Cover this with a plastic wrap or lid and allow it to rest in a warm spot for 24 hours.
- On the second day check for small bubbles on the surface. These bubbles indicate fermentation, and if you can’t see any, its likely that some may have appeared and disappeared overnight. You might find a dark liquid has begun to form on your starter on the second day. This is quite normal, and an indicator that your starter is quite hungry.
- On the third day remove and discard half of the starter from your jar. You’ll find that the texture is extremely stretchy. Add 60g of all-purpose flour and 60g of warm water, then mix with a fork until nice and smooth.
- Repeat the feeding process on days 4, 5 and 6. As your yeast begins to develop the starter will rise and bubbles will form on the surface.
- On the 7th day your starter should have doubled in size, and should have a cluster of bubbles both small and large. Your starter can be transferred to a new jar, and it’s ready to bake with.
How to Store Sourdough Starter
If you bake often, its best to store your starter at room temperature. This will speed up the fermentation process, making the starter bubbly, active and ready to use. Starters that are stored at room temperature should be fed one to two times a day, depending on how quickly they rise.
If you’re someone who doesn’t bake often, then storing your starter in the refrigerator with a lid might be the better option for you. You’ll only need to feed your starter once a week so that it maintains its strength when it’s not in use. Once you’re ready to get bread baking, feed your starter at room temperature to revive it.
Sourdough Loaf Recipe
This sourdough pan bread recipe is good for baking in a loaf pan or tin. Using simple ingredients to create the perfect sandwich bread recipe.
Ingredients
- Bread flour – 450 grams
- Water – 300 grams
- Salt – 10 grams,
- Active sourdough starter – 100 grams
Instructions
Part 1: Preparing the Dough
- Feed your starter 4 to 8 hours before you wish to make your dough. Take 25 grams of your active starter and mix it with 50 grams of bread flour and 50 grams of water. Let the mixture rise on the counter for 4 to 8 hours or until it has doubled in size.
- In a large mixing bowl, combine water, active sourdough starter and salt. Stir until the starter and salt have dissolved. Then add the flour on top of the wet ingredients. Stir the dough into the water until a lumpy dough forms without any dry bits of flour remaining. Cover the bowl with a tea towel and let the dough rest for 30 minutes.
- Now give the dough a set of stretch and folds. Grab the top part of the dough and fold it over towards the bottom. Then fold the bottom up towards the top, then fold the right over to the left and the left over the right. Cover the dough and let it rest for another 30 minutes. Repeat the stretch and fold process until you’ve completed three sets with 30 minutes of rest in between. After the third set let the dough rise for 3 to 6 hours. You want your dough to have doubled in size.
- Once the dough has doubled in size and jiggles a little when you shake the bowl, its time to shape the dough. Shape the dough into a smooth ball, cover with a tea towel and let it rest for 30 minutes.
Part II: Baking
- 30 minutes before baking preheat your oven to 425 degrees. Place a cake pan on the bottom rack, as this will act as a steam tray later on.
- If you have proofed your dough for 2 hours you can score it using a bread lame or razor blade before baking. If your dough has proofed for longer (3 to 4 hours) there’s no need to score it.
- Slide your loaf pan into the middle of the center rack of your oven and pour some hot water into the steam pan. This will accumulate steam into your oven during the first half of the bake. Close the oven door and let the dough bake for 20 minutes.
- After 20 minutes lower the oven temperature to 350 degrees. Remove the steam tray from the oven and let the bread continue to bake for 20 to 30 minutes, till the internal temperature of the bread reaches 190 degrees.
- Once your sourdough bread baked, remove it from the oven and slide the bread out of the bread pan. Transfer it to a wire rack for at least one hour before slicing.
Sourdough Loaf – Possible!
Baking sourdough sandwich bread in a loaf pan makes for a great recipe. It’s an easier alternative to baking in a Dutch oven and produces the perfect risen sourdough loaf, with a softer crust, great for sandwiches.
FAQs
Can You Bake Sourdough in a Loaf Pan?
You can absolutely bake sourdough bread in a loaf pan. After the dough has completed bulk fermentation, form the dough into an oval shape and place it in the loaf pan seam side down. Let the dough proof for 2 to 4 hours at room temperature then bake at 425 degrees for 35 to 45 minutes.
What Pan Should I Use for Sourdough Bread?
There are a few types of containers used for baking sourdough bread and they are: Dutch oven, casserole dish, loaf pan, baking steel, and bread pans.
Why is Sourdough Bread not Good for You?
For many sourdough is easier to digest and can help regulate blood sugar levels. However sourdough is a calorie dense bread, meaning that it can be hard to maintain your weight.
Can You Bake Sourdough in a Metal Pan?
Yes you can bake sourdough bread in a metal pan, ensuring that there is enough room for your dough to rise above the top of the pan without leaking over the edges.






![How To Cold Proof Sourdough [Your Easy Guide] 91 How to cold proof sourdough [your easy guide]](https://www.mydailysourdoughbread.com/wp-content/uploads/2023/01/blog-images-40-120x120.jpg)
