Last updated on October 16th, 2025
Learning how to dehydrate sourdough starter is one of those game-changing skills every baker should have in their back pocket. It’s like putting your wild yeast and lactobacillus bacteria into a cozy hibernation – they’re still totally alive, just taking a nice long nap until you’re ready to wake them up with flour and water. This awesome technique extends your starter’s shelf life indefinitely and makes sharing with friends super easy. Plus, some bakers have successfully brought back starters that sat dried for years!
What Is a Sourdough Starter?
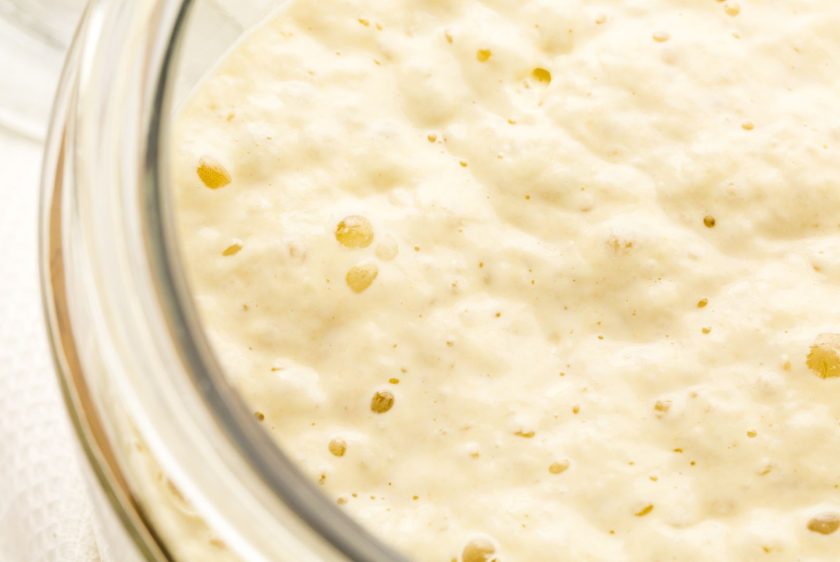
Before we dive into the dehydration magic, let’s make sure we’re all on the same page about what exactly we’re working with here. A sourdough starter is like a bustling little city of microorganisms – wild yeast and bacteria living in perfect harmony within a simple mixture of flour and water.
Unlike the instant yeast you grab from the baking aisle, this is natural fermentation at its finest. The wild yeast works alongside beneficial bacteria (primarily lactobacillus) to create that signature tangy flavor we all crave. These little guys feed on the starches in flour, producing carbon dioxide that makes your bread rise and organic acids that give sourdough its distinctive taste.
The fermentation process is what makes sourdough so special. When you mix flour and water and leave it alone, wild yeast and bacteria naturally present in the flour and environment start to colonize this mixture. Over time, with regular feeding, you develop a stable culture that’s uniquely yours – influenced by your local environment, the flour you use, and even the way you handle it.
This living culture needs regular feeding to stay active, which is exactly why dehydration becomes such a game-changer. When you can’t maintain that feeding schedule, dehydration lets you press pause on the whole process without losing all your hard work.
Related: How to Rehydrate Sourdough Starter
Why Dehydrate a Sourdough Starter?
Seriously, there are tons of reasons why every baker should master this technique! First up, it’s your ultimate insurance policy. You never have to stress about losing your starter to mold, contamination, or dropping that jar (been there, done that).
The preservation power is incredible – while your regular starter needs weekly fridge feedings, a dehydrated starter can chill in your pantry for literally years without any attention. I know bakers who’ve successfully brought back 2-year-old dried starter like it was no big deal.
For sharing, this method is absolutely unbeatable. Instead of worrying about shipping messy, wet starter that might spoil, just mail a teaspoon of dried flakes in a regular envelope. I’ve sent starter to friends thousands of miles away, and they had bubbling cultures within days.
The gifting aspect is my personal favorite. When someone gets curious about sourdough baking, you can hand them a little jar of dried starter with instructions. They can start their sourdough adventure whenever they’re ready – no pressure for immediate daily feedings!
Tools & Materials Needed
- Parchment paper or silicone baking mat (silicone works better)
- Clean a baking sheet
- Offset spatula for spreading
Optional Equipment (speeds things up):
- Food dehydrator set to lowest temp
- Oven with light only for gentle heat
Storage Supplies:
- Mason jars with tight lids
- Heavy-duty zip-lock bags
- Labels and marker
Preparing the Starter for Dehydration
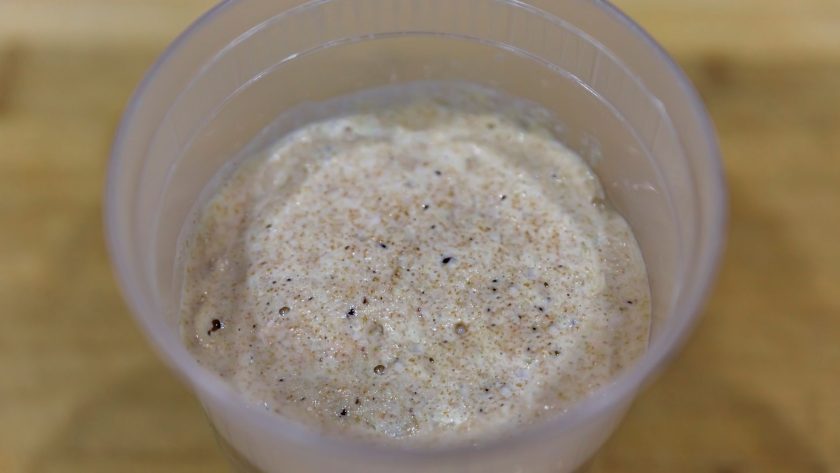
Timing is everything here – you can’t just grab any random starter from your fridge and expect amazing results. The secret is using a recently fed starter that’s at peak activity, which gives you the highest concentration of active yeast and bacteria to survive the drying process.
Here’s your step-by-step prep:
- Feed your starter with equal parts flour and lukewarm water using your normal ratio
- Wait 4-6 hours until you see it doubling in size and getting super bubbly and active
- Catch it at the sweet spot when it’s doubled and full of bubbles, but still holding strong
- Keep it warm (around 75-80°F) during this feeding process to encourage maximum activity
If your starter’s been chilling in the fridge for ages, give it a few good feedings over a couple of days to wake it up properly. A sluggish starter won’t dehydrate nearly as well, so this prep step is totally worth taking seriously. The more active your starter is going into dehydration, the easier it’ll be to bring back to life later!
Methods of Dehydration
Now for the fun part – turning your bubbly starter into shelf-stable flakes! Each method has its perks and quirks.
Air Drying Method
Spread your starter crepe-thin on parchment paper and let room temperature do the work. Takes 24-72 hours, depending on humidity.
Pros:
- Zero equipment needed
- Totally foolproof
Cons:
- Takes forever in humid climates, and you’re at the mercy of weather conditions
Oven Drying Method
Use only your oven light or convection fan (never actual heat!) to create gentle warmth.
Pros:
- Controlled environment
- Faster than air drying
- No worrying about pets or humidity
Cons:
- Easy to accidentally overheat if someone preheats the oven
- Requires constant vigilance
Dehydrator Method
Set your dehydrator to 95°F or below for 4-8 hours.
Pros:
- Most reliable method
- Consistent temperature and airflow
- Almost foolproof results
Cons:
- Requires owning a dehydrator
- Uses electricity
No matter which method you choose, your starter’s done when it peels easily off the surface and snaps like a potato chip when bent. If there’s any flexibility left, give it more time!
Related: Sourdough Hydration Process – Everything You Need to Know and More
Breaking Down & Storing
Once your starter’s completely dry and snapping like a potato chip, it’s time to prep it for storage. Break those crispy sheets into small chips with your hands, or toss them in a plastic bag and crush away. Some folks pulse it briefly in a food processor to make powder, but watch out – too much friction creates heat that can damage your sleeping cultures.
For storage, airtight is everything. Mason jars with tight lids are perfect since glass won’t react with your starter. Heavy-duty zip-lock bags work great too, especially if you’re sharing with friends. Just make sure everything’s bone dry before sealing up.
Here’s the real talk – labeling saves lives (or at least saves sanity). Date that jar and note what kind of flour you used. Mystery containers are the worst when you’re trying to remember what’s what six months later.
Store your containers somewhere cool, dark, and dry – think pantry, not above the stove. Properly stored dried starter stays viable for years. Some bakers keep theirs in the fridge for extra peace of mind, though room temperature storage works just fine if your spot stays consistently cool.
Rehydrating Your Dried Starter
When you’re ready to wake up your sleeping starter, the process is pretty straightforward but needs patience. Revival typically takes 2-4 days, depending on temperature and how old your dried starter is.
Start with about a teaspoon (5-10g) of dried flakes and mix with three times as much room temperature water. Let this sit for a couple of hours until the flakes completely dissolve into a paste-like consistency. Once dissolved, add about 20g of flour and stir until smooth.
Cover loosely and let it sit at room temperature. Don’t freak out if day one shows zilch for activity – totally normal! By day two, you should see some bubbles and maybe slight growth. Keep feeding daily with equal parts flour and water, discarding most of the mixture each time.
Temperature makes a huge difference in revival speed. Keep your reactivating starter somewhere warm (75-80°F) – try the oven with just the light on, or on top of your fridge. Once your starter reliably doubles within 4-8 hours of feeding, it’s ready for baking! Just remember, patience is key – some starters take their sweet time waking up, especially older ones.
Common Mistakes & Tips
- Using heat that’s too high – temperatures above 98°F start killing your beneficial bacteria and wild yeast, leaving you with useless flakes that won’t wake up
- Not spreading thin enough – thick layers create perfect mold conditions where the outside dries but the inside stays moist
- Storage slip-ups – exposure to moisture, extreme temps, or crappy sealing reduces viability big time
- Giving up too early during reactivation – some starters take several days to wake up, especially older dried starter or in cooler spots
- Temperature inconsistency – moving your reactivating starter around constantly slows down the process
- Skipping the prep step – using weak, unfed starter gives you way less viable cultures to work with
- Poor labeling – mystery jars are the worst when you can’t remember what’s what or how old it is
- Assuming bubbling means ready – just because your reactivated starter bubbles doesn’t mean it’s strong enough for bread yet
Your Sourdough Safety Net is Ready!
Now you’ve got the ultimate sourdough insurance policy sitting pretty in your pantry! Dehydrating starter isn’t just a neat trick – it’s peace of mind in flaky form. Whether you’re planning a long vacation, want to share starter love with friends, or just need that backup plan for life’s curveballs, dried starter has your back. The best part? Those little flakes can wait patiently for years until you’re ready to bring them back to bubbly life. So go ahead, take that trip, get busy with life – your sourdough culture will be right there waiting when you get back!
FAQs – How to Dehydrate Sourdough Starter
How to dehydrate your sourdough starter without a dehydrator?
You can easily air-dry your starter! Spread it super thin on parchment paper and let room temperature do the work – takes 24-72 hours depending on humidity. Speed things up by using your oven with just the light on (never actual heat) or place a small fan nearby for better airflow.
Is it better to freeze or dry sourdough starter?
Drying is way better than freezing! Frozen starter can lose viability and some of the yeast dies off during the freezing process. Dehydrated starter stays viable for years without any risk, requires zero maintenance, and is much easier to store and ship to friends.
How long until you can use a dehydrated sourdough starter?
Plan on 2-4 days to get your dried starter ready for baking. Start by dissolving the flakes in water, then feed daily with flour and water until it’s reliably doubling within 4-8 hours. Temperature matters – warmer spots speed up the revival process significantly.
What’s the best way to save sourdough starter for a long time?
Dehydration is hands-down the best long-term storage method. Feed your starter until bubbly, spread thin, and dry completely. Store the flakes in airtight containers in a cool, dark place. Properly dried starter stays viable for years without any maintenance required.

![How to freeze sourdough starter [top tips for success]](https://www.mydailysourdoughbread.com/wp-content/uploads/2023/06/storing-starter-in-freezer-120x120.jpg "How To Freeze Sourdough Starter [Top Tips For Success] 6")