
Last updated on August 16th, 2026
Store-bought croissants never quite hit the same as homemade ones—commercial yeast can’t compete with the flavor natural fermentation brings. That’s where sourdough viennoiserie comes in. Swapping commercial yeast for a sourdough starter unlocks deeper flavor, better texture, and that signature tang home bakers love.
From mixing and laminating to proofing and troubleshooting, everything needed to nail flaky, buttery pastries is right here. Get ready to bake sourdough viennoiserie that rivals any French bakery, with the technique and confidence to make it happen every time.
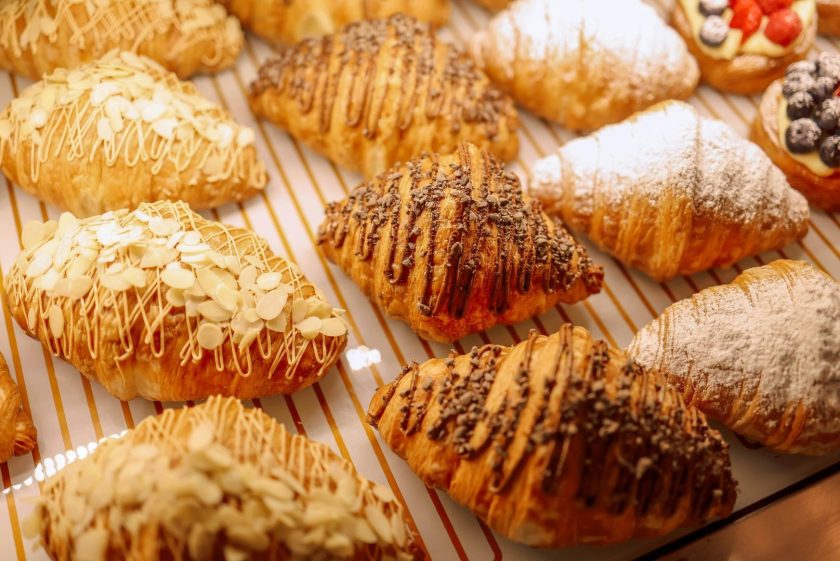
How Sourdough Viennoiserie Differs From Traditional
Traditional viennoiserie uses baker’s yeast (Saccharomyces cerevisiae), which ferments quickly, producing a rise within a couple of hours. Sourdough viennoiserie relies on a sourdough culture instead, requiring a fermentation period that can extend overnight or longer.
This longer fermentation changes the final product in several ways. Flavor becomes more complex, with a mild tang and additional depth that commercial yeast doesn’t produce in a short proof. The extended fermentation also strengthens the gluten network, which helps the dough hold up better during lamination.
Texture differs too: sourdough versions tend to have a chewier bite and a crisper exterior, while traditional viennoiserie is typically softer and more uniform.
The main trade-off is time. Sourdough viennoiserie requires significantly longer proofing than yeast-based recipes, meaning same-day baking isn’t realistic. This longer process is necessary to achieve the flavor and texture improvements associated with natural fermentation.
Related: Long Fermentation Sourdough Bread Recipe
Ingredients
- Bread flour – 500g (high protein, 12–14%)
- European butter – 300g (82%+ fat)
- Whole milk – 150ml
- Eggs – 2 large
- Sugar – 50g
- Salt – 10g
- Active sourdough starter – 150g (100% hydration)
Best Sourdough Viennoiserie Recipes to Try
Sourdough Croissants
Pros:
- Classic flaky texture with dozens of buttery layers
- Versatile base for sweet or savory fillings
- Freezes well before baking for fresh-baked convenience
Tip: Keep your butter block and dough at similar temperatures during lamination to prevent tearing or uneven layers.
Sourdough Pain au Chocolat
Pros:
- Uses the same dough as croissants, minimizing extra prep
- Rich chocolate contrast balances the tangy sourdough flavor
- Popular with both kids and adults, making it a crowd-pleaser
Tip: Use high-quality chocolate batons rather than chips—they hold their shape better during baking and won’t leak out.
Sourdough Kouign-Amann
Pros:
- Caramelized sugar crust creates a unique sweet-and-savory profile
- Impressive presentation for a relatively simple ingredient list
- Long fermentation deepens flavor complexity beautifully
Tip: Work quickly when incorporating sugar into the folds—it draws out moisture and can make the dough sticky if left too long.
How to Make Sourdough Viennoiserie Dough
Making sourdough viennoiserie dough requires attention to fermentation timing and temperature at every stage. Here’s the process:
- Mix ingredients. Combine flour, milk, eggs, sugar, salt, and active sourdough starter until just incorporated.
- Autolyse (optional). Let the flour and liquid rest together for 30–60 minutes before adding salt and starter to improve hydration and gluten development.
- Knead. Work the dough until smooth and elastic, with enough strength to hold structure during lamination.
- Bulk ferment. Let the dough rise at room temperature (around 75°F) for 4–6 hours, or until visibly puffy.
- Shape into a block. Flatten the dough into a rectangle to make lamination easier the next day.
- Retard overnight. Refrigerate the dough for 8–12 hours. This slows fermentation, develops flavor, and firms the dough for lamination.
- Check dough temperature before laminating. Cold, firm dough (around 65°F) laminates most cleanly and resists butter leakage.
Dough temperature control matters throughout this process. Fermentation that runs too warm develops unevenly, while dough that’s too cold stalls out. The overnight retard is especially important, since it not only develops flavor but makes the dough significantly easier to work with during lamination. By the next day, your dough should feel smooth, slightly tacky, and elastic enough to stretch without tearing—signs that the gluten network is ready for folding.
Related: How to Laminate Dough: A Step-by-Step Guide
Laminating Sourdough Viennoiserie Dough
Lamination creates the flaky layers that define viennoiserie. Prepare a beurrage (butter block) by pounding cold butter into an even slab, then encase it fully in your dough, sealing all edges to prevent leakage. Fold the dough using a letter fold, repeating two to three times, with at least 30 minutes of chilling between each fold.
Tips for successful lamination:
- Keep butter cold but pliable—not hard, not soft
- Seal dough edges completely around the butter block
- Chill between every fold to prevent butter from melting into the dough
- Work quickly in warm kitchens to maintain consistent temperature
- Roll dough evenly to keep layers uniform throughout
Consistent temperature control throughout lamination is what produces distinct, flaky layers rather than dense or greasy pastries.
Proofing and Baking Sourdough Viennoiserie
Proper proofing and baking determine whether your lamination work pays off. Follow these steps:
- Shape your pastries after the final lamination fold and chill.
- Place shaped pastries on a lined baking sheet, spaced apart to allow for expansion.
- Proof at room temperature for 2–4 hours, or until visibly puffy and jiggly when the tray is shaken gently.
- Check readiness with the poke test. Press a finger lightly into the dough—it should spring back slowly, leaving a slight indentation.
- Brush with egg wash just before baking for a golden, shiny finish.
- Preheat the oven to 375–400°F, ideally using convection for even heat circulation.
- Bake for 18–22 minutes, or until deep golden brown and layers are visibly crisp.
- Add steam early in baking (optional) to keep the exterior soft just long enough for full expansion before the crust sets.
- Cool on a wire rack for at least 15 minutes before serving to let the interior structure set.
Proofing time varies depending on starter strength, dough temperature, and kitchen conditions, so rely on visual and physical cues rather than the clock alone. Underproofed pastries will bake dense, while overproofed ones may collapse or lose their defined layers. Getting this stage right is what transforms all the earlier lamination work into the crisp, airy texture sourdough viennoiserie is known for.
Common Sourdough Viennoiserie Problems
Butter leaking during baking usually happens when butter gets too warm during lamination or when dough isn’t sealed properly around the butter block. Keeping everything cold and working efficiently helps prevent this.
A dense crumb typically results from insufficient fermentation—if the starter wasn’t active enough or bulk fermentation ran too short, the gluten network won’t develop enough strength to trap gas properly. Over-fermentation causes the same problem by weakening gluten past the point where it can hold structure.
Temperature issues usually cause poor rise during the final proof. Cold kitchens slow fermentation significantly, while warm kitchens can cause butter layers to melt before the dough fully expands.
Weak or uneven layers generally trace back to lamination technique: inconsistent folding, insufficient chilling between folds, or butter that was too soft or too hard. Maintaining butter at a cool, pliable temperature throughout lamination is essential for achieving clean, well-defined layers.
Tips for Better Sourdough Viennoiserie
- Maintain a strong, active starter. Feed it regularly and use it at peak activity—bubbly and doubled in size—for reliable fermentation.
- Monitor dough temperature closely. Small fluctuations affect fermentation timing significantly, so use a thermometer at each stage.
- Plan fermentation around your schedule. Long fermentation windows require mapping out mixing, folding, and baking times in advance.
- Use baker’s percentage. Measuring ingredients as a percentage of flour weight improves consistency and simplifies troubleshooting.
- Practice consistently. Early batches won’t be perfect, but repetition builds familiarity with starter behavior, kitchen conditions, and dough feel at each stage.
Flaky Layers Ahead
You’ve got everything you need to turn a simple starter and some butter into seriously impressive laminated pastries. From understanding what makes sourdough different from the traditional stuff to nailing the dough, folding in those buttery layers, and getting the bake just right, it’s really all about patience and a little practice.
Sure, things might not be perfect on your first try, but now you know exactly why that happens and how to fix it next time. Every fold and every proof teaches you something new about your dough. So grab your starter, flour, and butter, and get ready to create something flaky, buttery, and totally worth the wait.
FAQs
What is a viennoiserie?
Viennoiserie refers to a category of baked goods that sits between bread and pastry, known for their buttery, flaky, and often laminated dough. Classic examples include croissants, pain au chocolat, brioche, and Danish pastries. The term comes from French baking traditions, though it originated in Vienna. What sets viennoiserie apart is its rich, enriched dough made with butter, eggs, and sometimes sugar or milk.





