Most people quit sourdough not because the bread is hard to make, but because the schedule feels impossible to keep. You’re feeding a jar of flour paste on some invisible clock, watching for a rise that may or may not show up on time, and somewhere in there you’re supposed to also bake actual bread. It’s a lot to hold in your head at once.
Let me help: sourdough is really two separate routines running side by side, not one big complicated process. There’s the job of keeping your starter alive, and there’s the job of turning it into bread. They run on different schedules and don’t need to happen at the same time.
Once the routine clicks, it’s such a fun thing to have going in your kitchen. There’s a jar on the counter that’s alive and doing something, your house smells like a bakery on baking days, and you end up with bread that tastes better than what you may have tried before. And once you’ve got two or three go-to moves for both the loaf and the discard, it stops being a project and becomes just part of how your kitchen runs.
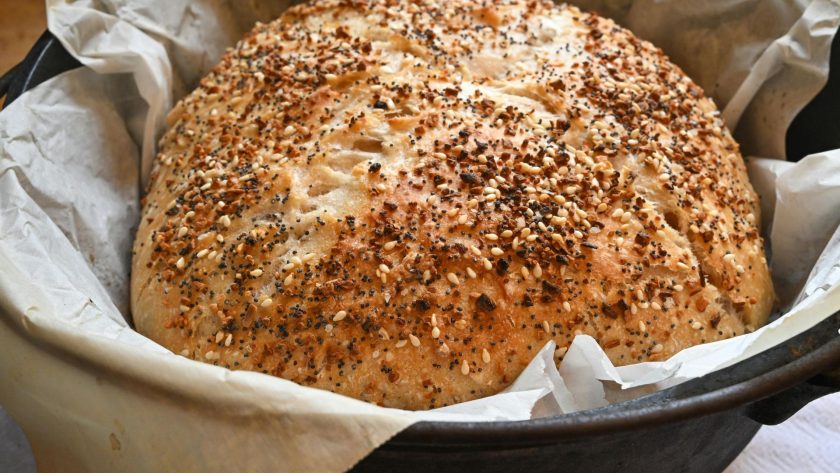
Table of Contents
- What "Workflow" Actually Means Here
- The Starter Workflow (aka Keeping It Active)
- The Discard Workflow (and Using What You Remove)
- A Beginner Baking Workflow Using Active Starter
- A Faster Discard Baking Workflow (No Waiting Required)
- Beginner Mistakes and Quick Fixes (Don't Panic!)
- Your Starter Will Tell You What It Needs, Eventually
- FAQs
What “Workflow” Actually Means Here
A sourdough workflow is just the repeatable sequence of steps you follow, on a schedule, so you’re not guessing every time.
So there is:
- Starter workflow — feeding and maintaining your starter so it stays active and bakeable.
- Baking workflow — the steps from mixing dough to pulling a loaf out of the oven.
Both have an “active” version (using a starter that’s fed and bubbly) and a “discard” version (using the portion you remove before or after feeding). You’ll use both regularly, so it helps to plan for them from day one instead of treating discard as an afterthought.
The Starter Workflow (aka Keeping It Active)
An active starter is one that’s been fed recently enough to be rising, bubbling, and roughly doubling in size within a predictable window.
Here’s a simple, low-stress feeding routine if you’re a beginner.
Daily Feeding Routine (Room Temperature)
| Step | What to Do | Timing |
|---|---|---|
| 1 | Discard all but about 30-50g of starter | Once a day |
| 2 | Add equal parts flour and water by weight (e.g. 50g flour, 50g water) | Right after discarding |
| 3 | Stir until no dry flour remains | Immediately |
| 4 | Cover loosely and leave at room temperature | 6-12 hours, depending on warmth |
| 5 | Check for doubling and a domed or slightly collapsing top | Peak activity window |
If your kitchen runs warm, your starter will peak faster (sometimes in 4-6 hours). In a cooler kitchen, give it more time.
A rubber band around the jar at the starting level makes it easy to track how much it’s grown without guessing.
Signs Your Starter Is Ready to Bake With
- It has roughly doubled or more since feeding
- The surface is domed, bubbly, or just starting to dip in the middle
- It smells tangy and yeasty, not sharp or like nail polish remover
- A small spoonful floats in water (the classic “float test,” though it’s not required)
Storing a Starter If You Won’t Bake for a While
If daily feeding isn’t realistic, move your starter to the fridge and feed it once a week instead.
Pull it out and let it warm up, then feed it once or twice at room temperature before baking to wake it back up.
The Discard Workflow (and Using What You Remove)
Discard is just unfed starter, and it still has flavor and some fermentation power even without being an active leavener. Instead of tossing it, keep a jar in the fridge and add to it whenever you feed your starter.
Most discard-based recipes don’t need the discard to be bubbly or recently fed.
Quick, low-effort ways to use it:
- Sourdough discard pancakes or waffles
- Crackers (mix discard with a little oil, salt, and herbs, roll thin, bake at 350°F/175°C for 15-20 minutes until crisp)
- Discard added to pizza dough for extra flavor
- Banana bread or muffins with a portion of discard swapped in for some flour and liquid
- Flatbreads or naan cooked in a hot skillet
Active Starter vs. Discard: When to Use Which
| Active Starter | Discard | |
|---|---|---|
| Leavens bread on its own | Yes | No, or very slowly |
| Best used for | Loaves, boules, sandwich bread | Pancakes, crackers, quick breads |
| Needs to be fed first | Yes | No |
| Needs to double before use | Yes | No |
| Good for zero-waste baking | Not the point | Exactly the point |
A Beginner Baking Workflow Using Active Starter
This is a realistic timeline for a single loaf, spread across a day rather than crammed into a few hours. Times are approximate and depend on your kitchen’s temperature.
- Morning: Feed your starter. Use the ratio above so it peaks in the afternoon or evening.
- Once starter peaks: Mix the dough. Combine flour, water, active starter, and salt. Many beginner recipes skip a separate levain step and mix the starter straight into the dough, which keeps things simpler.
- Bulk fermentation (4-6 hours at room temperature). During this window, do a few sets of stretch-and-folds, spaced about 30 minutes apart for the first two hours, then leave the dough alone to rise.
- Shape the dough. Once it’s noticeably puffier and holds some structure, shape it into a round or oval and place it in a floured bowl or banneton.
- Cold retard overnight (8-14 hours in the fridge). This step is optional but makes the schedule far more manageable, since it lets you bake the next morning instead of staying up late.
- Bake. Preheat your oven and a Dutch oven (or baking stone) to 450°F (230°C) for at least 30 minutes. Score the dough, bake covered for about 20 minutes, then uncovered at the same temperature for another 20-25 minutes until deeply golden.
Sample Weekly Schedule for a Beginner
| Day | Starter Task | Baking Task |
|---|---|---|
| Monday | Feed starter | Rest day |
| Tuesday | Feed starter | Rest day |
| Wednesday | Feed starter (morning) | Mix dough afternoon, bulk ferment, shape, fridge overnight |
| Thursday | Feed starter | Bake in the morning |
| Friday | Feed starter | Use discard for pancakes or crackers |
| Saturday | Feed starter | Rest day |
| Sunday | Feed starter | Rest day |
You don’t need to bake every week to keep this going. Feeding your starter takes a couple of minutes a day, and the baking days can be as occasional as your schedule allows.
A Faster Discard Baking Workflow (No Waiting Required)
If the multi-hour fermentation timeline feels like too much right now, start with discard recipes that use commercial yeast or baking soda for lift instead of relying on fermentation. These work on a normal recipe timeline, no feeding schedule or bulk ferment required.
- Mix discard into pancake or waffle batter along with the usual baking powder or baking soda, no extra rise time needed
- Fold discard into muffin or quick bread batter in place of some of the flour and liquid
- Make crackers, which use no leavening at all and just need a hot oven
All three go from mixing bowl to plate in under an hour, which makes them a good first project before committing to a full loaf.
This gives new bakers a low-stakes way to get comfortable with sourdough’s tangy flavor before committing to a full loaf timeline.
Beginner Mistakes and Quick Fixes (Don’t Panic!)
| Mistake | Why It Happens | Fix |
|---|---|---|
| Starter isn’t rising | Too cold, underfed, or too young | Move to a warmer spot, feed more often, give it another week |
| Bread turns out dense | Baked with unripe starter, or under-fermented dough | Wait for a fuller rise before mixing, extend bulk fermentation |
| Starter smells off | Normal tangy smell mistaken for spoilage | Sharp acetone smell means it’s hungry, not spoiled; feed it |
| Dough is too sticky to shape | High hydration for a beginner recipe | Lower the water percentage slightly, or wet your hands instead of adding flour |
| Discard pile keeps growing | Feeding without a discard-use plan | Set a weekly “discard recipe” day so it doesn’t pile up |
Your Starter Will Tell You What It Needs, Eventually
Give this a few weeks before judging whether it’s working.
The first several loaves might come out shorter or denser than what you pictured, and that’s mostly your starter and your kitchen still introducing themselves to each other. Every home is different: a drafty apartment in winter and a warm kitchen in summer will push the same starter through wildly different timelines, so the hours listed in any recipe (including this one) are a starting point, not a rule.
The routine gets easier to read over time. There’s a real payoff waiting on the other side of that learning curve: a warm loaf with a crackling crust, a stack of pancakes made from what used to be trash, and a little jar on your counter that’s basically a low-maintenance pet that feeds you.
FAQs
How often do I need to feed my sourdough starter?
Once a day at room temperature, or once a week if it’s stored in the fridge.
Can I bake bread with discard instead of active starter?
Not for a standard loaf, since discard usually lacks the rising power needed. It works well for pancakes, crackers, and other recipes that use an additional leavening agent.
How long does it take to build a sourdough starter from scratch?
Around 7 to 14 days of daily feeding before it’s consistently active enough to bake with.
Do I have to do an overnight cold retard?
No, it’s optional. It mainly exists to make the schedule fit around a normal day, and it can also improve flavor and crust.
What ratio should I use to feed my starter?
A 1:1:1 ratio of starter, flour, and water by weight is a reliable starting point for beginners.