
Last updated on December 13th, 2025
A sourdough starter is a bubbly mixture of flour and water teeming with wild yeast and beneficial bacteria that work together to make bread rise naturally. Learning how to make sourdough starter with yeast gives the fermentation process a serious head start. Adding commercial baker’s yeast means you’ll get that signature tangy sourdough flavor without waiting days for those first bubbles to appear. You’re creating a living culture with lactic acid bacteria, complex flavors, and natural leavening power—just jumpstarting things with store-bought yeast. Within a few days, your starter develops its own personality as wild yeast from your environment moves in and makes itself at home.
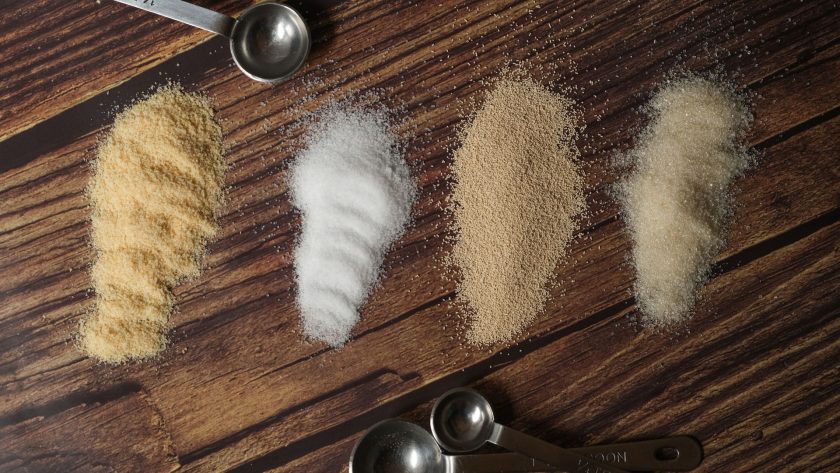
Table of Contents
- What You'll Need
- Understanding Yeast in Starters
- Mixing Your First Batch
- Feeding the Starter
- Temperature & Environment
- Troubleshooting Common Issues
- Using Your Starter
- Storing & Long-Term Care
- Ready to Bake Amazing Sourdough Bread?
- FAQs – How to Make Sourdough Starter With Yeast
What You’ll Need
- 1 cup (120g) all-purpose or bread flour (unbleached preferred)
- 1 cup (240ml) lukewarm water (filtered or dechlorinated)
- 1 tablespoon active dry yeast
- Glass jar (quart-sized, wide-mouth)
- Kitchen scale (optional but helpful)
- Spoon or spatula for mixing
Understanding Yeast in Starters
When you add commercial baker’s yeast to your starter, you’re introducing billions of organisms ready to ferment immediately. Baker’s yeast is cultivated specifically to make dough rise quickly and consistently—it’s your reliable workhorse that begins fermenting sugars right away, producing carbon dioxide bubbles and alcohol. Wild yeast, already floating in your flour and kitchen air, is slower but more complex, creating that characteristic sourdough tang. But yeast isn’t working alone. Lactobacillus bacteria are the real MVPs, producing lactic acid and acetic acid that give sourdough its sour notes. These bacteria multiply over the first few days, creating an acidic environment that wild yeast loves but bad bacteria hate—your starter builds its own security system. The magic happens when commercial yeast jumpstarts fermentation, creating perfect conditions for wild yeast and bacteria to move in. Within days of regular feeding, your starter transitions from yeast-dominant to a balanced ecosystem. With added yeast, you’re looking at a bubbling, active starter in 24-48 hours instead of 7-14 days—a total game-changer.
Related: Want to Substitute Sourdough Starter for Yeast? Here’s How!
Mixing Your First Batch
Time to get started with your first batch. Follow these steps and you’ll have your starter mixed and ready to ferment in just minutes.
- Combine your ingredients. In a medium-sized bowl or your glass jar, mix 1 cup of flour, 1 cup of lukewarm water (90-100°F), and 1 tablespoon of active dry yeast. The water should feel barely warm on your wrist—too hot kills the yeast, too cold leaves it sluggish.
- Stir thoroughly. Use a spoon or spatula and mix everything until there aren’t any dry flour pockets hiding at the bottom. The consistency should look like thick pancake batter—smooth enough to stir easily but not watery. It’ll be a bit shaggy at first, and that’s fine.
- Scrape down the sides. Make sure you scrape the sides of your jar or bowl. Those crusty bits left clinging to the sides can dry out and sometimes develop issues later.
- Transfer and mark. Once everything’s mixed, transfer to your clean glass jar if you haven’t already. What you’ve created is a 100% hydration starter—equal parts flour and water by weight. If it looks too thick, add a splash more water. Too soupy? Stir in a little flour. Texture matters more than exact measurements.
- Cover loosely. Cover with a lid (not sealed tight), cloth, or plastic wrap with holes poked in it. Your starter needs to breathe—it’s producing carbon dioxide that needs somewhere to go.
- Mark the level and wait. Stick a rubber band or piece of tape at the current level so you can track growth. Find a cozy spot for your jar and let it hang out for 24 hours.
Feeding the Starter
Feeding your starter is basically breakfast for yeast—once you get into a rhythm, it becomes second nature. After your initial 24-hour rest, start feeding once daily. Discard about half of what’s in your jar, then add fresh flour and water. Why discard? Without removing some, you’ll end up with a bathtub full of starter by week’s end. The standard feeding ratio is 1:1:1—equal parts starter, flour, and water by weight. If you’ve got 100 grams of starter after discarding, add 100 grams of flour and 100 grams of water.
Your starter will tell you when it’s happy—it should rise noticeably after feeding, sometimes doubling or tripling in volume. You’ll see bubbles throughout, not just on top, and it should smell pleasantly yeasty, maybe a little tangy. Pay attention to the rise and fall pattern. A healthy starter rises a few hours after feeding, then gradually falls as it runs out of food. During the first few days, your starter might rise super fast thanks to the commercial yeast. As wild yeast establishes itself over the next week, timing will stabilize. Keep feeding every 24 hours for at least 5-7 days until it’s bubbling consistently and rising predictably.
Temperature & Environment
Your starter’s picky about where it lives—get the temperature right and you’ll have a happy, bubbly starter in no time. The ideal fermentation temperature sits between 75-82°F. In this range, yeast and bacteria work together perfectly to create that rise and tangy flavor. If your home’s around 68-72°F (typical room temperature), your starter will still work—it’ll just take longer to rise after each feeding. When temperatures drop below 68°F, fermentation slows way down.
You might notice your starter taking forever to show activity or barely rising at all. It’s not dead, just sluggish. When things heat up above 85°F, fermentation goes into overdrive—your starter might blow through food too quickly, develop overly sour flavor, or get soupy. Look for naturally warm spots in your kitchen. The top of the refrigerator is classic since the compressor generates gentle heat.
Some folks keep their starter in the oven with just the light on—but you absolutely must remember it’s there before preheating. Near (not on) a radiator or heating vent works in winter, or nestle your jar inside a small cooler with warm water nearby. Temperature doesn’t just affect speed—it impacts flavor too. Cooler fermentation (around 68-70°F) produces more acetic acid, giving bread a sharper, vinegary tang. Warmer fermentation (around 78-80°F) favors lactic acid, creating milder, yogurt-like sourness.
Troubleshooting Common Issues
Even experienced bakers run into hiccups. Most problems have easy fixes, so don’t panic at the first sign of weirdness.
- Slow starter not rising: Check temperature first—if your kitchen’s cool, move it somewhere warmer. Feed with lukewarm water instead of room-temperature water, or add a tablespoon of whole wheat or rye flour for extra nutrients to jumpstart activity.
- Weird smells: Mild sour smell is normal—it’s sourdough. Nail polish remover or super vinegary scent means it’s hungry and over-fermented. Just feed it and it’ll bounce back. Vomit or rotten smell? Young starters sometimes go through a funky phase. Give it more feedings—if the smell improves, you’re golden.
- Gray liquid (hooch): That grayish or brownish liquid on top is alcohol from fermentation—not dangerous, just a sign your starter’s hungry. Pour it off or stir it back in (mixing adds more sour flavor), then feed as usual.
- Mold: This is game over. Mold looks fuzzy and can be white, green, blue, black, pink, or orange. If you spot fuzzy growth or colored streaks, toss everything and start fresh. Don’t try saving it—mold spores have contaminated what you can’t see. Prevent mold with cleanliness and regular feeding.
- Water quality issues: High chlorine in city water can inhibit fermentation. Switch to filtered or bottled water, or let tap water sit uncovered for 24 hours before using.
Related: Sourdough vs Yeast: What’s the Difference?
Using Your Starter
You’ve been feeding this thing for days—now, when can you actually bake with it? Your starter’s ready when it passes the consistency test. After feeding, it should reliably double (or more) in volume within 4-8 hours, then gradually fall back down. This rise-and-fall pattern should happen predictably every time you feed it. If you’re seeing this consistently for at least 3-4 feedings in a row, you’ve got a mature starter. Look for lots of bubbles—not just on the surface, but throughout when you look through the jar’s side. The texture should be light and airy, almost mousse-like.
When you stir it, it should feel stretchy and elastic, not dense. There’s also the float test—drop a small spoonful into a glass of room-temperature water. If it floats, it’s full of gas bubbles and ready to leaven bread. For your first loaf, don’t overcomplicate things. Look for a simple beginner sourdough recipe. Use your starter at peak activity—when it’s risen high, super bubbly, and hasn’t started falling yet. A typical recipe calls for 50-200 grams of starter. The basic flow: mix the dough, let it ferment for hours (bulk fermentation), shape it, let it rise again (final proof), then bake. Sourdough takes 8-24 hours from start to finish. Don’t expect perfection on your first try—it’ll still taste amazing.
Storing & Long-Term Care
You can’t bake every day, so let’s talk about keeping your starter alive without it taking over your life.
Once your starter’s mature and reliably active, move it to the fridge for cold storage. This is the easiest long-term maintenance method. Cold temperatures slow fermentation way down, so instead of feeding daily, you only need to feed once a week—or honestly, less frequently if you’re not baking regularly. Before refrigerating, give your starter a good feeding and let it sit at room temperature for about an hour so fermentation gets going, then pop it in the fridge. When you’re ready to bake, pull it out, let it come to room temperature, and give it a feeding. Within 4-8 hours, it should be bubbly and ready.
You can freeze sourdough starter for longer-term storage, though it’s not ideal. Spread a thin layer on parchment paper, freeze solid, then break into pieces and store in a freezer bag. When you want to use it, thaw and give it several feedings over a few days. The gold standard for long-term storage is drying your starter. Spread a thin layer on parchment, let it dry completely (24-48 hours), then break into flakes and store in an airtight container. Dried starter lasts for years at room temperature. To revive, mix flakes with equal parts flour and water, then start feeding regularly. Within days, it’ll be bubbling again.
Ready to Bake Amazing Sourdough Bread?
Making sourdough starter with yeast is your shortcut to homemade bread without the long wait—just flour, water, and a tablespoon of yeast gets you bubbling in 24-48 hours instead of two weeks.
The beauty of this method is that commercial yeast kickstarts fermentation while wild yeast and beneficial bacteria naturally take over, creating that authentic sourdough tang.
Keep your starter between 75-82°F for the perfect balance, feed it daily with equal parts flour and water for 5-7 days, and you’ll know it’s ready when it doubles consistently after feeding.
Once mature, refrigerate it and feed just once a week, or dry it for long-term storage.
You’ve got everything you need to create a thriving starter that’ll produce incredible homemade bread for years to come!
FAQs – How to Make Sourdough Starter With Yeast
Can you make sourdough starter from yeast?
Yes, you can make sourdough starter using commercial yeast as a jumpstart. Mix 1 cup flour, 1 cup lukewarm water, and 1 tablespoon active dry yeast in a glass jar. The commercial yeast accelerates fermentation while wild yeast and bacteria from your environment naturally colonize the starter over the next few days, creating authentic sourdough flavor and a balanced, active culture.
How do I create my own sourdough starter?
Combine 1 cup flour, 1 cup lukewarm water, and 1 tablespoon active dry yeast in a clean glass jar. Stir well, cover loosely, and let sit at room temperature for 24 hours. Feed daily by discarding half and adding equal parts fresh flour and water. After 5-7 days of consistent feeding, your starter will be bubbly, active, and ready for baking.
Related Articles:
![How to freeze sourdough starter [top tips for success]](https://www.mydailysourdoughbread.com/wp-content/uploads/2023/06/storing-starter-in-freezer-120x120.jpg "How To Freeze Sourdough Starter [Top Tips For Success] 2") How to Freeze Sourdough Starter [Top Tips For Success]
How to Freeze Sourdough Starter [Top Tips For Success]
![How to keep sourdough starter warm [best tips]](https://www.mydailysourdoughbread.com/wp-content/uploads/2023/07/a-bubbly-starter-on-a-cooling-rack-120x120.jpg "How To Keep Sourdough Starter Warm [Best Tips And Why You Need To] 3") How to Keep Sourdough Starter Warm [Best Tips and Why You Need To]
How to Keep Sourdough Starter Warm [Best Tips and Why You Need To]
 How to Discard Sourdough Starter – Tips For Disposing Of Your Starter
 How to Tell When Your Sourdough Starter is Ready for Baking
![Easy recipes using sourdough starter [with step by step guide]](https://www.mydailysourdoughbread.com/wp-content/uploads/2025/05/10-Recipes-Using-Sourdough-Starter-Beyond-Basic-Bread-120x120.jpg "10 Recipes Using Sourdough Starter (Beyond Basic Bread!) 6") 10 Recipes Using Sourdough Starter (Beyond Basic Bread!)
10 Recipes Using Sourdough Starter (Beyond Basic Bread!)
