
Last updated on February 18th, 2026
You’ve been feeding your starter for days, maybe weeks, and now you’re staring at a jar of bubbly goo wondering: is this thing actually ready? It’s one of the most common questions new sourdough bakers have, and honestly, it trips up experienced bakers too. Unlike commercial yeast, which you just tear open and pour in, a sourdough starter is a living culture. It doesn’t come with a green light that flicks on when it’s good to go.
The good news is that your starter is constantly giving you signals. You just need to know what to look for. Once you understand the signs of a healthy, active starter, you’ll never second-guess yourself at the counter again. Let me show you what to look for, what the tests actually tell you, how temperature and flour affect your results, and what to do when your starter is dragging its feet.
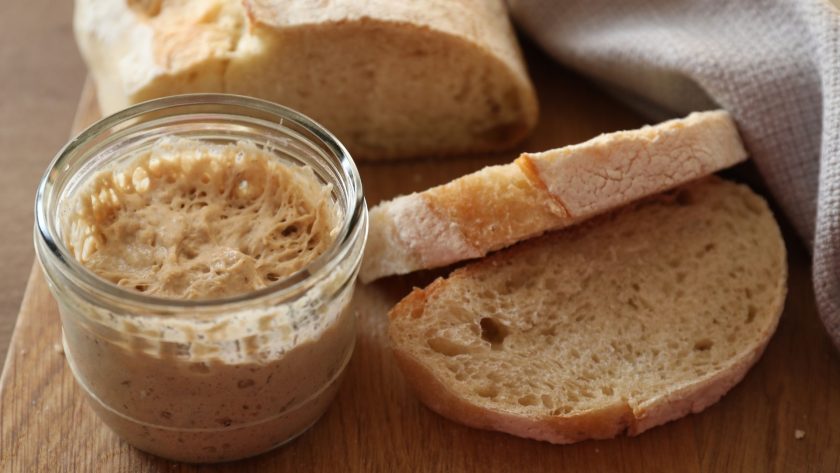
Table of Contents
- The Basics
- The 4 Signs Your Starter Is Ready
- The Science Behind Starter Readiness
- Does My Starter Have to Double?
- The Float Test: Does It Work?
- How Temperature and Flour Affect Readiness
- How to Speed Up a Sluggish Starter
- Common Mistakes When Checking Readiness
- Troubleshooting an Unready Sourdough Starter
- When Exactly Should I Use My Starter?
- Ready to Bake?
- FAQs – When Is Sourdough Starter Ready?
The Basics
Your sourdough starter is ready when it:
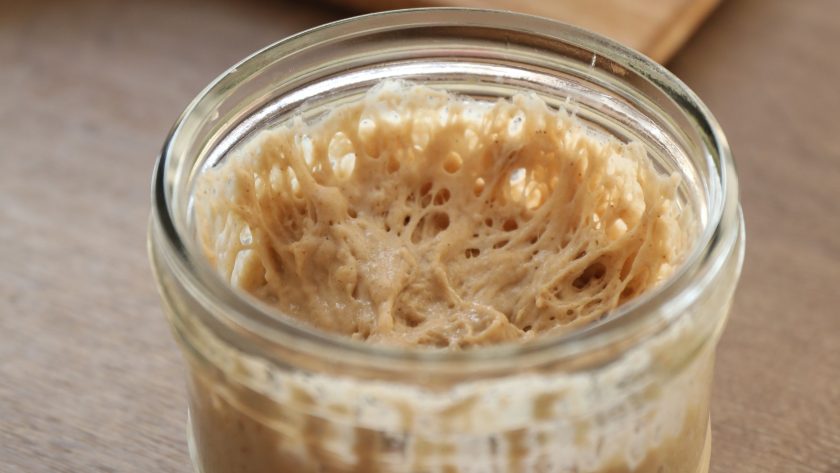
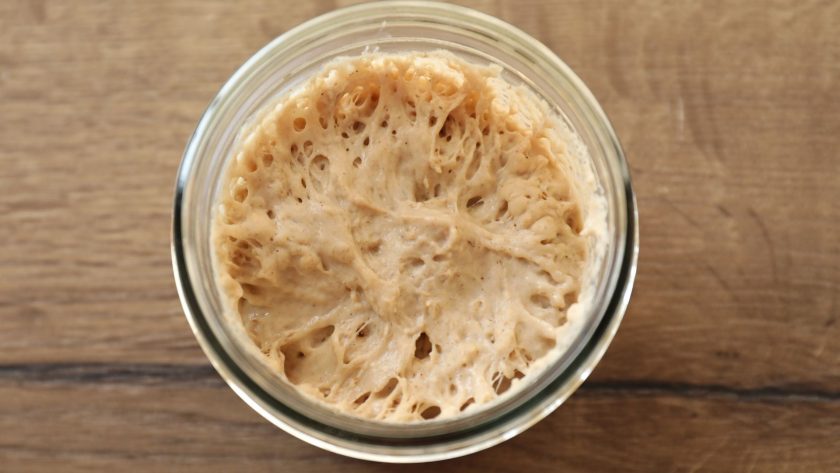
- Is actively bubbling throughout (not just on top)
- Doubles in size within 4–6 hours of feeding
- Smells pleasantly tangy, like yogurt or mild vinegar
- Has a domed surface and a stretchy, elastic texture
Let’s get into the details, the science, visible signs, tests, and what to do when your starter needs a boost.
The 4 Signs Your Starter Is Ready
| Sign | What to Look For | Ready? |
|---|---|---|
| Bubbles | Bubbles throughout the jar, not just on the surface | ✅ Yes |
| Rise | Doubled in size within 4–6 hours of feeding | ✅ Yes |
| Aroma | Mildly tangy, like yogurt or light vinegar | ✅ Yes |
| Texture | Stretchy and elastic when you lift a spoon | ✅ Yes |
| Flat with no bubbles | Little to no activity after feeding | ❌ Not yet |
| Liquid on top (hooch) | Clear liquid layer. Starter is hungry. | ❌ Feed first |
| Smells like nail polish remover | Overfermented or overly acidic | ❌ Feed again |
Tip: Use a rubber band around your jar at the starting level so you can easily track the rise after each feeding.
Related: 10 Active Sourdough Starter Recipes
The Science Behind Starter Readiness
When your starter bubbles, two processes are happening at once. Yeast breaks down glucose and produces carbon dioxide (the bubbles that make bread rise) and ethanol. Bacteria produce acids: mainly lactic acid, which gives a mild, yogurt-like tang, and acetic acid, which gives a stronger, vinegary bite.
As fermentation progresses, the pH of your starter drops. A mature starter sits between pH 3.5 and 5.0. Once the pH falls below 4.2, any harmful bacteria are killed off, which is why an active starter is actually very safe. The ratio of lactic to acetic acid shifts with temperature and hydration, which is why your starter’s flavor can vary week to week even with consistent feeding.
Does My Starter Have to Double?
Doubling is a great sign, but it’s not the only one. Some high-hydration starters stay flatter because the gas escapes more easily, but they can still be perfectly active. Whole wheat and rye starters also tend to rise less dramatically than white flour starters.
Rule of thumb: If your starter isn’t strong enough to lift itself, it’s not strong enough to lift a loaf of bread dough. Look at the full picture: bubbles, aroma, and texture, not just height.
The Float Test: Does It Work?
Drop a small spoonful of starter into a glass of room-temperature water. If it floats, it’s ready. If it sinks, feed it and try again later.
How to Do the Float Test Correctly
- Do not stir the starter before testing. You’ll release the gas bubbles.
- Scoop gently from the top to capture as much trapped CO₂ as possible
- Use a glass wide enough that the starter doesn’t stick to the sides
- Watch immediately. The instant reaction is what matters.
| Result | What It Means |
|---|---|
| ✅ Floats | Good sign. Starter is likely ready (but confirm with other signs). |
| ❌ Sinks | May not be ready, or may be past peak, high hydration, or whole grain |
| ⚠️ False positive | Starters under 4 weeks old may float but aren’t mature enough for great bread |
| ⚠️ False negative | High-hydration starters can break apart in water even when ready |
The float test is a helpful check, not a definitive one. Use it alongside the visual and smell checks above.
How Temperature and Flour Affect Readiness
| Factor | Effect on Fermentation | Notes |
|---|---|---|
| Temperature < 70°F | Slower rise, more acetic acid (tangier flavor) | Move to a warmer spot |
| Temperature 76–80°F | Ideal. Active rise within 4–6 hours. | Sweet spot for most starters |
| Temperature > 85°F | Stresses microbes; can weaken starter | Avoid prolonged heat |
| Bread flour (12–14% protein) | Better gluten = taller rise, more gas trapped | Good for strong starters |
| Whole wheat / rye flour | More nutrients for bacteria; denser rise | Great for sluggish starters |
| Chlorinated tap water | Can inhibit yeast growth | Switch to filtered or spring water |
How to Speed Up a Sluggish Starter
- Warm it up. Move your starter somewhere between 76°F and 80°F, near a warm appliance, in the oven with just the light on, or in a sunny spot for 1–2 hours. Don’t go above 85°F.
- Switch to rye or whole wheat flour. These flours are packed with nutrients that feed yeast and bacteria. Even swapping 20–30% of your flour can make a noticeable difference.
- Feed more frequently. Feed up to 3 times a day for a few days. Discard about half before each feeding so the microbes have plenty of fresh food.
- Check your water. If you’re using tap water, switch to filtered or spring water. Chlorine can slow fermentation.
- Fix the hydration. Aim for 100% hydration (equal parts flour and water by weight). Too much water and the starter can’t hold gas; too little and fermentation slows.
Tip: If your starter bubbles vigorously but won’t rise, it’s likely too wet. Stir in flour a tablespoon at a time until it holds its shape a bit better.
Common Mistakes When Checking Readiness
| Mistake | Why It’s a Problem | Fix |
|---|---|---|
| Testing too early | Young starters (under 2 weeks) show false activity from unwanted bacteria | Wait until it reliably doubles in 4–6 hours before baking |
| Panicking over hooch | The liquid on top just means the starter is hungry, not ruined | Pour it off and feed as normal |
| Thinking a collapsed starter is dead | A collapsed starter is just past its peak. It still has life. | Feed it again and wait |
| Wrong feeding ratio | Too much old starter = slow activity; too little = weak start | A 1:1:1 ratio (starter:flour:water by weight) works for most situations |
| Using cake or pastry flour | Too low in protein to support bread fermentation | Use bread flour or all-purpose flour instead |
Related: How to Use Sourdough Starter Like a Pro (Even as a Beginner)
Troubleshooting an Unready Sourdough Starter
| Problem | Likely Cause | What to Do |
|---|---|---|
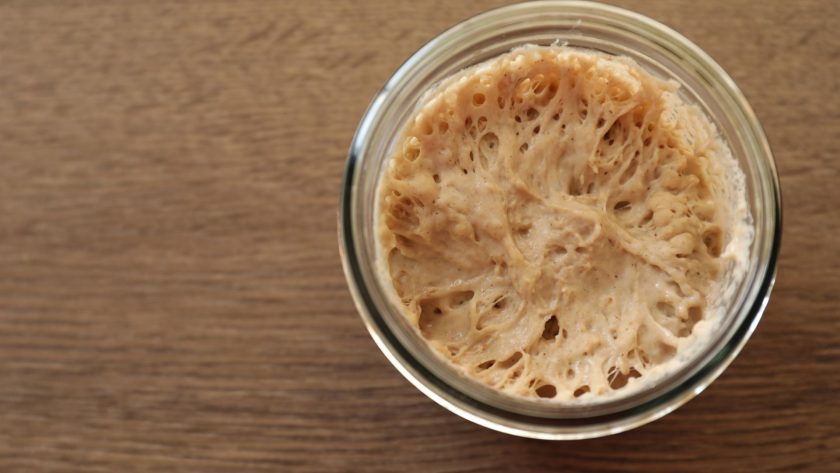
| Barely bubbling, sluggish activity | Temperature too low, even 70°F can slow things down significantly | Move to a warmer spot (75°F to 80°F) and use warm water at the next feeding |
| Still slow after warming up | Yeast population too small or weak | Feed up to 3 times a day for a couple of days; discard half before each feeding so microbes have plenty of fresh food |
| Active bubbles but no rise | Starter is too wet and can’t hold its structure as gas tries to lift it | Stir in flour a tablespoon at a time until the consistency is a smooth, wet dough rather than runny like pancake batter |
| Consistently weak despite regular feeding | Flour lacks enough nutrients for the bacteria and yeast | Switch to whole wheat or rye flour, or add a portion of it to your regular flour for a few feedings |
| Starter is over 3 months old and still struggling | Microbial community may need a reset | Feed exclusively with whole wheat or rye flour for a few days to strengthen it |
| Using cake or pastry flour | Too low in protein to support fermentation | Switch to bread flour or all-purpose flour immediately |
When Exactly Should I Use My Starter?
Use your starter at its peak: the moment it has fully risen and is just beginning to sag under its own weight. At this point, yeast activity is at its highest and the gas-trapping ability of the gluten is strongest. For most starters fed at room temperature, peak is around 4–6 hours after feeding.
The surface will look domed with visible bubbles throughout. If you see the top starting to wrinkle or flatten, you’ve passed the peak. Feed again and try next cycle.
Ready to Bake?
Trust the process, pay attention to what your starter’s showing you, and you’ll know exactly when it’s ready to bake that yummy, perfect loaf.
FAQs – When Is Sourdough Starter Ready?
How do you know if sourdough starter is ready?
Look for active bubbling throughout, a size increase of roughly double within 4–6 hours of feeding, a pleasant tangy smell, and a stretchy texture when stirred. All four signs together mean you’re good to bake.
What happens if I use my sourdough starter too early?
Your bread won’t rise properly. An immature starter doesn’t have enough yeast activity to produce sufficient CO₂, resulting in a dense, heavy loaf with poor oven spring. Wait until your starter consistently peaks within 4–6 hours.
At what stage should I use my sourdough starter?
Use your starter at its peak—when it has doubled in size and is just beginning to sag under its own weight, typically 4-6 hours after feeding. At this point, it has maximum yeast activity and gas-trapping capability. The surface should look domed with plenty of bubbles throughout, and it should pass the float test.
What does ready sourdough starter smell like?
A healthy, ready starter smells pleasantly sour, similar to plain yogurt, mild vinegar, or a light beer. A very sharp or nail-polish-remover smell means it’s overfermented; feed it and wait for the next cycle.
Can I use my starter after it collapses?
It’s best to avoid it. A collapsed starter is past peak, meaning the yeast activity has slowed and the gas has mostly escaped. You’ll get better results waiting for the next rise after feeding.
How long does it take for a brand-new starter to be ready?
Most new starters take 5–14 days to establish a stable community of yeast and bacteria. Early bubbling in the first 1–3 days is often from unwanted bacteria and doesn’t mean the starter is mature enough for baking.
Related Articles:
 10 Simple Sourdough Dinner Ideas: Beyond the Basic Loaf
 Delicious Sourdough Rolls From Starter
![Easy recipes using sourdough starter [with step by step guide]](https://www.mydailysourdoughbread.com/wp-content/uploads/2025/05/10-Recipes-Using-Sourdough-Starter-Beyond-Basic-Bread-120x120.jpg "10 Recipes Using Sourdough Starter (Beyond Basic Bread!) 7") 10 Recipes Using Sourdough Starter (Beyond Basic Bread!)
10 Recipes Using Sourdough Starter (Beyond Basic Bread!)
 Sourdough Cinnamon Coffee Cake Recipe: 9 Steps to Irresistible Bakery-Style Results
 Strawberry Cinnamon Rolls Recipe: A Sweet Twist on a Classic Favorite
