
That jar on your counter can feel like a needy houseguest, always wanting something. Understanding starter health and maintenance is what separates a thriving culture from one that just limps along. Once you know what to look for, keeping it happy becomes second nature—no more guessing whether it’s ready to bake with or needs another day. Here’s everything on what a healthy starter looks like, how to feed it based on your actual schedule, how temperature changes the game, and simple ways to bring a sluggish starter back to full strength, all in one place.
What Does a Healthy Sourdough Starter Look Like?
Bubbles, Rise, and the Signs of Life
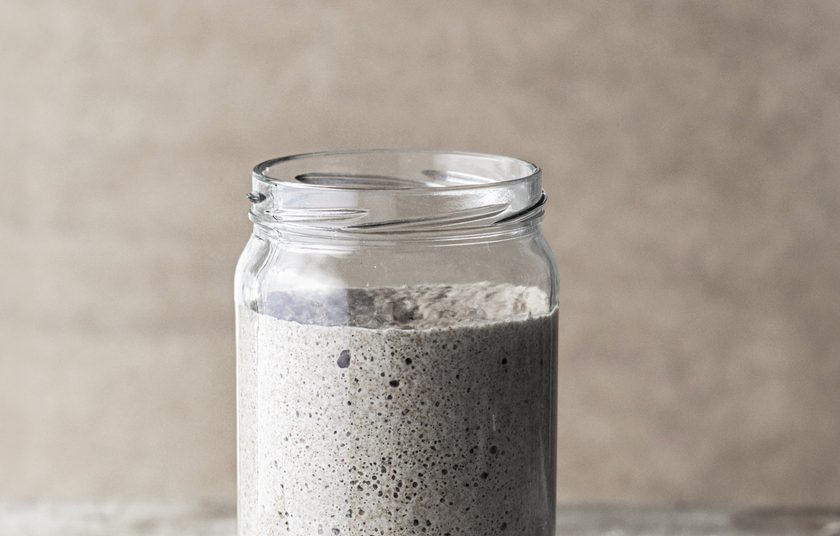
Peek under the lid of a thriving starter and you’ll see it: bubbles scattered through the mixture like tiny air pockets in a sponge. That’s your wild yeast and lactic acid bacteria hard at work, turning flour and water into carbon dioxide. A few hours after feeding, a healthy starter should noticeably rise — doubling or even tripling before settling back down. That rise-and-fall pattern is the fermentation cycle doing exactly what it’s supposed to do.
The Smell and Texture Test
Give it a sniff — a healthy starter smells tangy and yeasty, maybe faintly fruity. A harsh, nail-polish-remover smell just means it’s hungry, not that something’s wrong. Texture matters too: a starter fed at 100% hydration should look like thick, spreadable batter. Change the hydration and the look changes with it — stiffer starters rise in a compact dome, looser ones spread and bubble more visibly.
Activity Over Appearance
A starter doesn’t need to look perfect to be healthy. What matters is activity: is it rising predictably, bubbling after feedings, and smelling alive? Judge it by what it does, not just how it looks.
Signs of a healthy starter:
- Doubles (or more) within a few hours of feeding
- Bubbles visible throughout, not just on top
- Pleasant tangy or yeasty smell
- Thick, spreadable consistency (adjusts with hydration)
- Consistent, predictable fermentation cycle
Related: How to Make Sourdough Bread Without a Starter (Guide + Recipe)
How Often Should You Feed a Sourdough Starter?
Room Temperature vs. the Fridge
At normal room temperature, most starters get hungry within 12 to 24 hours, so a daily feeding keeps the wild yeast and bacteria strong and predictable. Not baking daily? The fridge slows fermentation way down, stretching feedings to once a week or longer. Before baking, give your starter a dedicated feeding so it peaks right when you plan to mix your dough.
There’s No One-Size-Fits-All Schedule
Fermentation speed depends on temperature, starter strength, and even the flour you use. Rather than following a rigid clock, watch your starter’s behavior and let it guide you.
Feeding frequency at a glance:
- Daily bakers: feed once a day at room temperature
- Occasional bakers: refrigerate and feed weekly (or less)
- Before baking: feed to hit peak activity at mix time
- Signs it’s time to feed: flattening, sinking, or a sharp sour smell
Choosing the Right Feeding Ratio
The Classic 1:1:1 Feeding
A 1:1:1 ratio — equal parts starter, flour, and water by weight — is the workhorse ratio most bakers start with. It keeps the culture balanced and predictable, making it a reliable go-to for daily maintenance.
Larger Ratios for a Slower Burn
Bump things up to a 1:2:2 or even 1:5:5 ratio (more flour and water relative to starter), and you stretch out the fermentation timeline. This is handy if you want your starter to peak later in the day, or if you’re heading out and don’t want to feed again for a while.
Smaller Ratios for Quick Turnarounds
Flip it around with a smaller ratio — feeding a larger proportion of starter to fresh flour and water — and fermentation speeds up. This works well when you need your starter ready again fast.
Hydration Changes the Texture, Not Just the Timing
The water-to-flour balance also shapes hydration and consistency. Higher hydration gives you a looser, more pourable starter that ferments a bit faster; lower hydration creates a stiffer starter that ferments more slowly and holds structure longer.
Match the Ratio to Your Plans
There’s no single “correct” ratio — it’s a dial you adjust based on your baking schedule. Baking today? Use a ratio that speeds things along. Baking tomorrow? Stretch it out. Once you get the hang of it, choosing a feeding ratio starts to feel like second nature.
Managing Starter Temperature
Wild yeast and lactic acid bacteria are temperature-sensitive, and warmth speeds fermentation up — in a kitchen around 78°F to 82°F, a starter can peak in just a few hours. Cooler kitchens slow things down, giving you more flexibility in timing but a longer wait for that rise.
Seasonal swings are completely normal — your starter may double in half the time in summer compared to winter. Rather than fighting it, adjust feeding times and ratios to match the temperature. And once you understand this relationship, you can use it strategically: a cooler spot delays peak activity, while a warm spot near the oven speeds it up when you need your starter ready sooner.
How to Maintain a Starter in the Refrigerator
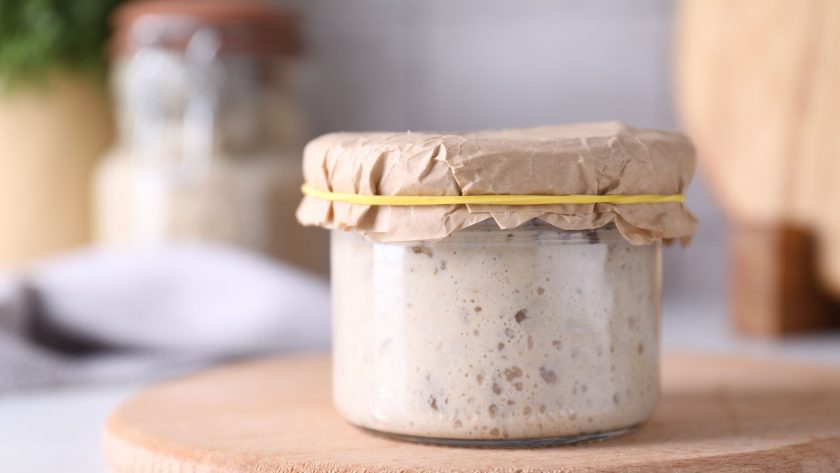
If you’re not baking every day, the refrigerator slows fermentation to a crawl, saving you from daily feedings. The key step: always feed your starter right before it goes into the fridge, giving it a reserve to work through while chilling.
A refrigerated starter typically only needs refreshing once a week, though some bakers stretch it longer. When it’s time to bake, bring it back to room temperature with one or two feedings — it’ll rise slower on that first one as it shakes off the cold. Once it’s doubling reliably within a few hours again, it’s ready to bake with. Skipping this wake-up step is one of the most common reasons fridge-stored starters underperform in a loaf.
Signs Your Starter Needs Attention
- Sluggish rises — if it used to double in four hours and now barely budges after eight, feeding or temperature is likely off
- Little to no bubbling — a flat, smooth surface means the yeast population has taken a hit
- A sharp, vinegary smell — a little tang is normal; an overpowering nail-polish-remover smell means it’s gone too long without food
- Hooch on top — that grayish or amber liquid is just the starter’s way of saying it’s hungry, not a disaster
- Separation or layering — usually reversible with a good feeding
- Neglect vs. spoilage — most of these signs point to fixable neglect; real spoilage looks like pink or orange streaks or fuzzy mold, and that’s the one case where starting fresh is the safer bet
How to Revive a Weak Starter
A weak starter is almost always salvageable with a little patience and consistency. Here’s how to bring it back:
- Scrape and refresh. Discard most of the tired starter and feed what’s left with fresh flour and water to dilute built-up acidity.
- Feed consistently. Stick to the same ratio and timing every day — erratic feeding is often what weakened it in the first place.
- Find a warmer spot. Move it somewhere warmer, like on top of the fridge, to give fermentation a boost.
- Adjust the ratio if needed. A smaller feeding ratio (more starter, less flour and water) can help it regain strength faster.
- Wait for repeated rises. Look for two or three consecutive feedings where it doubles predictably before baking with it.
A strong, predictable rise is a more reliable readiness signal than the classic float test.
Related: Top Tips to Revive Your Inactive Sourdough Starter
Preventing Common Starter Maintenance Problems
- Feed consistently — sporadic feeding confuses the fermentation cycle; pick a rhythm and stick with it
- Store it properly — match counter vs. fridge storage to how often you actually bake
- Avoid temperature swings — a stable spot keeps fermentation timing predictable
- Use the right amount — too much starter overwhelms a feeding; too little leaves it undernourished
- Don’t ignore peak activity — using it well past its peak can lead to weaker bread
- Don’t let too much time pass between feedings — this is the root cause behind most starter problems
A Simple Sourdough Starter Maintenance Routine
Baking multiple times a week? Keep your starter on the counter and feed it once a day at a consistent time so it’s always primed. Baking about once a week? Keep it in the fridge, pull it out a day or two ahead, and feed it once or twice at room temperature before baking. Only baking every few weeks? Lean on the fridge fully — feed before refrigerating, refresh weekly if you can, and give it a couple of wake-up feedings before your next bake.
No matter your routine, a quick daily glance goes a long way: Is it bubbly? Has it risen since the last feeding? Does it smell pleasantly tangy? The healthiest starters aren’t the ones fed with scientific precision — they’re the ones fed on a routine their baker actually sticks to.
Keeping Your Starter Alive and Thriving
At the end of the day, a healthy starter just comes down to paying attention—bubbles, rise, smell, and texture will always tell you what’s up. Feed it on a schedule that fits your life, whether that’s daily on the counter or a more relaxed fridge routine, and let temperature work in your favor to speed things up or slow them down.
Even if your starter gets a little tired or neglected, it’s almost always fixable with some patience and consistency. The real secret isn’t perfection—it’s finding a rhythm you’ll actually stick to. Get that right, and you’ll be rewarded with warm, crusty homemade sourdough for years to come.
FAQs – Sourdough Starter Health and Maintenance
How much starter should I maintain?
Most home bakers get by keeping just a small amount—around 4 to 8 ounces—between feedings. You don’t need a giant jar sitting around; a little starter fed regularly will always bulk up when you need it for a bake. If you bake often or want backup in case something goes wrong, keeping a slightly larger amount on hand doesn’t hurt.
How can I tell if my starter is healthy?
A healthy starter doubles (or more) within a few hours of feeding, is full of bubbles throughout, and smells pleasantly tangy or yeasty rather than sharp and vinegary. Texture should be thick and spreadable, adjusting with hydration. If it’s rising predictably and bubbling reliably after every feeding, you’ve got an active, healthy starter on your hands.
Related Articles:
 Strawberry Cinnamon Rolls Recipe: A Sweet Twist on a Classic Favorite
 How Much to Feed Sourdough Starter (Beginner’s Guide)
 How to Feed Sourdough Starter from Fridge (Your Complete Guide to Better Bread)
 Why Is My Sourdough Starter Not Rising? (And How to Fix It)
 Can You Freeze Sourdough Starter? A Simple Guide to Saving Your Starter for Later
