Last updated on August 18th, 2025
The art of making bread is one of the most rewarding and enjoyable skills to learn. Look, I’m not going to sugarcoat it—some of these recipes will test your patience. But trust me, the payoff is worth every minute of waiting. These recipes cover everything you need, including that easy sourdough that won’t have you babying a temperamental starter for weeks. Each bread has its own personality, and once you nail one recipe, you’ll find yourself experimenting with flavors and techniques like a mad scientist in the best possible way.
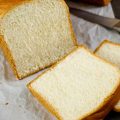
Basic White Sandwich Bread
Listen, this is the bread that’ll make you feel like a baking genius on your first try. It tastes like the sandwich bread you grew up with, but about a million times better because you made it with your own two hands.
Plus, you get two loaves out of this deal, so you can eat one warm (obviously) and stash the other in the freezer for later.
New to bread baking? Start here and prepare to feel smug about your skills.
Ingredients
- 6 cups all-purpose flour
- 2¼ teaspoons active dry yeast (1 packet)
- 2 tablespoons sugar
- 2 teaspoons salt
- 2 tablespoons butter, softened
- 2 cups warm water (110°F)
- 1 tablespoon vegetable oil for greasing
How to Make
- Begin by dissolving the yeast and sugar in warm water in a large mixing bowl. Allow the mixture to sit for 5-10 minutes until it becomes foamy, which indicates the yeast is active.
- Add the flour, salt, and softened butter to the yeast mixture.
- Mix the ingredients until they form a shaggy dough, then turn the mixture onto a lightly floured surface.
- Knead the dough for 8-10 minutes until it becomes smooth and elastic. The dough should spring back when poked gently with your finger.
- Place the kneaded dough in a greased bowl, turning it to coat all sides with oil. Cover with a damp cloth or plastic wrap and let rise in a warm place for 1-1.5 hours, or until doubled in size.
- Punch down the risen dough and turn it onto a lightly floured surface. Divide the dough in half and shape each portion into a loaf.
- Place the shaped loaves in greased 9×5-inch loaf pans, cover, and let rise again for 45-60 minutes until the dough crowns above the pan edges.
- Preheat your oven to 375°F during the final 15 minutes of rising.
- Bake the loaves for 30-35 minutes until the tops are golden brown and the bread sounds hollow when tapped on the bottom.
- Remove from pans immediately and cool on wire racks.
Tips
- Test your yeast before starting by proofing it in warm water with a pinch of sugar. If it doesn’t foam within 10 minutes, the yeast may be dead and should be replaced. Keep the water temperature between 105-115°F for optimal yeast activation.
- The dough should feel slightly sticky but manageable during kneading. Add flour sparingly if the dough is too wet, as too much flour creates dense bread. Conversely, resist adding too much flour during kneading, as this can result in a tough texture.
- Create a warm environment for rising by placing the bowl near a sunny window, on top of a warm appliance, or in an oven with just the light on. The ideal temperature for rising is around 80°F.
No-Knead Artisan Bread
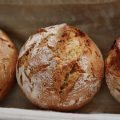
Here’s the bread that broke the internet and made everyone feel like a kitchen wizard. Seriously, this recipe is almost too good to be true—you literally just mix everything together, walk away for almost a day, then bake it in a screaming hot Dutch oven.
The result? Crusty, chewy, hole-filled bread that looks like you trained at a French bakery.
It’s the lazy baker’s dream come true.
Ingredients
- 3 cups all-purpose flour
- ¼ teaspoon active dry yeast
- 1¼ teaspoons salt
- 1⅝ cups warm water
- Cornmeal or flour for dusting
How to Make
- Combine flour, yeast, and salt in a large bowl, whisking to distribute evenly.
- Add the warm water and stir with a wooden spoon until the mixture forms a rough, sticky dough with no dry flour visible. The dough will look shaggy and wet compared to traditional bread dough.
- Cover the bowl tightly with plastic wrap and let the dough rest at room temperature for 12-18 hours. The dough is ready when it has more than doubled in size, appears bubbly on the surface, and has a slightly sour, yeasty aroma.
- Turn the risen dough onto a heavily floured surface using a bowl scraper or spatula. The dough will be very sticky and loose.
- Fold the dough over itself 2-3 times using floured hands or a bench scraper, then shape it into a rough ball.
- Place the shaped dough seam-side down on a piece of parchment paper. Cover loosely with a towel and let rise for 2 hours until doubled in size and jiggly when gently shaken.
- Thirty minutes before baking, place a heavy Dutch oven with its lid in the oven and preheat to 450°F.
- Carefully remove the hot pot and lift the parchment paper to transfer the dough into the Dutch oven. Cover with the lid and bake for 30 minutes.
- Remove the lid and continue baking for 15-20 minutes until the crust is deep golden brown. The internal temperature should reach 200°F when measured with an instant-read thermometer.
- Cool completely on a wire rack before slicing.
Tips
- The tiny amount of yeast requires patience but produces superior flavor through slow fermentation. Don’t be tempted to add more yeast, as this will compromise the taste and texture that make this bread special.
- Room temperature affects rising time significantly. In cooler conditions, the initial rise may take up to 24 hours, while warmer temperatures can complete the rise in 12 hours. Look for visual cues rather than relying solely on timing.
- Handle the sticky dough with well-floured hands and tools. The high hydration creates the open crumb structure but makes the dough challenging to work with. Embrace the stickiness rather than adding excess flour.
Easy Sourdough Bread
Okay, let’s talk about this.
You know how real sourdough usually requires you to basically adopt a pet starter and feed it daily like a needy houseplant? Well, this recipe gives you all that tangy, chewy goodness without the commitment issues.
We’re cheating a little by adding commercial yeast to make sure this bread actually rises, but hey, life’s too short for bread failures. The result is reliably delicious sourdough that won’t leave you stressed about starter maintenance.
Ingredients
- 1 cup active sourdough starter
- 1½ cups warm water
- 1 tablespoon honey
- 2 teaspoons salt
- 1 teaspoon active dry yeast
- 4-5 cups bread flour
- 2 tablespoons olive oil
How to Make
- Mix the sourdough starter, warm water, and honey in a large bowl until well combined. The mixture should be smooth with no lumps of starter remaining.
- Sprinkle the yeast over the surface and let it proof for 5 minutes until foamy.
- Add salt and 4 cups of flour to the starter mixture, stirring with a wooden spoon until a rough dough forms. The dough will be slightly sticky but should hold together.
- Add additional flour gradually if the mixture is too wet to handle.
- Turn the dough onto a lightly floured surface and knead for 8-10 minutes until smooth and elastic. The dough should feel supple and spring back when poked.
- Place in an oiled bowl, turning to coat all surfaces.
- Cover the bowl and let the dough rise for 1.5-2 hours until doubled in size. The longer rising time allows the sourdough flavors to develop while the commercial yeast ensures reliable rising.
- Punch down the dough and shape it into a round loaf or divide for two smaller loaves.
- Place on a parchment-lined baking sheet, cover, and let rise for 45-60 minutes until puffy and increased in size.
- Preheat the oven to 425°F and score the top of the loaf with a sharp knife in a cross or decorative pattern.
- Bake for 35-40 minutes until the crust is golden brown and the bread sounds hollow when tapped.
- Cool completely before slicing.
Tips
- If you don’t have an active sourdough starter, you can create a quick version by mixing equal parts flour and water and letting it sit at room temperature for 3-5 days, stirring daily until it becomes bubbly and sour-smelling.
- The sourdough starter should be active and bubbly when used. If your starter has been refrigerated, feed it with equal parts flour and water and let it sit at room temperature for 4-6 hours before using.
- Scoring the dough allows controlled expansion during baking and creates an attractive appearance. Use a sharp knife or razor blade and make swift, confident cuts about ¼ inch deep.
If you’ve got more time and desire to try other sourdough recipes using actual sourdough starter, have a look at these:
Honey Wheat Bread
This is the bread that makes you feel good about yourself while you’re eating it.
We’re talking wholesome whole wheat flour sweetened with honey—it’s like a hug for your conscience and your taste buds. The honey doesn’t just add sweetness; it keeps the bread moist for days, which means you won’t end up with doorstop-hard leftovers.
It’s hearty enough to make you feel virtuous but soft enough that the kids won’t complain.
Ingredients
- 2 cups whole wheat flour
- 2½ cups all-purpose flour
- 2¼ teaspoons active dry yeast
- ⅓ cup honey
- 2 tablespoons butter, melted
- 2 teaspoons salt
- 1¼ cups warm water
- 2 tablespoons vital wheat gluten (optional)
How to Make
- Dissolve the yeast in warm water in a large mixing bowl and let stand for 5 minutes until foamy.
- Stir in honey, melted butter, and salt until well combined. The honey should dissolve completely in the warm mixture.
- Add whole wheat flour and vital wheat gluten if using, stirring to combine.
- Gradually add all-purpose flour until a soft dough forms. The dough should be slightly sticky but manageable.
- Knead the dough on a lightly floured surface for 10-12 minutes until smooth and elastic. Whole wheat dough requires longer kneading to develop proper gluten structure.
- The finished dough should feel supple and pass the windowpane test.
- Place the kneaded dough in a greased bowl, cover, and let rise for 1-1.5 hours until doubled. Whole wheat dough typically rises more slowly than white bread dough due to the fiber content.
- Punch down the dough and shape into a loaf.
- Place in a greased 9×5-inch pan, cover, and let rise for 45-60 minutes until the dough crowns above the pan rim.
- Preheat the oven to 375°F and bake for 35-40 minutes until the top is golden brown and the internal temperature reaches 190°F.
- Remove from the pan immediately and cool on a wire rack.
Tips
- Vital wheat gluten improves the texture of whole wheat bread by strengthening the gluten network, resulting in better rise and less dense texture. While optional, it makes a noticeable difference in the final product.
- Whole wheat flour can vary significantly in protein content and absorption. Start with the recommended amount of liquid and adjust as needed. The dough should feel slightly tacky but not overly sticky.
- Store honey wheat bread wrapped in plastic or in an airtight container to maintain moisture. The honey helps keep the bread fresh for several days at room temperature.
Rustic French Bread
This is as close as you’ll get to those crusty baguettes you devoured in Paris without actually getting on a plane.
Fair warning: this recipe is a little fussy about technique, but the results are absolutely worth the extra attention. You’ll end up with bread that has a crackling crust and those beautiful irregular holes inside that scream “I know what I’m doing.”
Ingredients
- 4 cups bread flour
- 1¾ cups warm water
- 2 teaspoons salt
- 1 teaspoon active dry yeast
- Cornmeal for dusting
How to Make
- Dissolve yeast in warm water and let proof for 5 minutes until foamy.
- Add flour and salt, mixing with a wooden spoon until a shaggy dough forms. The dough will be wetter than typical bread dough.
- Instead of traditional kneading, use a series of folds to develop the dough. Every 30 minutes for the first 2 hours, perform a set of folds by lifting one side of the dough and folding it over to the opposite side.
- Rotate the bowl and repeat from all four sides.
- After the folding period, cover the bowl and let the dough rise for an additional 2-3 hours until nearly tripled in size. The dough should appear bubbly and jiggly when gently shaken.
- Turn the dough onto a lightly floured surface and divide into 2-3 pieces for individual loaves.
- Shape each piece into a long oval, then roll and stretch into baguette shapes about 14-16 inches long.
- Place the shaped baguettes on a parchment-lined baking sheet dusted with cornmeal.
- Cover with a towel and let rise for 45-60 minutes until puffy and increased in size.
- Preheat the oven to 450°F with a shallow pan on the bottom rack.
- Score each baguette diagonally with 3-4 cuts using a sharp knife.
- Just before baking, pour hot water into the bottom pan to create steam, then quickly load the bread.
- Bake for 20-25 minutes until the crust is golden brown and crispy. The bread should sound hollow when tapped on the bottom.
- Cool on wire racks before serving.
Tips
- The fold-and-turn technique develops gluten without overworking the dough, creating the desired open texture. Be gentle during folding to preserve the gas bubbles that create the characteristic holes.
- Steam during the first part of baking is crucial for developing a crispy crust. The moisture allows the bread to expand fully before the crust sets. Remove the water pan after 15 minutes to allow browning.
- Proper scoring allows the bread to expand evenly and creates the classic appearance. Make swift, decisive cuts at a 45-degree angle to the surface, about ¼ inch deep.
Irish Soda Bread
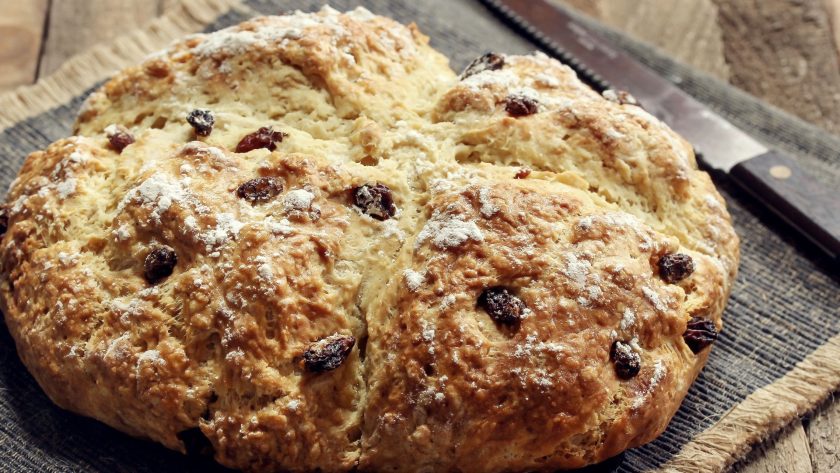
This is bread for people who don’t have time for yeast nonsense. Seriously, you can have fresh bread on your table in under an hour, which is basically magic in the bread world. It’s got that slightly dense, crumbly texture that’s incredible with butter, and the tangy buttermilk gives it character.
Plus, there’s something deeply satisfying about cutting that traditional cross on top—it’s like you’re channeling your inner Irish grandmother.
Ingredients
- 4 cups all-purpose flour
- 1 teaspoon baking soda
- 1 teaspoon salt
- 1¾ cups buttermilk
- 2 tablespoons butter, melted (optional)
How to Make
- Preheat the oven to 425°F and line a baking sheet with parchment paper.
- In a large bowl, whisk together flour, baking soda, and salt until evenly distributed.
- Make a well in the center of the dry ingredients and pour in the buttermilk and melted butter if using.
- Using a fork or wooden spoon, stir the mixture just until it comes together into a shaggy dough. Avoid overmixing, which can result in tough bread.
- Turn the dough onto a lightly floured surface and gently knead 2-3 times just to bring it together.
- Shape into a round loaf about 8 inches in diameter and 2 inches thick.
- Place the shaped loaf on the prepared baking sheet and use a sharp knife to cut a deep cross on top, extending almost to the edges.
- Bake for 35-40 minutes until the crust is golden brown and the bread sounds hollow when tapped on the bottom. The internal temperature should reach 190°F when measured with an instant-read thermometer.
- Cool on a wire rack for at least 15 minutes before slicing.
Tips
- Fresh buttermilk is essential for proper rise and flavor. If buttermilk isn’t available, substitute by adding 1 tablespoon of lemon juice or vinegar to regular milk and letting it sit for 5 minutes to curdle.
- Handle the dough minimally to prevent developing too much gluten, which creates a tough texture. The dough should just hold together and will appear rougher than yeast bread dough.
- Variations can include adding raisins, caraway seeds, or other mix-ins, but fold them in gently to avoid overworking the dough. Traditional Irish soda bread is plain, but modern adaptations embrace creative additions.
Focaccia Bread
This is the bread equivalent of that effortlessly cool person who makes everything look easy.
Focaccia is basically a canvas for whatever toppings make you happy—rosemary, olives, tomatoes, caramelized onions, you name it.
The best part? It’s nearly impossible to mess up, and even if you do, people will still think you’re fancy because you made bread with dimples. The olive oil pools create little pockets of flavor that’ll make you wonder why you ever bought store-bought bread.
Ingredients
- 4 cups all-purpose flour
- 2 teaspoons salt
- 1 teaspoon active dry yeast
- 2 cups warm water
- 6 tablespoons olive oil, divided
- 2 tablespoons fresh rosemary, chopped
- 1 teaspoon coarse sea salt
- 1 medium onion, thinly sliced (optional)
How to Make
- Combine flour, salt, and yeast in a large bowl, whisking to distribute evenly.
- Add warm water and 2 tablespoons of olive oil, stirring with a wooden spoon until a wet, sticky dough forms. The consistency will be much looser than traditional bread dough.
- Cover the bowl with plastic wrap and let rise at room temperature for 2 hours until doubled in size and very bubbly.
- Generously oil a 9×13-inch baking pan with 2 tablespoons of olive oil.
- Transfer the risen dough to the prepared pan using oiled hands or a bowl scraper. The dough will be very sticky and difficult to handle.
- Gently stretch and press the dough to fit the pan, working from the center outward. Don’t worry about reaching the corners initially; let the dough rest for 15 minutes, then stretch again.
- Cover and let rise for 30-45 minutes until puffy.
- Preheat the oven to 425°F.
- Create dimples across the surface of the dough using your fingertips, pressing down to the bottom of the pan.
- Drizzle with the remaining 2 tablespoons of olive oil, allowing it to pool in the dimples.
- Sprinkle the surface with chopped rosemary, coarse sea salt, and sliced onion if using.
- Bake for 25-30 minutes until the top is golden brown and crispy around the edges.
- Cool in the pan for 10 minutes before cutting and serving.
Tips
- The wet dough is essential for the light, airy texture but can be challenging to handle. Keep your hands and tools well-oiled when working with the dough to prevent sticking.
- Don’t skip the dimpling step, as it creates pockets for oil and seasonings while preventing the bread from puffing up too much during baking. Press firmly but don’t tear the dough.
- Experiment with toppings like cherry tomatoes, olives, caramelized onions, or different herbs. Add delicate ingredients during the last 10 minutes of baking to prevent burning.
Tips for Baking Bread at Home!
Alright, let’s get real about bread baking.
After you’ve made a few loaves, you’ll start to develop what I like to call “bread intuition”—that magical ability to know just by touching dough if it’s ready, or by smell if your yeast is actually alive.
But until you get there, these tips will save you from some rookie mistakes that we’ve all made.
- Temperature is everything, and I mean everything. Your yeast doesn’t care about your schedule—it cares about warmth. Get yourself a thermometer and actually use it. Water for active dry yeast should be between 105-115°F. Too hot and you’ll murder your yeast; too cold and it’ll just sit there doing nothing. Room temperature affects rising times more than you’d think. In winter, your bread might take twice as long to rise, while summer heat can make it go crazy fast.
- Measuring matters more than you think. I know, I know, baking is supposed to be this relaxing, intuitive thing, but bread is actually pretty science-heavy. If you have a kitchen scale, use it. Flour can vary wildly in density depending on how it’s packed, how humid it is, and probably the phase of the moon. A cup of flour can weigh anywhere from 4 to 6 ounces depending on how you measure it. That’s a huge difference in bread terms.
- The windowpane test is your friend. This sounds fancy but it’s simple: take a small piece of kneaded dough and stretch it gently. If you can stretch it thin enough to see light through it without it tearing, your gluten is properly developed. If it tears immediately, keep kneading. This test works for any bread that requires kneading.
- Create your own proofing environment. Your oven with just the light on creates a perfectly warm, draft-free space for rising. The top of your refrigerator, near a sunny window, or even wrapped in a heating pad on low can work. The magic number is around 80°F. Too much warmer and your dough will rise too fast and taste yeasty; too cool and you’ll be waiting forever.
- Shaping actually matters. When you’re making sandwich bread, you want to shape it into a tight log. Flatten your dough into a rectangle roughly the length of your pan, then roll it up tightly from one short end, pinching the seam closed as you go. This creates surface tension that helps the bread rise evenly and prevents weird air pockets.
- Steam creates amazing crusts. For crusty artisan breads, you need steam in the first part of baking. You can put a pan of hot water on the bottom of your oven, spray the oven walls with water before loading your bread, or use the Dutch oven method. The steam keeps the crust soft initially so the bread can expand fully, then you remove it to let the crust brown and crisp up.
- Don’t guess about doneness. Sure, the “tap the bottom and listen for hollow” thing works, but an instant-read thermometer takes the guesswork out. Most breads are done when they hit 190°F internally, while lean breads like baguettes need to reach 200-210°F.
- Cool completely before slicing, even though it’s torture. I get it—fresh bread smells incredible and you want to tear into it immediately. But cutting too soon will give you gummy, sticky slices because the crumb structure hasn’t set yet. The bread is still cooking from residual heat even after it comes out of the oven.
- Storage depends on the bread type. Crusty breads like baguettes are best eaten within hours but can be refreshed by misting with water and heating in the oven for a few minutes. Soft sandwich breads should go in plastic bags or airtight containers to keep them from drying out. Most homemade bread doesn’t have preservatives, so eat it within a few days or freeze what you won’t use.
- When things go wrong, learn from it. Dense bread usually means dead yeast, too much flour, not enough kneading, or insufficient rising time. Bread that collapses was probably overproofed—the gluten structure got too weak from extended fermentation. Gummy texture means you cut it too soon or underbaked it. Keep notes about what works in your kitchen and what doesn’t.
- Don’t be afraid to experiment once you get the basics down. Start with simple recipes and nail them before you start adding crazy ingredients. But once you’re comfortable, bread is incredibly forgiving for substitutions and additions. Want to add herbs? Cheese? Different flours? Go for it, but change one thing at a time so you can figure out what works.
- Invest in a few good tools. You don’t need a lot, but a kitchen scale, instant-read thermometer, and bench scraper will make your life so much easier. A stand mixer with a dough hook is nice but not necessary—your hands work just fine for most recipes.
- Practice really does make better bread. Every kitchen is different, every climate affects rising times, and every oven bakes a little differently. The more you bake, the more you’ll understand how your specific setup works. Don’t get discouraged if your first few loaves aren’t Instagram-worthy. Even mediocre homemade bread beats most store-bought stuff.
Homemade Bread – There’s Nothing Like It!
The truth is, humans have been making bread for thousands of years with way less technology and knowledge than we have now. You’ve got this.
Start simple, pay attention to what your dough is telling you, and remember that even “failed” bread usually makes excellent toast or bread pudding.
Go have fun with making your bread at home!