Last updated on October 15th, 2025
Milk Brioche transforms the classic French viennoiserie into something even more extraordinary. This enriched yeast bread incorporates milk alongside eggs and butter, creating an impossibly soft crumb with subtle dairy sweetness. French bakers have perfected this variation for centuries, elevating simple ingredients into something that sits beautifully between bread and pastry. The milk proteins create a more delicate crumb structure while the lactose contributes to that gorgeous golden-brown crust. Perfect for French toast, artisan burger buns, or simply savoring with morning coffee, milk brioche makes ordinary moments feel special.
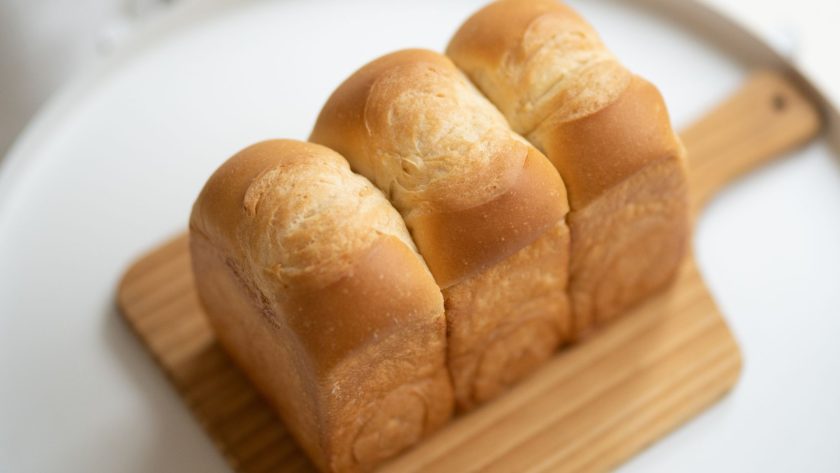
The Origins of Brioche
Brioche emerged in 15th-century Normandy around 1404, where those famous Norman cows produced exceptionally rich cream. The word comes from the Old French “brier,” meaning to work dough with a wooden roller called a “broye.” Initially eaten by peasants, brioche transformed into aristocratic luxury in 1509 when the Rouen Cathedral’s archbishop lifted butter consumption restrictions during Lent for a fee. This made butter a status symbol. By Louis XIV’s reign, French bakers created richer butter-to-flour ratios, establishing brioche’s indulgent reputation and spreading across France with over 30 regional variations.
Milk Brioche vs Classic Brioche
The difference between milk brioche and classic brioche is like comparing velvet to silk – both luxurious, but each with its own distinct character. Classic brioche gets its richness primarily from generous amounts of eggs and butter, while milk brioche incorporates milk into the enriched dough, creating subtle but significant improvements.
Texture-wise, milk brioche takes softness to another level. The milk proteins work alongside gluten to create an even more delicate, cloud-like interior that practically dissolves on your tongue. Classic brioche already has that trademark tender crumb, but the added milk creates better steam production during baking, resulting in those incredibly tender layers.
Flavor differences are equally compelling. Classic brioche delivers beautiful butteriness with subtle sweetness from eggs and sugar. milk brioche adds another dimension – gentle dairy sweetness that creates gorgeous harmony between the butter, eggs, and milk fat. The lactose also contributes to better browning, producing that stunning golden crust.
From a baking perspective, the milk brings additional moisture and fat content, creating a more hydrated dough. This can sometimes allow for slightly reduced butter content since milk fat provides supplementary richness, creating balanced indulgence that feels approachable rather than overwhelmingly heavy.
Related: Best Sourdough Brioche Recipe (Beginner Friendly)
Ingredients Needed
- 4 cups all-purpose flour
- 1 packet (2¼ tsp) active dry yeast
- ⅓ cup granulated sugar
- 1 tsp salt
- ¾ cup whole milk, lukewarm
- 3 large eggs (room temperature)
- ½ cup unsalted butter, softened
- 1 egg for wash
Step-by-Step Recipe
- Activate the yeast. In your stand mixer bowl, whisk together lukewarm whole milk, sugar, and active dry yeast. The milk should feel like a comfortable bath – too hot kills yeast, too cold won’t activate it. Let it sit for 10 minutes until foamy and bubbly – this confirms your yeast is alive and ready. No foam means start over with fresh yeast.
- Mix the dough. Add flour, salt, and 2 eggs to the yeast mixture. Using the dough hook, mix on low speed for 3-5 minutes until a shaggy dough forms. Don’t worry about smoothness yet – it’ll look messy and that’s exactly what you want. The flour needs time to hydrate properly.
- Incorporate butter. With the mixer running on medium speed, add softened butter one piece at a time, waiting for each piece to incorporate before adding the next. This takes patience – about 10-15 minutes – but the dough will transform from sticky mess to smooth, elastic perfection that pulls away from bowl sides and becomes gloriously glossy.
- First rise. Shape dough into a ball and place in an oiled bowl, turning once to coat all surfaces. Cover with a damp towel and rise at room temperature for 2 hours until doubled in size. The dough should feel light and airy when gently pressed.
- Cold fermentation. Punch down gently to release air bubbles, reshape into a ball, and refrigerate overnight. This proofing dough step develops complex flavors and makes handling much easier the next day. Cold dough is less sticky and shapes beautifully.
- Shape and final proof. Divide chilled dough into equal portions and shape as desired – loaves, rolls, or pull-apart style. Place in prepared, greased pans and rise for 1.5-2 hours until puffy and nearly doubled. Proper proofing creates that signature light texture.
- Bake to perfection. Brush gently with beaten egg wash for that gorgeous golden finish. Bake at 375°F for 25-35 minutes until the internal temperature reaches 190°F and the crust turns beautifully golden brown. Your kitchen will smell absolutely incredible.
Let cool completely before slicing – this allows the crumb to set properly and prevents a gummy texture. The wait is torture, but your patience creates perfect baking results every time.
Baking Tips & Tricks
- Temperature matters: butter should leave a fingerprint when pressed, but not be melted. Room temperature eggs blend more easily than cold ones. Milk should feel like bath water – lukewarm activates yeast perfectly.
- Timing your rises: watch for doubling during the first rise, but be extra careful with the second proofing dough phase. Properly proofed brioche springs back slowly when gently poked. Over-proofed dough creates dense, gummy results.
- Butter incorporation technique: add softened butter gradually while the mixer runs. Don’t panic if the dough looks broken initially – keep mixing for the full 10-15 minutes. The transformation from sticky mess to smooth, glossy dough is pure baking science magic.
- Shaping secrets: handle dough gently to preserve air bubbles. For pull-apart loaves, divide into equal portions and nestle together. Uneven pieces create uneven baking.
- Oven management: Start checking at 25 minutes since oven temperatures vary. If the top browns too quickly, tent with foil. Internal temperature should reach 190°F for perfect doneness.
- Cooling patience: let brioche cool completely before slicing. Cutting too early creates a gummy texture as the crumb hasn’t set properly. This dough troubleshooting tip prevents many disappointments.
- Egg wash perfection: brush gently to avoid deflating risen dough. Double egg washing creates that gorgeous golden color bakeries achieve.
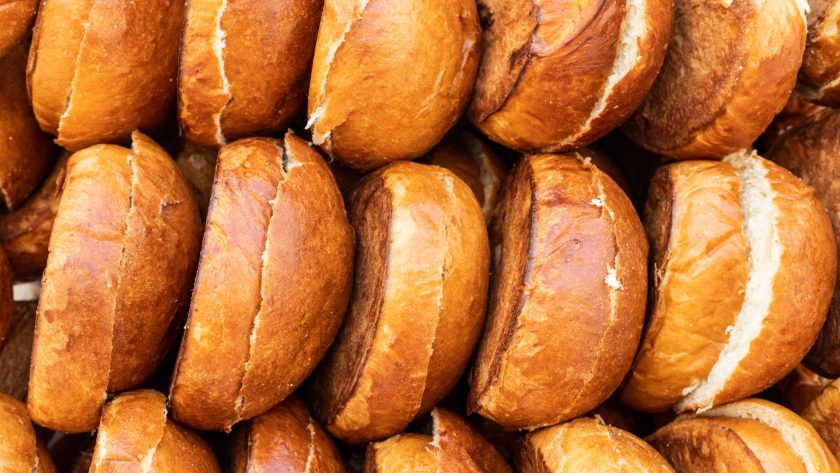
Variations of Milk Brioche
Chocolate chip brioche brings pure joy to breakfast tables. Fold in about ¾ cup of mini chocolate chips during the final kneading stage – mini chips distribute more evenly than regular-sized ones. The slight sweetness of the dough pairs beautifully with dark chocolate, creating brioche rolls that taste like a pastry shop treasure.
Nutella-stuffed brioche takes indulgence to new heights. Roll your dough into a rectangle, spread softened Nutella down the center, then fold and shape into a loaf. As it bakes, the Nutella creates pockets of molten chocolate heaven that’ll make your family think you’re a magician.
Jam-filled variations work wonderfully, too. Apricot, raspberry, or strawberry jam can be swirled through the dough or used as a filling for individual buns. Just make sure your jam isn’t too thick – it should spread easily without tearing the delicate dough.
Savory brioche opens entirely different possibilities. Add herbs like rosemary or thyme, fold in grated cheese, or incorporate caramelized onions for a sophisticated flavored bread that pairs beautifully with soups and salads. These savory versions make elegant dinner companions.
For special occasions, try shaped variations. Braided brioche looks stunning on holiday tables, while individual brioche buns make perfect dinner rolls. Pull-apart versions create interactive eating experiences that bring people together around the table.
Serving Ideas
French toast made with milk brioche is absolutely legendary. The bread’s custardy interior soaks up the egg mixture beautifully while maintaining structure, creating golden, crispy edges with creamy centers. Serve with fresh berries and maple syrup for restaurant-quality results that’ll make your guests forget every other French toast they’ve ever tasted.
Toast it lightly and spread with butter and jam for classic French breakfast perfection. The bread’s natural richness means you don’t need heavy toppings – a thin layer of good apricot preserves or honey lets the brioche flavors shine through.
Gourmet sandwiches reach new heights with this bread for breakfast versatility. Its soft texture and subtle sweetness complement both sweet and savory fillings. Try ham and brie, turkey with cranberry sauce, or grilled cheese that’ll ruin you for ordinary bread forever.
Burger buns made from brioche dough elevate backyard barbecues into gourmet affairs. The slight sweetness balances savory burger flavors while the sturdy yet tender texture holds up beautifully. For elegant entertaining, slice and serve alongside cheese boards or charcuterie. This brunch bread becomes sophisticated when paired with artisanal cheeses, cured meats, smoked salmon, and cream cheese.
Storage & Shelf Life
Proper storage keeps your milk brioche tasting bakery-fresh for days. Store cooled brioche in an airtight container at room temperature for up to 3-4 days – the enriched dough stays fresher longer thanks to all that butter and milk fat. Refrigeration extends shelf life to one week but makes the texture slightly denser. For freezer storage, slice before wrapping tightly in plastic wrap and foil for up to 3 months. Individual slices thaw quickly and toast beautifully straight from frozen. Avoid refrigerating unless necessary, since fresh bread stored at room temperature maintains the softest texture.
Time to Bake Milk Brioche
Milk Brioche brings French bakery magic straight to your kitchen. This enriched yeast bread delivers an impossibly soft texture, subtle dairy sweetness, and versatility that transforms everything from morning toast to gourmet burgers. The combination of whole milk, butter, and eggs creates that signature tender crumb that makes each bite memorable. Whether you’re crafting weekend French toast or elegant dinner rolls, mastering this recipe opens doors to countless delicious possibilities. Your family will think you’ve discovered the secret to bakery-quality bread – and honestly, you have.
FAQs
What’s the difference between milk bread and brioche?
Milk bread is typically lighter and less rich, made with milk, flour, yeast, and minimal fat. Brioche is an enriched dough containing significantly more butter and eggs, creating a richer, more decadent texture and flavor. Both use milk, but brioche’s high butter and egg content make it more pastry-like than traditional bread.
What makes brioche so fluffy?
Brioche’s fluffiness comes from its enriched dough containing eggs, butter, and milk. The eggs provide structure and lift, while butter creates tender layers. The high fat content interferes with gluten development, creating a softer crumb. Proper fermentation and multiple rises also develop air pockets, resulting in that signature light, airy texture.
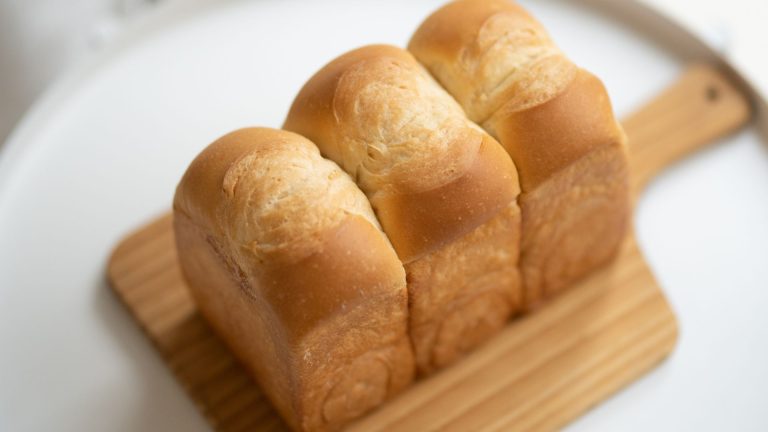
Milk Brioche
Classic brioche gets its richness primarily from generous amounts of eggs and butter, while milk brioche incorporates milk into the enriched dough, creating subtle but significant improvements.
Ingredients
- 4 cups all-purpose flour
- 1 packet (2¼ tsp) active dry yeast
- ⅓ cup granulated sugar
- 1 tsp salt
- ¾ cup whole milk, lukewarm
- 3 large eggs (room temperature)
- ½ cup unsalted butter, softened
- 1 egg for wash
Instructions
- Activate the yeast. In your stand mixer bowl, whisk together lukewarm whole milk, sugar, and active dry yeast. Let it sit for 10 minutes until foamy – this confirms your yeast is alive.
- Mix the dough. Add flour, salt, and 2 eggs to the yeast mixture. Using the dough hook, mix on low speed for 3-5 minutes until a shaggy dough forms.
- Incorporate butter. With the mixer running on medium speed, add softened butter one piece at a time. This takes 10-15 minutes, but the dough will transform into smooth, elastic perfection.
- First rise. Shape dough into a ball, place it in an oiled bowl, and rise for 2 hours until doubled.
- Cold fermentation. Punch down gently and refrigerate overnight for complex flavors.
- Shape and final proof. Divide chilled dough, shape as desired, and rise 1.5-2 hours until puffy.
- Bake to perfection. Brush with egg wash and bake at 375°F for 25-35 minutes until golden brown.
Notes
Temperature matters: butter should leave a fingerprint when pressed, but not be melted. Room temperature eggs blend more easily than cold ones. Milk should feel like bath water – lukewarm activates yeast perfectly.