Last updated on August 18th, 2025
Making easy sourdough bread feels impossible when staring at complicated recipes with endless steps and cryptic fermentation timelines. You’ve probably avoided it, thinking you need professional skills or fancy equipment to create that perfect crusty loaf with the ideal tangy flavor. The truth is, most recipes overcomplicate what’s a simple process using just three ingredients: flour, water, and salt. This beginner-friendly approach cuts through the confusion with clear timing, foolproof techniques, and troubleshooting tips that guarantee bakery-quality results from your first attempt.
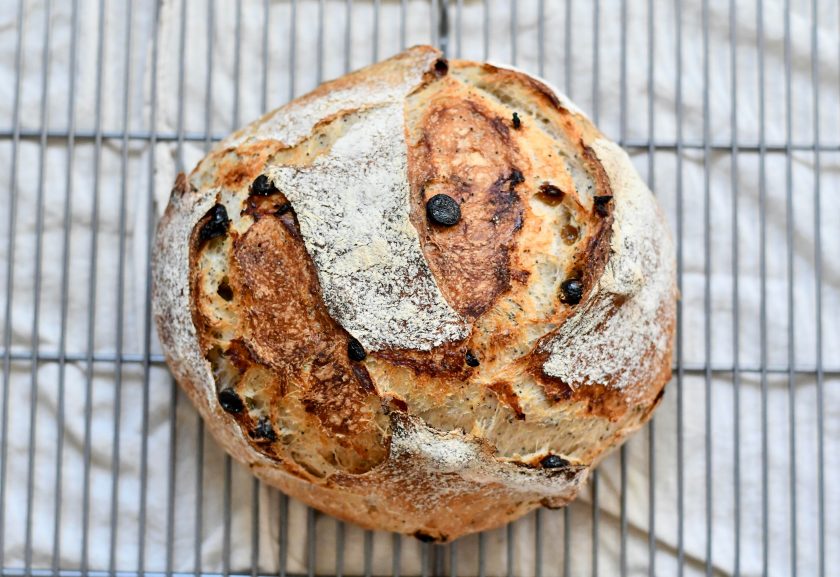
What is Sourdough Bread?
Think of sourdough as bread’s wild child – the free-spirited cousin who ditches commercial yeast for something far more interesting. Sourdough is a type of bread that uses fermentation by naturally occurring yeast and lactobacillus bacteria to raise the dough. Instead of relying on packets of store-bought yeast, this ancient technique harnesses wild microorganisms that are floating in the air around us.
Sourdough bread is made using a naturally fermented mixture of flour and water called a sourdough starter. This sourdough starter is a living culture of wild yeast and lactic acid bacteria that leaven the bread and develop its characteristic flavor. It’s like having a pet that you feed with flour and water, and in return, it gives you incredible bread.
What makes sourdough special isn’t just the wild yeast – it’s the lactobacillus bacteria that create that distinctive tangy flavor. LAB outnumber yeast cells in a mature sourdough starter by roughly 100 to 1. These bacteria produce lactic acid and acetic acid, giving sourdough its signature sour taste while keeping harmful bacteria away.
The fermentation process makes sourdough easier to digest than regular bread. Sourdough is also a prebiotic, which helps to support the gut microbiome. Unlike commercial bread with its long ingredient list, authentic sourdough needs just three things: flour, water, and salt. The starter does all the heavy lifting, creating complex flavors that prove sometimes the old ways are the best.
Related: Ultimate Guide to Garlic Bread
Tools You Need
Must-Have Tools:
- Kitchen scale for accurate measurements
- Large mixing bowl (clear-sided preferred)
- Bench scraper for handling sticky dough
- 5-6 quart Dutch oven for steam and crust
Nice-to-Have Tools:
- Proofing basket for shaping and pretty patterns
- Bread lame for scoring (sharp knife works too)
- Baking stone for an extra crispy bottom
Ingredients
- Bread flour (500g) – Higher protein content (12-14%) creates stronger gluten networks for better rise and open crumb
- Active sourdough starter (100g) – Your living leavening agent at 100% hydration that contributes both flavor and lift
- Filtered water (350-400g) – Controls hydration levels; aim for 70-75% hydration for beginner-friendly dough
- Salt (10g) – Strengthens gluten, controls fermentation, and enhances flavor; use 2% of flour weight
Step-by-Step Recipe
- Mix and Rest (Autolyse) – Combine flour and water in a large bowl until you get a shaggy, rough mixture where all the flour gets hydrated. Cover and let rest for 30 minutes to an hour. This autolyse period lets flour proteins form gluten bonds naturally while enzymes break down starches into simpler sugars. You’ll notice the dough becomes smoother and more extensible during this time.
- Add Starter and Salt – Introduce your active sourdough starter and salt to the rested flour mixture. Mix everything using your hands or a wooden spoon until just combined. The dough will feel sticky and unmanageable – this is normal! Pro tip: make a slurry with reserved water, starter, and salt for easier incorporation.
- Stretch and Fold Development – Wet your hands, grab one edge of the dough, and stretch it up and over to the opposite side. Rotate your bowl a quarter turn and repeat until you’ve completed a full circle. Perform this technique twice, spacing sets 30 minutes apart. Each fold builds strength and traps gas bubbles for an airy crumb.
- Bulk Fermentation – Let your dough increase by 50-75% in volume over 7-10 hours at room temperature. Watch for visual cues: the dough should look puffy with visible gas bubbles and jiggle slightly when you shake the bowl. Trust your eyes more than the clock.
- Shape and Final Rise – Turn fermented dough onto a lightly floured surface and shape into a round boule. Rest 15 minutes, then do final shaping before placing in a proofing basket. For easier scoring and better oven spring, proof in the refrigerator overnight.
- Score and Bake – Using a sharp blade, make one deep expansion score about ¼ to ½ inch deep. A simple slash or cross pattern works perfectly for beginners. Bake in a preheated Dutch oven at 500°F with lid on for 20 minutes, then remove lid and reduce to 475°F for 15-25 minutes until golden brown.
Making and Caring for the Starter
Creating your sourdough starter feels like conducting a tiny orchestra of wild yeast and bacteria – honestly, it’s way less intimidating than it sounds. Since wild yeast is present in all flour, the easiest way to make a starter is simply by combining flour and water and letting it sit for several days.
Day one starts ridiculously simple: mix equal parts flour and water in your starter jar using a 1:1 ratio. Stir it into a thick pancake batter consistency, cover with a coffee filter, and let nature work its magic at 75-80°F. Days two and three bring bubbles as wild yeast wakes up. You may see bubbles on day 2, or you may not. Trust the process!
Starting on day four, begin the discard and feed cycle. Remove and discard half of your sourdough starter from the jar, then add fresh flour and water. This 1:1:1 feeding ratio means equal weights of starter, flour, and water. Continue daily until your starter consistently doubles in size within 6-8 hours.
Choose a wide-mouth quart jar and mark it with a rubber band to track growth. Use a small rubber spatula to scrape down the sides to prevent mold. Your starter should smell tangy and pleasantly sour, not foul. When ready to bake, use your starter at peak activity when it doubles and passes the float test – drop a spoonful in water, and if it floats, you’re golden.
Common Mistakes & Fixes
Flat, Dense Bread
The most frustrating outcome after hours of work is a loaf that looks more like a Frisbee than bread. This usually happens from under-proofing – your dough simply didn’t get enough time to develop structure and rise properly. Think of it like trying to wake up before you’ve had enough sleep.
- Test with the poke method: gently press your finger into the dough, it should spring back slowly but leave a slight indentation
- Move the dough to a warmer spot around 75°F – try your oven with just the light on
- Give bulk fermentation more time, especially in cooler kitchens
Impossibly Sticky Dough
Nothing’s more maddening than dough that clings to everything except where it belongs. This sticky nightmare usually comes from temperature issues – hot kitchens speed up fermentation, creating a gloppy mess. Don’t panic and dump flour everywhere!
- Wet your hands before handling, instead of adding more flour
- Use cooler water in hot kitchens to slow fermentation
Overly Sour Flavor
Sometimes your bread develops a tang that could strip paint. Over-fermentation creates this unpleasantly strong sour bite.
- Reduce the rising time by at least an hour
- Move the dough to a cooler environment to slow fermentation
- Consider partial refrigeration during bulk fermentation
Related: The Home Baker’s Guide to Perfect Yeast Bread
Storing Your Bread
Your gorgeous loaf is finally out of the oven, and after hours of work, the last thing you want is to watch it turn into a brick or sprout fuzzy green fuzz. Think of proper storage like creating a cozy apartment for your bread – it needs just the right balance of moisture and airflow to stay happy for as long as possible.
For that first magical day after baking, your sourdough is showing off – the crust stays crispy while the crumb remains perfectly moist. Just leave it uncovered on your counter, cut side down, to prevent the exposed crumb from drying out. Once you hit the 24-hour mark, grab a large bowl or cake cover to create a protective dome that maintains airflow while shielding your bread.
Here’s where a good bread knife becomes your best friend – a dull knife will squash your loaf instead of cutting it cleanly. For longer storage, an airtight bag is your top choice for sourdough bread stored at room temperature for longer than a day. Skip the fridge entirely – it’ll turn your masterpiece stale faster than you can say “sandwich.”
Freezing transforms your storage game completely. Slice your cooled loaf, layer parchment paper between slices, and freeze in ziplock bags. Frozen slices toast beautifully straight from the freezer, while whole loaves can be refreshed by misting with water and reheating in a 350°F oven for 10-15 minutes for that fresh-baked magic all over again.
Now You’re Ready to Bake
You now have everything needed for incredible sourdough – just flour, water, salt, and patience. Your starter becomes a reliable kitchen companion with the simple 1:1:1 feeding ratio and float test mastery. Trust the process over rushing: watch for a 50-75% volume increase and use the poke test for perfect timing.
Armed with troubleshooting knowledge for flat bread, sticky dough, and sourness issues, you’re prepared for any baking challenge. Proper storage keeps your loaves fresh for days, with freezing options for long-term enjoyment.
Stop overthinking it – exceptional sourdough uses just three ingredients and ancient techniques your ancestors perfected. Start your first starter today and join thousands of years of baking tradition while creating artisan-quality bread that nourishes your body.
FAQs – Easy Sourdough Bread Recipe
What is the secret to good sourdough bread?
The secret lies in maintaining an active, healthy starter and mastering fermentation timing. Use proper hydration ratios, develop gluten through folding techniques, and be patient with long fermentation. Temperature control and understanding your starter’s peak activity are crucial for achieving the perfect tangy flavor and airy crumb structure.
Is sourdough healthier than regular bread?
Yes, sourdough offers several health benefits over regular bread. The fermentation process breaks down gluten proteins, making it easier to digest. It has a lower glycemic index, contains beneficial probiotics, and increases mineral bioavailability. The natural acids also act as preservatives, eliminating the need for artificial additives found in commercial breads.
What is the biggest mistake you can make with your sourdough starter?
The biggest mistake is neglecting consistent feeding schedules. Starving your starter or feeding it irregularly weakens the yeast and bacteria balance, leading to poor rise and off flavors. Using chlorinated water, wrong flour types, or storing at incorrect temperatures also compromises starter health and bread quality significantly.
How do you make a quick sourdough starter?
While traditional starters take 7-14 days, you can accelerate the process by using whole grain flours, maintaining warmer temperatures (75-80°F), and feeding twice daily with equal parts flour and water. Adding a small amount of pineapple juice initially helps create the right acidic environment for faster fermentation.
Easy Sourdough Bread Recipe for Beginners
The fermentation process makes sourdough easier to digest than regular bread. Sourdough is also a prebiotic, which helps to support the gut microbiome.
Ingredients
- Bread flour (500g)
- Active sourdough starter (100g)
- Filtered water (350-400g)
- Salt (10g)
Instructions
- Mix and Rest (Autolyse) – Combine flour and water until shaggy. Cover and rest 30 minutes to 1 hour for natural gluten development.
- Add Starter and Salt – Mix active sourdough starter and salt into rested flour mixture by hand until combined. Dough will feel sticky.
- Stretch and Fold – Wet hands, stretch dough edges over to opposite side, rotating bowl. Perform twice, 30 minutes apart, building strength and trapping gas bubbles.
- Bulk Fermentation – Let dough increase 50-75% over 7-10 hours at room temperature. Look for puffy appearance with visible bubbles.
- Shape and Final Rise – Shape into boule, rest 15 minutes, final shape, then proof in basket. Refrigerate overnight for easier scoring.
- Score and Bake – Score ¼-½ inch deep. Bake in Dutch oven at 500°F covered 20 minutes, then 475°F uncovered 15-25 minutes until golden.
Notes
Since wild yeast is present in all flour, the easiest way to make a starter is simply by combining flour and water and letting it sit for several days.