
Last updated on May 30th, 2026
If you haven’t heard of a bread machine, then it’s time to invest in one. Now, making sourdough bread is certainly delicious and rewarding, but it admittedly can be time-consuming. The phenomenal results of a perfectly baked sourdough loaf are certainly worth the effort, but pushing a button and wandering off to do something else while the dough is being kneaded for you is also an attractive prospect. Try this sourdough bread machine recipe, if you just don’t have the time but still want to make gorgeous sourdough loaves!
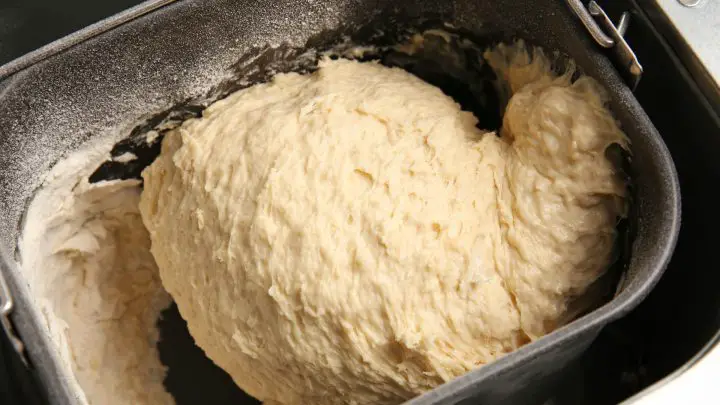
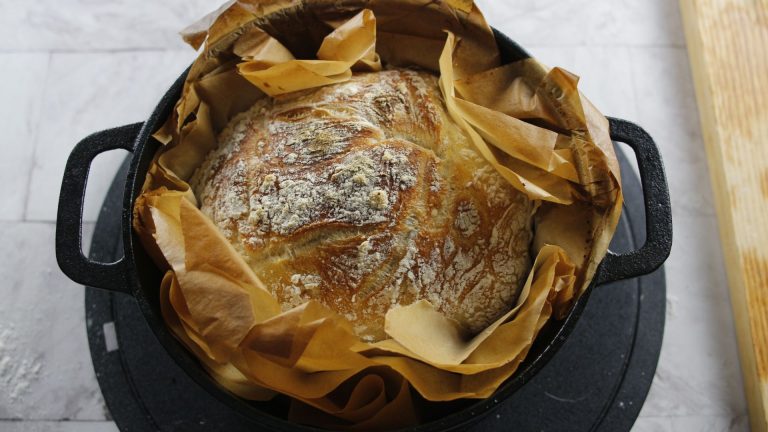
Bread Machine Sourdough Recipe
A bread machine is probably one of the handiest tools for sourdough bread bakers. And your sourdough loaf will emerge just as delicious!
If you’re unable to hunch over the kitchen counter and knead the dough with pent-up passion, then have no fear, the brilliant bread machine will gladly take your place to create scrumptious sourdough loaves!
- Total Time: 8 hrs 55 mins (mostly hands-off)
- Yield: 1 loaf 1x
Ingredients
- 120g (½ cup) active sourdough starter, fed and bubbly
- 180g (¾ cup) water, room temperature
- 360g (3 cups) bread flour, all-purpose flour, or whole grain rye flour
- 1 teaspoon (6g) fine sea salt
Optional Add-ins
- 1–2 tablespoons softened butter (for softer texture)
- 1 teaspoon honey or sugar (for better crust browning)
Equipment Needed
- Bread machine with dough cycle
- Kitchen scale
- Dutch oven (5-7 quart) with lid
- Parchment paper
- Sharp knife or bread lame
- Wire cooling rack
- Serrated bread knife
Instructions
- Add ingredients to bread machine pan in manufacturer’s recommended order
- Run dough cycle (approximately 90 minutes)
- Continue with rise cycle for 2 more hours until doubled
- Remove dough and shape into smooth ball on floured surface
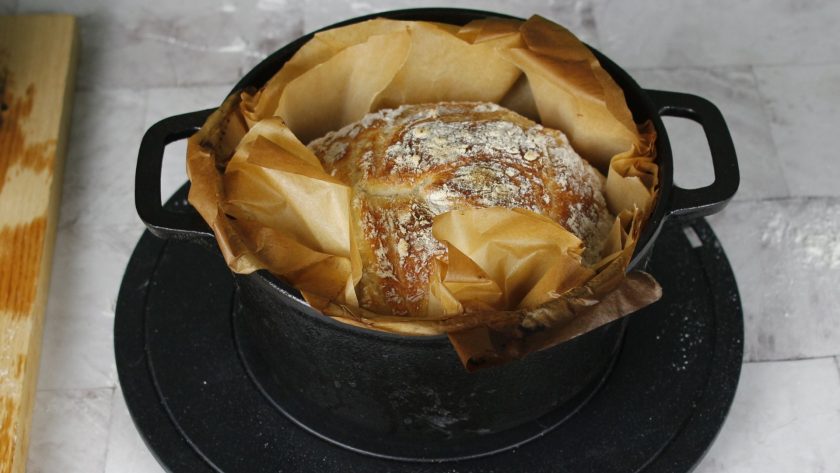
- Place in parchment-lined Dutch oven, cover, and rise 4 hours until doubled
- Preheat oven to 450°F during last 30 minutes of rising
- Score top of dough with sharp knife
- Bake covered at 450°F for 25 minutes
- Remove lid, reduce to 400°F, bake 20 minutes more until golden brown
- Cool on wire rack for at least 1 hour before slicing
Notes
- Hydration level: This recipe is at 50% hydration. For airier texture, increase water to 270g (75% hydration)
- Flour substitutions: Can use 100% whole wheat, rye, or mix of flours
- Storage: Store in bread box 3-4 days or freeze sliced for up to 3 months
- Starter test: Active starter should double in 4-6 hours after feeding
- Internal temp: Bread is done when center reaches 205-210°F
- Prep Time: 10 mins
- Cook Time: 45 mins
- Category: bread
- Method: Baking
- Cuisine: American
Nutrition
- Calories: 117 kcal
- Sodium: 195 mg
- Fat: 1g
- Saturated Fat: 1g
- Carbohydrates: 24g
- Fiber: 1 g
- Protein: 4g
In Today’s Post
Today I am here to show you how to make delicious sourdough bread using a bread machine to handle the kneading.
This one’s for bakers who want authentic sourdough flavor without the physical effort of hand-kneading. The bread machine method combines the benefits of wild yeast fermentation with modern convenience.
We’re learning the complete process, from feeding your starter to baking a beautiful loaf in your Dutch oven.
- Use your bread machine for kneading only, then finish rising and baking traditionally
- Total time: ~9 hours (mostly hands-off rising time)
- Produces one delicious loaf with authentic sourdough flavor
- Great for those with mobility issues or time constraints
Why Use a Bread Machine for Sourdough?
Traditional sourdough bread making is incredibly rewarding, but the extensive kneading process can be time-consuming and physically demanding. A bread machine offers a practical solution that doesn’t compromise on quality.
Benefits of Bread Machine Sourdough
| Benefit | Description |
|---|---|
| Speed | Automated kneading saves 20-30 minutes of hands-on time |
| Consistency | Machine provides even gluten development |
| Accessibility | Perfect for bakers with arthritis, carpal tunnel, or limited hand strength |
| High Hydration | Handles sticky, wetter doughs without the mess |
| Energy | Frees you to multitask while dough kneads |
Have a medical condition? Bread machines allow you to continue enjoying your passion for baking without, physical strain. And no, it isn’t cheating!
Using Sourdough Discard
Don’t throw away that excess starter! You can absolutely use sourdough discard in this bread machine recipe.
How to Substitute
- Use discard in place of active starter
- Add ¼ teaspoon commercial yeast to compensate for reduced leavening power
- Or increase rising time by 1-2 hours
The flavor will be tangier and just as delicious!
Tips to Know for a Successful Loaf
Hydration Levels
Water content dramatically affects your final loaf:
- 65-70% hydration: Denser, chewier crumb
- 75% hydration: Airy, fluffy texture with larger holes (recommended)
- 80%+ hydration: Very open crumb, requires experience
Read more about High Hydration Sourdough on the blog.
Optional Enhancements
For Softer Texture
- Add 1-2 tablespoons softened butter to the dough
- Note: This will produce a less crispy crust
For Better Browning
- Add 1 teaspoon sugar or honey to the dough
- Especially important since home ovens don’t reach bakery temperatures
- Creates a beautiful, golden-brown crust
Before Baking
- Lightly dust the top of your risen dough with flour
- Score deeply from top to middle with a sharp blade
- This allows proper expansion and creates an artisan appearance
Bread Machine Sourdough Recipe
This delicious machine sourdough bread is probably one of the easiest tools for sourdough bread bakers. And your sourdough loaf will emerge just as delicious, if not better!
If you’re unable to hunch over the kitchen counter and knead the dough with pent-up passion, then have no fear, the brilliant sourdough bread machine will gladly take your place!
Ingredients
- 120g sourdough starter
- 180g water
- 360g whole grain dark rye flour, bread flour, or all-purpose flour
- 1 tsp. salt
| Ingredient | Amount | Notes |
|---|---|---|
| Active sourdough starter | 120g (½ cup) | Should be fed and bubbly |
| Water | 180g (¾ cup) | Room temperature |
| Flour | 360g (3 cups) | Bread flour, all-purpose, or whole grain rye |
| Salt | 1 tsp (6g) | Fine sea salt preferred |
Flour Options
- Bread flour: Best for structure and rise
- All-purpose: Good all-around choice
- Whole grain rye: Deeper flavor, denser texture
- Mix of flours: Experiment with 50/50 combinations
How to Make
- Add ingredients to bread machine pan in the order recommended by your manufacturer (typically: liquids first, then dry ingredients, with salt away from starter)
- Start the dough cycle and allow it to complete (usually 90 minutes of kneading and initial rising)
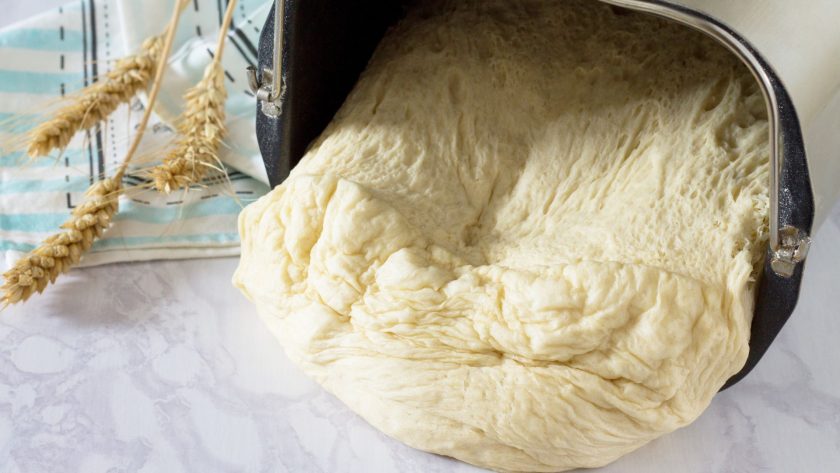
- Continue the rise cycle for an additional 2 hours in the machine, or until dough has roughly doubled
- Remove dough from the bread machine and place on a lightly floured surface
- Shape into a smooth ball by gently folding edges toward the center, then flipping seam-side down
- Prepare Dutch oven by lining with parchment paper (leave long edges to use as handles later)
- Transfer dough to the parchment-lined Dutch oven, seam side down
- Cover with lid and let rise for 4 hours at room temperature until doubled in volume (should feel puffy and spring back slowly when poked)
- Preheat oven to 450°F (230°C) during the last 30 minutes of rising
- Score the dough with a sharp knife or bread lame, making one deep slash or decorative pattern
- Bake covered at 450°F for 25 minutes with the lid on
- Remove lid and reduce temperature to 400°F (200°C), then bake for an additional 20 minutes until deep golden brown
- Cool completely on a wire rack (at least 1 hour) before slicing to allow crumb to set
Recipe Tips and Notes
- Starter readiness test: Drop a small amount in water: if it floats, it’s ready to use
- Don’t skip the cooling: Cutting too early results in gummy texture
- Use a serrated knife or electric knife for clean slices
- Storage: Keep in a bread box or paper bag for 3-4 days, or slice and freeze for up to 3 months
- Crust softening: If you prefer a softer crust, place the hot loaf in a plastic bag immediately after baking
Sourdough Starter Feeding Guide for This Recipe
How Much to Feed
The simplest method uses equal weights:
Night Before Baking
- Reserve 60g starter
- Add 60g fresh flour (rye or whole wheat preferred)
- Add 60g water
- Mix well and let sit overnight (8-12 hours)
Morning of Baking
- You’ll have 180g total starter
- Use 120g for this recipe
- Keep 20g for maintenance
- Discard or use remaining 40g in another recipe
Feed Remaining Starter
- Mix 20g starter + 20g flour + 20g water
- Store in refrigerator or continue counter feeding
Best Flour for Starter
| Flour Type | Benefits |
|---|---|
| Whole wheat | High nutrients, active fermentation, mild flavor |
| Rye flour | Very nutritious, robust flavor, fast fermentation |
| All-purpose | Consistent, mild flavor, readily available |
Recommendation: Use whole grain (wheat or rye) for the most active, healthy starter.
Sourdough Bread Machine – Our Pick!
The bread machine is an incredible tool to have in your kitchen, alongside the Dutch oven, and dough mixer of course!

- 12 MENU FEATURES: The compact, automatic Cuisinart Bread Maker Machine offers a wide range of options with its 12 menu programs, allowing you to bake various types of bread and other baked goods.
Prices pulled from the Amazon Product Advertising API on:
Product prices and availability are accurate as of the date/time indicated and are subject to change. Any price and availability information displayed on [relevant Amazon Site(s), as applicable] at the time of purchase will apply to the purchase of this product.
Recommended Equipment
Non-negotiables
- Bread machine with dough cycle
- Dutch oven (5-7 quart)
- Kitchen scale (for accurate measurements)
- Sharp knife or bread lame

- ORIGINAL KITCHEN MULTITASKER – The DuraCast 6Qt Enameled Cast Iron Dutch Oven is the ultimate cookware piece to enhance any meal from gourmet macaroni and cheese to healthy sourdough bread. The natural heat retention of the cast iron pot combined with the enamel finish allows you to fry and sauté, sear, slow cook, stew, braise, boil, deep fry, roast, broil & bake up to 500°F! Compatible with all cooktops, including induction and oven.
Prices pulled from the Amazon Product Advertising API on:
Product prices and availability are accurate as of the date/time indicated and are subject to change. Any price and availability information displayed on [relevant Amazon Site(s), as applicable] at the time of purchase will apply to the purchase of this product.
Helpful
- Bread storage container
- Instant-read thermometer (internal temp should reach 205-210°F)
- Bench scraper
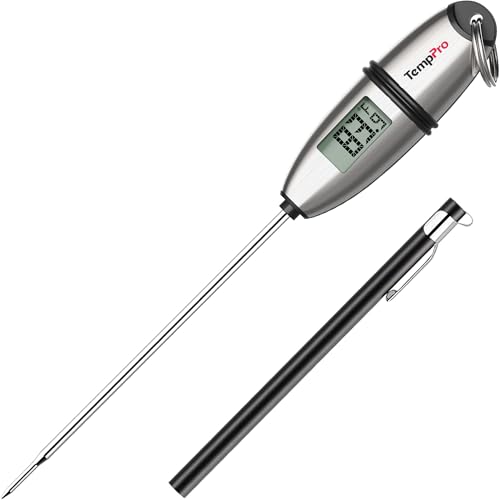
- Fast and Accurate Reading: Kitchen thermometer for cooking features a 1 to 3 second readout speed and high accuracy of ±0.9 degrees Fahrenheit, ensuring you receive the most delicious results every time
Prices pulled from the Amazon Product Advertising API on:
Product prices and availability are accurate as of the date/time indicated and are subject to change. Any price and availability information displayed on [relevant Amazon Site(s), as applicable] at the time of purchase will apply to the purchase of this product.
Let the Machine Do the Kneading!
Start with this basic recipe, then experiment with different flours, add-ins like seeds or dried fruit, and varying hydration levels to make it your own!
I used rye flour in this recipe, so you might like these rye sourdoughs on my blog as well:
Sourdough Bread Machine Recipe – FAQs
How Does Sourdough Rise Without Yeast?
Contrary to what many may believe, sourdough most certainly does not rise without yeast, just like regular bread dough. The difference is, that sourdough does not require commercial yeast to rise, but rather a natural culture of wild yeasts and good bacteria, otherwise known as the sourdough starter.
This sourdough starter is quite literally a living breathing organism, that resides on your kitchen counter, requiring regular feedings to remain alive and healthy. The naturally occurring yeasts in the sourdough starter feed on the flour and water to create carbon dioxide gas. This also creates air bubbles in your sourdough bread recipe.
You will require a strong gluten network so that the dough is able to maintain the gas bubbles produced by the sourdough yeast.
How Much Should I Feed My Sourdough Starter?
When it comes to feeding your sourdough starter, the simplest way of feeding it is to combine equal weights of starter, with flour and water.
The night before baking, reserve 60g of sourdough starter, then proceed to mix in 60g of fresh wholegrain rye flour and 60g of water. The next morning you should have 180g of sourdough starter all ready for you.
Then simply measure out 120g for the bread, 20g to feed, and discard the remainder. Finally, feed the remaining 20g of sourdough starter with 20g of flour and 20g of water.
What is The Best Flour to Feed My Sourdough Starter?
When it comes to choosing the best flour for your starter, you should aim for the most nutritious flour i.e., whole wheat or rye flour. This is so that it can supply a good amount of nutrients for your yeast and bacteria to flourish, as well as produce wonderfully flavored sourdough loaves.
Can You Use A Bread Machine To Make A Whole Wheat Sandwich Bread?
Absolutely, and why not? Simply swap your regular flour for wheat flour, and toss the ingredients into the machine and let the bread maker work its magic! The bread machine is great for baking basic sourdough bread, but if you’re looking for something a little more healthy and flavorful, then you can certainly experiment with a variety of flour.
You can even sweeten the no-yeast sourdough bread with a smidge of granulated sugar, honey, or even maple syrup. I like to add this in with my main ingredients so that it blends with the smooth beautifully.
Why is My Bread Dense?
Common causes:
Weak starter: Make sure it doubles in size after feeding
Under-proofed: Dough should double and feel puffy
Old flour: Check expiration dates
Too much salt: Can inhibit yeast activity





