Last updated on September 25th, 2025
Making killer bread at home just got super easy with these awesome bread machine recipes. With grocery prices going crazy, homemade bread is totally the way to go. These five rock-solid recipes are foolproof – just follow the steps and you’ll get amazing results every time. Whether you’re into classic white bread, healthy whole wheat, sweet cinnamon raisin, gluten-free options, or that fancy herb and cheese stuff, these recipes have you covered. Your kitchen’s about to smell incredible, and your wallet will thank you for ditching those overpriced store loaves.

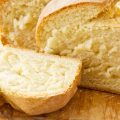
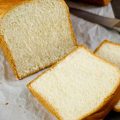
Basic White Bread (Beginner-Friendly)
Ingredients (1.5 lb loaf):
- 1 cup warm water (110°F / 43°C)
- 2 tbsp sugar
- 2 ¼ tsp active dry yeast
- 3 cups bread flour
- 1 tsp salt
- 2 tbsp butter, softened
Instructions:
- Begin by adding the warm water to your bread machine pan, ensuring the temperature is between 105-115°F for optimal yeast activation. Sprinkle the sugar evenly over the water, followed by the active dry yeast. Let this mixture stand for 5-10 minutes until it becomes foamy and bubbly, which confirms your yeast is active and ready to work.
- Once the yeast mixture is foamy, add the bread flour to the pan, spreading it evenly to cover the liquid completely. Create a small well or depression in the center of the flour using your finger or a spoon. Place the salt on one side of the flour and the softened butter on the opposite side, keeping both ingredients away from direct contact with the yeast to prevent inhibiting its activity.
- Carefully insert the bread pan into your bread machine, ensuring it’s properly seated and locked in place. Select the Basic/White Bread setting on your machine’s control panel and choose your preferred crust color – light for a pale, soft crust, medium for golden brown, or dark for a deep, crispy exterior.
- Press start and allow the machine to complete its full automatic cycle, which includes mixing, kneading, rising, and baking phases over approximately 3-4 hours.
- When the cycle completes, immediately remove the hot loaf from the pan and transfer to a wire cooling rack. Allow the bread to cool completely for at least 30-45 minutes before slicing to ensure proper texture and prevent the interior from becoming gummy or compressed.
Related: The Best Sourdough Bread Machine Recipe
Whole Wheat Honey Bread
Ingredients (1.5 lb loaf):
- 1 cup warm water
- 2 tbsp honey
- 2 tbsp olive oil
- 1 ½ cups whole wheat flour
- 1 ½ cups bread flour
- 1 ½ tsp salt
- 2 ¼ tsp active dry yeast
Instructions:
- Start by pouring the warm water (around 110°F) into your bread machine pan, ensuring it covers the bottom evenly. Drizzle the honey directly into the warm water, allowing it to dissolve naturally – you can give it a gentle stir if needed. Add the olive oil to the liquid mixture, which will help create a tender, moist texture in the finished loaf.
- Next, add the whole wheat flour first, spreading it evenly across the liquid mixture. The whole wheat flour is denser and benefits from being in direct contact with the moisture. Follow with the bread flour, creating an even layer that completely covers the wet ingredients. Make a small indentation in the center of the flour mixture.
- Carefully sprinkle the salt along one edge of the flour, keeping it away from where you’ll place the yeast. Create a small well in the opposite side of the flour and add the active dry yeast, ensuring it doesn’t come into direct contact with the salt or liquid, which could inhibit its effectiveness.
- Insert the bread pan securely into your bread machine and select the Whole Wheat cycle, which provides a longer rising time to accommodate the denser whole wheat flour. Choose your preferred crust setting – medium typically works best for whole wheat bread.
- Allow the machine to complete the entire cycle without interruption. Once finished, immediately remove the loaf from the pan and place it on a wire cooling rack. Let the bread cool completely for at least 45 minutes to an hour before slicing, as whole wheat breads need extra time to set properly and develop their full flavor and texture.
3. Cinnamon Raisin Bread
Ingredients (1.5 lb loaf):
- 1 cup warm milk
- 2 tbsp butter
- 3 cups bread flour
- 3 tbsp sugar
- 1 tsp salt
- 1 ½ tsp ground cinnamon
- 2 ¼ tsp active dry yeast
- ¾ cup raisins (add at “add-in” beep)
Instructions:
- Begin by warming the milk to approximately 110°F – it should feel comfortably warm to the touch but not hot. Pour the warm milk into your bread machine pan, then add the butter, which can be softened or melted. The warm milk will help soften any remaining solid butter pieces during the initial mixing phase.
- Add the bread flour to the pan, spreading it evenly to cover the liquid ingredients completely. Sprinkle the sugar evenly over the flour – this will feed the yeast and contribute to the bread’s tender, slightly sweet crumb. Distribute the ground cinnamon throughout the flour mixture for even flavor distribution.
- Create a small well on one side of the flour and add the salt, keeping it separate from where you’ll place the yeast. Make another depression on the opposite side of the flour and carefully add the active dry yeast, ensuring it doesn’t come into direct contact with the salt or liquid ingredients until mixing begins.
- Insert the bread pan into your machine and select the Sweet Bread setting, which provides a gentler kneading cycle and appropriate rising time for enriched doughs. Choose your desired crust color, keeping in mind that sweet breads tend to brown more quickly due to the sugar content.
- When your bread machine signals with its add-ingredient beep (typically after the first kneading cycle), quickly add the raisins to the pan. The machine will incorporate them during the next kneading phase without over-mixing.
- Allow the machine to complete its full cycle. Once finished, immediately remove the loaf and transfer to a wire cooling rack. Let the bread cool completely for at least one hour before slicing to allow the interior to set properly and prevent the sweet, tender crumb from becoming compressed.
Gluten-Free Bread Machine Bread
Ingredients (1.5 lb loaf):
- 1 ½ cups warm water
- 3 tbsp olive oil
- 3 cups gluten-free bread flour blend
- 2 tbsp sugar
- 1 tsp salt
- 1 tbsp xanthan gum (if not already in flour blend)
- 2 ¼ tsp active dry yeast
Instructions:
- Start by adding the warm water (110°F) to your bread machine pan, ensuring it’s at the proper temperature since gluten-free doughs are more sensitive to temperature variations. Pour in the olive oil, which helps provide moisture and structure that gluten would normally contribute to traditional bread doughs.
- Carefully measure and add the gluten-free bread flour blend, spreading it evenly over the liquid ingredients. Check your flour blend’s label first – if it doesn’t already contain xanthan gum, add the full tablespoon to help bind the ingredients and create structure. Sprinkle the sugar evenly over the flour, which will help feed the yeast and improve the bread’s texture and browning.
- Create a small depression on one side of the flour mixture and add the salt, keeping it separated from where you’ll place the yeast. On the opposite side, make another well and carefully add the active dry yeast, ensuring it remains dry and doesn’t come into contact with the salt or liquid until the mixing cycle begins.
- Insert the bread pan securely into your bread machine. If your machine has a Gluten-Free cycle, select this setting as it’s specifically designed with shorter kneading times and adjusted rising periods for gluten-free doughs. If this cycle isn’t available, use the Basic setting but monitor the dough consistency during the first few minutes of kneading.
- Allow the machine to complete its entire cycle without opening the lid, as gluten-free doughs are more sensitive to temperature fluctuations and interruptions. Once the baking cycle finishes, immediately remove the loaf from the pan.
- Transfer the bread to a wire cooling rack and let it cool completely for at least 1-2 hours before attempting to slice. Gluten-free bread is particularly delicate and fragile when hot, and slicing too early will result in a gummy, compressed texture. The bread will firm up and develop better structure as it cools completely.
Related: Sourdough Bread Machine Recipe – No Yeast No Problem!
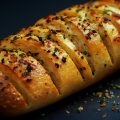
Herb & Cheese Bread
Ingredients (1.5 lb loaf):
- 1 cup warm water
- 2 tbsp olive oil
- 3 cups bread flour
- 2 tbsp sugar
- 1 tsp salt
- 1 tsp dried basil
- 1 tsp dried oregano
- ¾ cup shredded cheddar cheese
- 2 ¼ tsp active dry yeast
Instructions:
- Begin by adding the warm water (around 110°F) to your bread machine pan, ensuring it’s at the optimal temperature for yeast activation. Pour in the olive oil, which will contribute to the bread’s flavor and help create a tender crumb that complements the herbs and cheese perfectly.
- Add the bread flour to the pan, spreading it evenly to cover the liquid ingredients completely. Sprinkle the sugar over the flour – this small amount will help feed the yeast and balance the savory flavors. Distribute the salt evenly across one section of the flour, keeping it away from where you’ll place the yeast.
- Evenly distribute the dried basil and oregano throughout the flour mixture, ensuring the herbs are well-dispersed for consistent flavor in every slice. The dried herbs will rehydrate during the kneading process and infuse the entire loaf with aromatic Mediterranean flavors.
- Create a small well in the center of the flour mixture, opposite where you placed the salt, and carefully add the active dry yeast. Make sure the yeast doesn’t come into direct contact with the salt or liquid ingredients until the mixing cycle begins.
- Insert the bread pan into your machine and select the Basic/White Bread setting, which provides the appropriate kneading and rising times for this enriched dough. Choose your preferred crust color, keeping in mind that the cheese may cause slightly more browning.
- When your bread machine signals with its add-ingredient beep (typically 15-20 minutes into the cycle), quickly lift the lid and add the shredded cheddar cheese. The timing is crucial – adding it too early will cause the cheese to break down completely, while adding it too late won’t allow proper incorporation.
- Once the baking cycle completes, immediately remove the loaf from the pan and transfer it to a wire cooling rack. Allow the bread to rest for at least 20-30 minutes before slicing. This resting period allows the melted cheese to set slightly and prevents it from oozing out when you cut into the warm bread, ensuring clean, attractive slices with evenly distributed cheese throughout.
You’re Ready to Rock That Bread Machine!
Congrats – you now have five foolproof recipes that’ll make your kitchen smell amazing and your family think you’re a total bread wizard. The game-changer here? It’s all about that 110°F water temp and keeping salt away from yeast.
Whether you’re going basic white, getting fancy with herbs and cheese, or keeping it healthy with whole wheat, you’ve got this covered. Your bread machine just became your new best friend, ready to pump out bakery-quality loaves while you Netflix and chill.
FAQs – 5 Bread Machine Recipes
What can I make in my bread machine?
Your bread machine is way more versatile than you think! You can make tons of different breads – white, whole wheat, sourdough, gluten-free, sweet breads like banana or cinnamon raisin. But get this – you can also whip up pizza dough, dinner rolls, cinnamon rolls, jams, and even cake! Some machines have pasta dough settings, too.
Is it cheaper to buy bread or make it in a bread machine?
Making bread at home is cheaper! A homemade loaf costs around $1-2 in ingredients, while decent store-bought bread runs $3-5. Even fancy artisan loaves only cost about $2 to make yourself. Plus, you know exactly what’s going on in there – no weird preservatives or additives. Your wallet and your family will thank you.