Last updated on September 25th, 2025
Fresh bread baking fills your kitchen with incredible aromas. These easy bread recipes for beginners use simple pantry ingredients and straightforward techniques that build confidence with every bake. Each recipe includes detailed step-by-step instructions that explain the reasoning behind each technique, ensuring success from your very first attempt. From classic white bread to artisan no-knead loaves, you’ll learn how satisfying and rewarding homemade bread can be. Master fundamental skills like yeast activation, proper kneading, and perfect timing while creating delicious, preservative-free bread that costs significantly less than store-bought options.
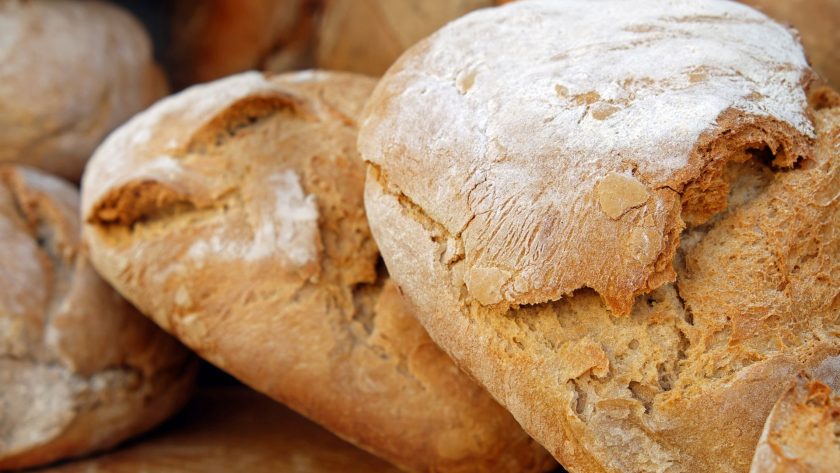
Classic White Bread
Ingredients:
- 3 cups all-purpose flour
- 1 packet (2¼ tsp) active dry yeast
- 1 tablespoon sugar
- 1 teaspoon salt
- 1 cup warm water (110°F)
- 2 tablespoons vegetable oil
Step-by-Step Instructions:
- Test your water temperature – it should feel comfortably warm on your wrist, not hot. Mix warm water, sugar, and yeast in a large bowl. Stir gently and let sit for 5-10 minutes until the mixture becomes foamy and bubbly. If it doesn’t foam, your yeast might be dead, or the water is too hot.
- Create your dough foundation – Add flour, salt, and oil to the yeast mixture. Using a wooden spoon, mix until a shaggy, soft dough forms. Don’t worry if it looks messy at first – that’s completely normal.
- Knead with purpose – Turn the dough onto a lightly floured surface. Knead for 8-10 minutes using the heel of your hand to push the dough away from you, then fold it back over itself. The dough is ready when it feels smooth, elastic, and slightly springs back when poked.
- First rise magic – Place dough in a greased bowl, turning once to coat all sides. Cover with a damp towel and let rise in a warm spot for 1 hour until doubled in size. You’ll know it’s ready when you can poke it with two fingers and the indentation remains.
- Shape like a pro – Gently punch down the risen dough to release air bubbles. Turn onto a lightly floured surface and shape into a smooth log that fits your greased 9×5-inch loaf tin. Place seam-side down in the pan.
- Final rise perfection – Cover the loaf and let rise for 45 minutes until the dough crowns just above the rim of the pan. This creates that beautiful dome shape.
- Bake to golden perfection – Preheat oven to 375°F. Bake for 30-35 minutes until the top is golden brown and the loaf sounds hollow when tapped on the bottom. Cool on a wire rack for at least 30 minutes before slicing.
Related: Sourdough Bread for Beginners: Your Guide From Starter to Loaf
No-Knead Artisan Bread
Ingredients:
- 3 cups all-purpose flour
- ¼ teaspoon active dry yeast
- 1¼ teaspoons salt
- 1⅝ cups warm water
Step-by-Step Instructions:
- Mix the simple base – In a large bowl, whisk together flour, yeast, and salt until evenly distributed. The tiny amount of yeast might surprise you, but it’s all you need for this slow fermentation method.
- Create the shaggy dough – Add water all at once and stir with a wooden spoon until a sticky, shaggy dough forms. Don’t worry about it looking rough – this messy appearance is exactly what you want. Cover tightly with plastic wrap.
- Let time work its magic – Leave the covered bowl at room temperature for 12-18 hours. The dough will bubble, rise, and develop incredible flavor as wild fermentation does all the work. It’s ready when the surface looks bubbly and the dough has more than doubled in size.
- First gentle fold – Turn the risen dough onto a heavily floured surface (it’ll be quite sticky). Using floured hands, fold the dough over itself 2-3 times, creating surface tension without traditional kneading.
- Rest and relax – Cover the folded dough with the bowl and let it rest for 15 minutes. This brief rest makes the final shaping much easier.
- Shape into artisan beauty – With floured hands, gently shape the dough into a rough ball, creating tension on the surface. Place seam-side down on parchment paper and cover with a clean towel.
- Final rise preparation – Let the rise for 2 hours until doubled and jiggly when gently shaken. Meanwhile, place your cast-iron Dutch oven with lid in the oven and preheat to 450°F for at least 30 minutes.
- Steam baking technique – Carefully remove the blazing hot Dutch oven. Using the parchment as a sling, lower the dough into the pot. Cover immediately and bake 30 minutes.
- Golden finish – Remove the lid and continue baking 15-20 minutes until deeply golden brown. The contrast between crispy crust and chewy interior will amaze you.
Whole Wheat Bread
Ingredients:
- 2 cups whole wheat flour
- 1 cup all-purpose flour
- 1 packet (2¼ tsp) active dry yeast
- 1 teaspoon salt
- 2 tablespoons honey
- 2 tablespoons olive oil
- 1¼ cups warm water (110°F)
Step-by-Step Instructions:
- Activate with sweetness – In a large bowl, dissolve yeast in warm water with 1 teaspoon of the honey. Stir gently and let the foam form for 5-10 minutes. The honey feeds the yeast and helps create a more active starter.
- Combine the flour foundation – In a separate bowl, whisk together whole wheat flour, all-purpose flour, and salt. The combination gives you whole-grain nutrition while keeping the texture manageable for beginners.
- Create the enriched dough – Add the yeast mixture, remaining honey, and olive oil to the flour mixture. Stir with a wooden spoon until a slightly sticky dough forms. Don’t worry if it seems wetter than white bread dough.
- Critical hydration rest – Cover the bowl and let the dough rest for 20 minutes. This autolyse period allows the whole wheat flour to fully absorb the liquid, making kneading much easier and more effective.
- Gentle kneading approach – Turn onto a lightly floured surface and knead gently for 6-8 minutes. Whole wheat dough needs a lighter touch than white bread – you’re aiming for smooth and slightly elastic, not perfectly stretchy.
- First rise patience – Place in an oiled bowl, turning to coat all sides. Cover and rise in a warm place for 1 hour until doubled. Whole wheat bread may take slightly longer to rise than white bread.
- Shape with confidence – Gently deflate and shape into a loaf. Place in a greased 9×5-inch pan, ensuring the seam is on the bottom for a smooth top crust.
- Final rise monitoring – Cover and rise for 45 minutes until the dough crests above the rim of the pan. This creates the perfect dome shape.
- Bake to nutty perfection – Bake at 375°F for 35-40 minutes until golden brown and hollow-sounding when tapped. The olive oil and honey create a beautifully golden crust.
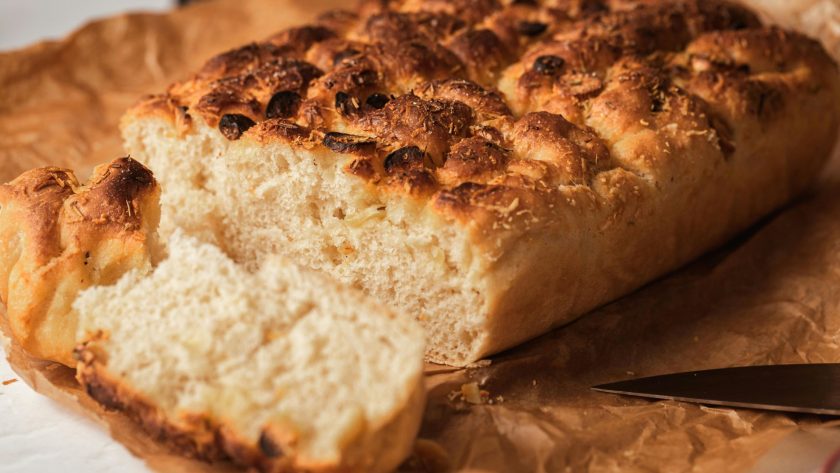
Focaccia Bread
Ingredients:
- 3 cups all-purpose flour
- 1 packet (2¼ tsp) active dry yeast
- 1 teaspoon salt
- 1 cup warm water (110°F)
- ⅓ cup olive oil (divided)
- 2 tablespoons fresh rosemary, chopped
- Coarse sea salt for sprinkling
Step-by-Step Instructions:
- Start the yeast party – Mix yeast with warm water in a large bowl, stirring gently. Let foam for 5-10 minutes until bubbly and active. This ensures your focaccia will have proper lift and texture.
- Build the base – Combine flour and salt in the bowl with activated yeast. Add 2 tablespoons of olive oil and mix with a wooden spoon until a sticky, wet dough forms. This wetter consistency is key to focaccia’s open crumb.
- Minimal kneading magic – Turn onto a lightly floured surface and knead briefly for just 2-3 minutes until the dough comes together. Don’t overwork it – focaccia thrives on a relaxed approach.
- First rise development – Place in an oiled bowl, turning to coat. Cover and rise for 1 hour until doubled. The high hydration creates those characteristic air pockets during this rise.
- Generous pan preparation – Liberally oil a 9×13-inch baking pan with about 2 tablespoons of the remaining olive oil. This creates the crispy bottom crust that makes focaccia so special.
- Gentle stretching technique – Transfer the risen dough to the oiled pan. Using oiled hands, gently stretch and press the dough to fit the pan. If it springs back, let it rest 10 minutes and try again.
- Second rise for texture – Cover and let the dough rise for 30 minutes, until it is puffy and light. This second rise creates the focaccia’s signature airy interior.
- Create the dimples – Using your fingertips, make deep dimples all over the surface, pressing almost to the bottom of the pan. These wells hold olive oil and seasonings beautifully.
- Final flavor touches – Drizzle generously with remaining olive oil, ensuring it pools in the dimples. Sprinkle with fresh rosemary and coarse sea salt.
- High-heat baking – Bake at 425°F for 25-30 minutes until golden brown and crispy around the edges. The olive oil creates a beautifully fried bottom crust.
Soda Bread
Ingredients:
- 4 cups all-purpose flour
- 1 teaspoon baking soda
- 1 teaspoon salt
- 1¾ cups buttermilk, cold
Step-by-Step Instructions:
- Preheat for immediate baking – Set your oven to 425°F and position a rack in the center. Unlike yeast breads, soda bread goes straight into the oven, so having it ready is crucial.
- Dry ingredient foundation – In a large bowl, whisk together flour, baking soda, and salt until evenly distributed. Make sure the baking soda is well incorporated – any lumps will create bitter spots.
- Create the well technique – Make a deep well in the center of the dry ingredients, like a flour volcano. This traditional method helps you control the mixing and prevents overworking the dough.
- Add liquid all at once – Pour the cold buttermilk directly into the well. The cold temperature slows down the reaction between the acid and baking soda, giving you more working time.
- Gentle mixing approach – Using a large fork or your hands, gently stir from the center outward, gradually incorporating flour into the liquid. Mix just until a soft, slightly sticky dough forms – lumps are better than overmixing.
- Minimal handling rule – Turn the shaggy dough onto a lightly floured surface. Gently pat and fold it just 2-3 times until it barely holds together. Resist the urge to knead – this isn’t that kind of bread.
- Shape with confidence – Form into a round loaf about 6 inches across and 2 inches high. The shape doesn’t need to be perfect – rustic is the goal.
- Traditional cross scoring – Place on a parchment-lined baking sheet. Using a sharp knife, cut a deep cross on top, about ½ inch deep. This helps the bread bake evenly and prevents cracking.
- Quick bake method – Bake immediately for 30-40 minutes until golden brown and sounds hollow when tapped on the bottom. The crust should be firm, and the bread should feel relatively light.
Related: Best Sourdough Brioche Recipe (Beginner Friendly)
Sweet Cinnamon Swirl Bread
Ingredients:
- 3 cups all-purpose flour
- 1 packet (2¼ tsp) active dry yeast
- ¼ cup sugar
- 1 teaspoon salt
- ½ cup warm milk
- ¼ cup butter, melted
- 1 egg
For Filling:
- ⅓ cup brown sugar
- 2 tablespoons cinnamon
- 2 tablespoons butter, softened
- Pinch of salt
Step-by-Step Instructions:
- Activate the yeast – In a large bowl, mix warm milk (110°F) with 1 teaspoon sugar, then sprinkle yeast on top. Stir gently and let the mixture foam for 5-10 minutes, until it is bubbly and active. This ensures your yeast is alive and ready to create lift.
- Build the foundation – Combine flour, remaining sugar, and salt in the same bowl, whisking to distribute evenly throughout.
- Create enriched dough – Add the foamy yeast mixture, melted butter, and room-temperature egg. Mix with a wooden spoon until shaggy, then knead on a floured surface for 8-10 minutes until smooth, elastic, and slightly tacky.
- First rise development – Place dough in a buttered bowl, turning to coat all sides. Cover with a damp towel and rise in a warm spot for 1 hour until doubled in size.
- Prepare the swirl – Mix brown sugar, cinnamon, softened butter, and salt until it forms a spreadable paste. The salt intensifies the cinnamon’s warmth.
- Roll with precision – On a lightly floured surface, roll risen dough into a 9×15-inch rectangle, keeping thickness even for uniform swirls.
- Fill strategically – Spread cinnamon mixture evenly across dough, leaving ½-inch borders on all sides to prevent filling from leaking during rolling.
- Roll technique – Starting from a short end, roll tightly into a log, keeping it snug but not so tight that filling squeezes out. Pinch seam closed securely.
- Final rise preparation – Place seam-side down in a greased 9×5-inch loaf pan. Cover and rise 45 minutes until dough crowns above rim.
- Bake to perfection – Brush top with melted butter and bake at 350°F for 30-35 minutes until golden brown and sounds hollow when tapped on the bottom.
Ready to Rise to the Occasion?
You’ve now got six foolproof recipes that transform anyone into a confident bread baker. From classic white loaves to artisan no-knead masterpieces, each recipe builds your skills while filling your home with incredible aromas. These aren’t just recipes – they’re your gateway to fresh, preservative-free bread that costs pennies compared to store-bought options. Whether you’re kneading away stress with traditional techniques or embracing the magic of slow fermentation, you’re creating something truly nourishing with your own hands. Your family will never look at store-bought bread the same way again. Time to get baking!