
Small starter maintenance is the secret home bakers wish they’d known from day one. Keeping just 10 to 50 grams of starter ferments every bit as actively as a massive jar, with way less flour and way less mess. It’s simple, low-key, and fits right into a normal routine—no giant containers, no daily discard pile taking over the kitchen.
Ahead, you’ll find exactly how much starter to keep, the feeding ratios that actually work, and the signs of a healthy, active culture. Everything needed to keep a small starter happy and ready to bake, whenever the mood strikes.
What Is a Small Sourdough Starter?
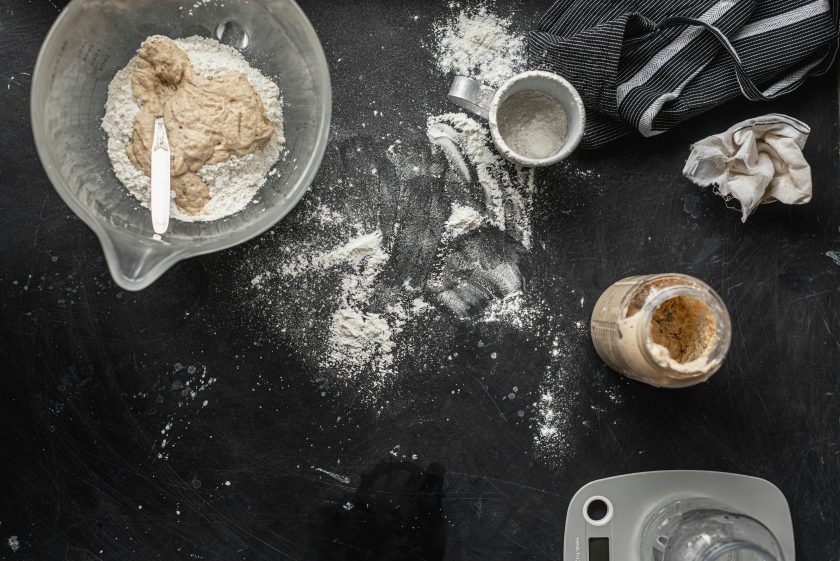
Forget the mason jar bubbling away like a science experiment gone rogue. A small sourdough starter is exactly what it sounds like — somewhere between 10 and 50 grams of flour, water, wild yeast, and lactic acid bacteria living happily together in a tiny jar. No massive tub, no daily flour bill that rivals your grocery run.
Here’s where a lot of home bakers get tripped up: they assume a bigger starter means a stronger one. Nope. Strength comes from consistent feeding and balanced fermentation, not volume. Think of it like a campfire — a small, well-tended flame burns just as hot as a bonfire; it’s just easier to manage.
A 20-gram starter can rise, fall, and double just as fast as a 500-gram one, provided it’s fed on a good schedule. Less starter means less flour and water each feeding, which means less waste and a lot less scooping discard into the trash. Your wallet — and your compost bin — will thank you.
How Much Starter Should You Keep?
There’s no magic number here, and honestly, that’s the beauty of it. Some bakers keep as little as 10 grams tucked in a small jar; others prefer 50 grams for a bit more of a buffer. Both work just fine.
A digital kitchen scale is your best friend for this — precision matters way more than the actual number you land on. Whether you keep 10 grams or 50, the starter behaves the same way as long as your feeding ratio stays consistent.
The right amount really comes down to your baking habits. Bake once a week? A smaller starter, like 10–20 grams, keeps things simple and low-waste. Bake three or four times a week? Bumping up to 50 grams gives you more of a buffer without extra math.
When it’s go time, you don’t feed your whole starter into a giant batch overnight. Instead, scale it up gradually over one or two feedings until you’ve hit the quantity your recipe calls for — steady growth, not a sudden flood.
Related: How to Maintain a Sourdough Starter (Without Wasting So Much Flour)
The Basic Small-Starter Feeding Ratio
The 1:1:1 ratio is the workhorse of small-starter maintenance — equal parts starter, flour, and water by weight. If you’ve got 20 grams of starter, you’d add 20 grams of flour and 20 grams of water. Simple math, reliable fermentation, happy starter.
Want your starter to take longer to ripen, maybe because you’re not baking until tomorrow? Bump the ratio up to 1:2:2 or even 1:5:5. More flour and water relative to starter gives the wild yeast and lactic acid bacteria more food to work through, which slows fermentation down and stretches out the timeline between feedings.
These ratios are really baker’s percentage in disguise — everything is measured by weight, not volume, which keeps hydration consistent every single time. No guessing with cups and spoons here, and no surprises in how your starter behaves from one feeding to the next.
The higher the ratio, the longer your starter takes to hit peak activity. A 1:1:1 might peak in 4–6 hours at room temperature, while a 1:5:5 could stretch that out to 8–12 hours. That flexibility is handy when your schedule doesn’t line up perfectly with a hungry starter.
Here’s a quick reference for the most common ratios:
| Ratio | Starter | Flour | Water | Typical Peak Time |
| 1:1:1 | 20 g | 20 g | 20 g | 4–6 hours |
| 1:2:2 | 20 g | 40 g | 40 g | 6–8 hours |
| 1:5:5 | 20 g | 100 g | 100 g | 8–12 hours |
Pick the ratio that matches your schedule, not the other way around — your starter will happily adapt.
How Often Should You Feed a Small Starter?
- Room temperature, daily: Most home bakers keeping a small starter on the counter feed it once a day, which keeps wild yeast active and lactic acid bacteria from taking over the flavor.
- Room temperature, twice daily: If your kitchen runs warm or your starter is unusually vigorous, it might ask for two feedings a day — watch for it peaking and deflating faster than usual.
- Refrigerated, weekly: Cold temperatures put fermentation into a sort of hibernation, letting you stretch feedings out to once a week instead of daily.
- Refrigerated, longer intervals: Some starters can go two weeks or more between feedings in the fridge, though they’ll need a little extra attention to bounce back.
- Temperature is the biggest factor: A starter at 85°F wants feeding far more often than one chilling at 38°F. Let temperature, not the calendar, guide your schedule.
- Watch the starter, not the clock: Rise, fall, and bubble activity tell you more than any fixed schedule ever will.
How to Reduce Flour Waste
This is the whole point of going small — a tiny seed starter, maybe just 10–20 grams, means every feeding uses a fraction of the flour a full-sized jar would demand.
Feed smarter by discarding down to a small amount before adding fresh flour and water, rather than feeding first and tossing the overflow later. Same result, way less waste.
There’s no need to build a giant feeding jar if you’re just maintaining. Keep the daily feed proportional to your small starter size, and you’ll never be staring down a fridge full of unused starter.
Your everyday starter stays small; a separate, larger levain gets built only when a recipe calls for it. That way, you’re not maintaining bakery-sized quantities for a loaf you’re making once a week.
How to Tell if a Small Starter Is Healthy
- Predictable rise and fall: It rises after feeding and falls back down once it’s used up its food — a sign the wild yeast is doing its job.
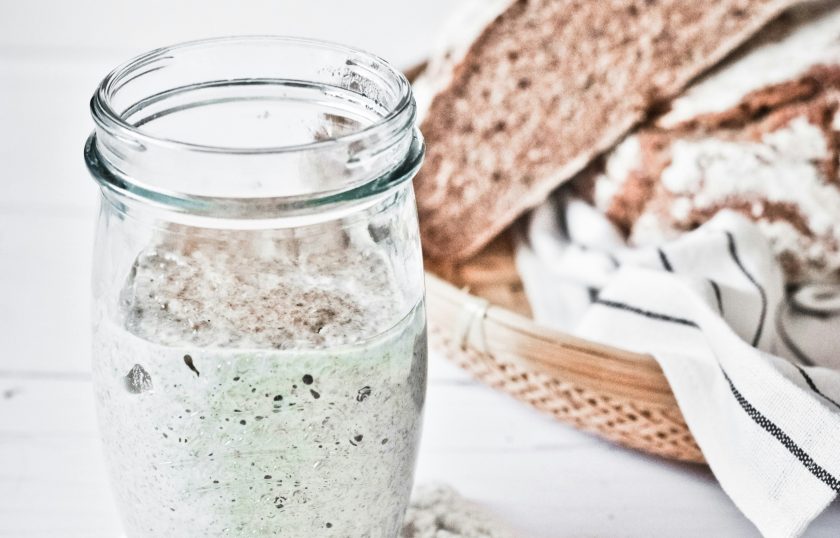
- Bubbles throughout: A thriving starter shows bubbles distributed all through the jar, not just clustered on top. Hold it up to the light — it should look almost like a sponge.
- Pleasant aroma: A ripe, healthy starter smells tangy, a bit like yogurt or fresh dough. A sharp, nail-polish-remover smell means it’s hungry.
- Consistent peak timing: If it peaks around the same time after each feeding, that’s a strong sign of a balanced, established culture.
- The float test isn’t definitive: Dropping a spoonful in water is a fun trick, but not reliable on its own — a starter can float and still be underdeveloped, or sink and bake beautifully anyway. Trust the rise, bubbles, and smell more.
Small Starter Maintenance in the Refrigerator
Baking once a week or less? The fridge is your friend — it takes the pressure off daily feedings and lets you maintain your starter with far less hands-on time.
Always feed before chilling. Give your starter a fresh feeding before tucking it into the fridge, so it has enough food reserves to coast through the slower, colder fermentation without starving.
Weekly feeding is the sweet spot. A weekly schedule works well for most fridge-kept starters. Some bakers stretch it to two weeks or more, though the starter may need extra attention afterward.
Refresh before baking. When you’re ready to bake, pull the starter out, discard down to your usual small amount, and feed it as normal — just expect it to take longer to wake up.
Warm it up first. Cold starter ferments sluggishly, so give it one or two room-temperature feedings before baking day to get fermentation moving at a normal pace again.
Related: Sourdough Starter Maintenance: How to Feed and Maintain Your Starter
Common Small-Starter Problems
- Starter not rising: Usually a sign it’s too cold, underfed, or exhausted from missed feedings. Consistent feedings at room temperature typically bring it back.
- Rising too quickly: Often caused by a warm kitchen or a feeding ratio that’s too low for how active the starter already is. Bumping up to 1:2:2 slows things down.
- Hooch on top: That dark liquid layer isn’t a disaster — it just means your starter is hungry. Stir it in or pour it off, then feed as usual.
- Sour, vinegar-like smell: Points to excess acetic acid, usually from going too long between feedings. More frequent feedings shift the balance back toward milder lactic acid.
- Mold: The one true red flag. Fuzzy spots in any color mean it’s time to start fresh — no amount of stirring fixes mold.
- Long gaps or temperature extremes: Neglect and swings between cold and warm are behind most starter problems. A consistent feeding rhythm, whether at room temperature or in the fridge, heads off most issues before they start.
How to Maintain a Small Starter Before Baking
- Keep a tiny mother starter. Maintain your everyday starter at just 10–20 grams — it never needs to grow beyond a snack-sized amount.
- Build a levain separately. When a recipe calls for more, don’t grow your whole starter — use a small portion of your mother starter as the base for a separate levain.
- Refresh once or twice. Most levains only need one or two feedings to reach the quantity and ripeness your recipe requires.
- Calculate the amount you need. Check your recipe’s total starter or levain weight, then work backward to figure out how much to build and when to start.
- Time it to peak at mix time. Build your levain so it hits peak ripeness right as you’re ready to mix your dough.
- Skip the permanent large starter. Keep the mother small, build a levain only when needed, and you’ll always have exactly enough — no more, no less.
Small Starter, Big Payoff
Turns out, keeping a tiny sourdough starter is way easier than lugging around a giant jar—and it works just as well. A small amount ferments just as actively, cuts down on waste, and takes way less flour to maintain. The trick is finding a feeding rhythm that fits your life, whether that’s daily on the counter or a weekly check-in from the fridge. A healthy starter tells you everything through its bubbles, its rise, and its smell—no fancy tests needed. And when it’s the odd hiccup like hooch or a slow rise, it’s usually nothing a fresh feeding can’t fix. Bottom line: small is simple, low-maintenance, and totally capable of showing up big when you need it to.
FAQs
What to do with a small sourdough starter?
Feed it regularly using a simple ratio like 1:1:1, keep it at room temperature or in the fridge depending on your baking schedule, and build a levain from it when you’re ready to bake. A small starter needs the same care as a big one—just less flour and less mess.
Is 20g of sourdough starter enough?
Yes, 20 grams is plenty. It’ll rise, ferment, and ripen just as actively as a much larger starter, as long as it’s fed consistently. You’ll just scale it up into a levain before baking, using one or two feedings to reach the amount your recipe calls for.
Related Articles:
 How to Feed Sourdough Starter (A Beginner’s Guide to Perfect Bread)
 Sourdough Cinnamon Banana Bread: Easy, Moist & Delicious Recipe
 How to Use Sourdough Starter Like a Pro (Even as a Beginner)
 How to Rehydrate Sourdough Starter: Step-by-Step Guide for Beginners
 How Often to Feed Sourdough Starter (Your No-Stress Guide)
